15 Hand Lettering Drills That Will Improve Your Skills Fast
Disclosure: Some of the links in this post are affiliate links. This means if you click on the link and purchase an item, I will receive an affiliate commission at no extra cost to you.
Are you practicing your lettering but still not seeing the results you want? Maybe your lines looked shaky, your letters felt uneven, or your words seemed awkward no matter how hard you tried.
It’s frustrating because you’re putting in the effort but not seeing the progress you expected. That’s where Hand Lettering Drills make all the difference.
Instead of practicing random words, you’ll focus on simple exercises that train your hand to move with more confidence.
If you’re still learning the basics, How to Learn Hand Lettering Step-by-Step (Even If You Can’t Draw) is the perfect place to start.
Many beginners believe they need to practice for hours every day. In reality, a few focused drills often produce better results than filling pages with random lettering.
Each exercise teaches your hand one specific skill, and those small improvements quickly add up. Before long, you’ll notice smoother strokes, better spacing, and cleaner letters without feeling overwhelmed.
This guide shares fifteen simple drills you can add to your daily routine. You don’t need expensive supplies or artistic talent to get started. Just grab your favorite pen, spend a few minutes practicing each exercise, and enjoy watching your lettering improve one stroke at a time.
15 Hand Lettering Drills That Will Improve Your Skills Fast
Drill 1: Fill a Page With Basic Strokes
Many beginners want to jump straight into writing beautiful words. That excitement is completely understandable.
Still, skipping the basics often leads to shaky lines, uneven letters, and slow progress. Every letter you create comes from a handful of simple movements.
When those movements become smooth, your lettering improves without feeling forced. That’s why this should be the first exercise in your practice routine.
These Hand Lettering Drills may look simple, but they build the skills behind every beautiful alphabet.
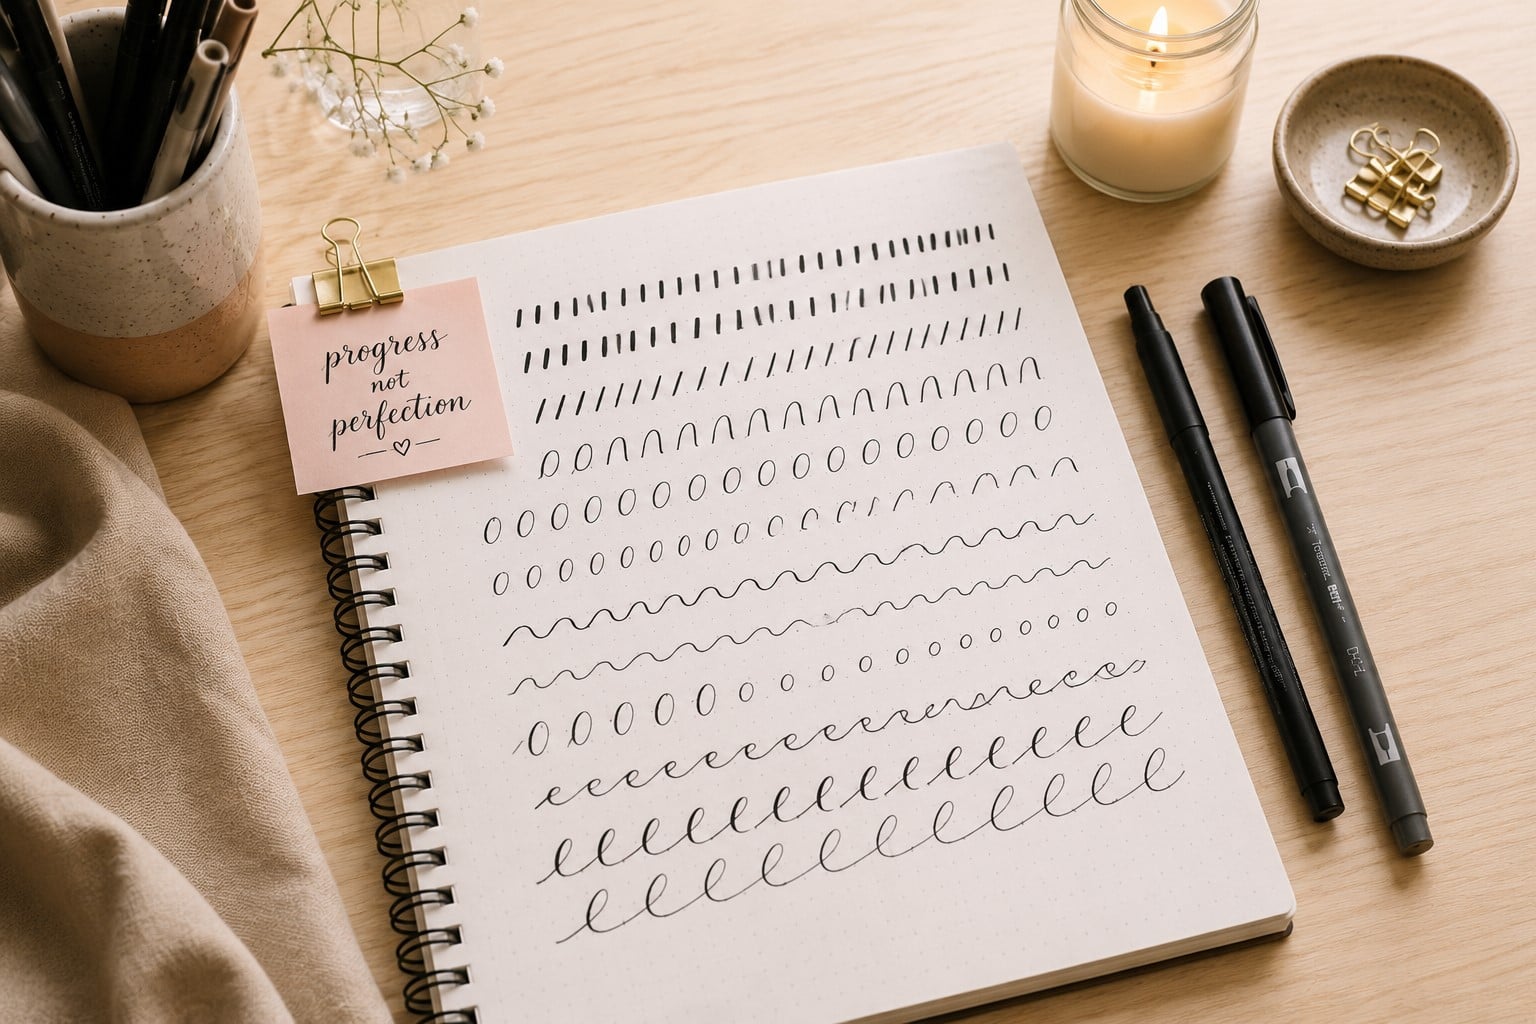
Start with a blank sheet of smooth paper. Draw straight lines from top to bottom, then from side to side. Next, practice gentle curves, loops, underturns, overturns, and ovals.
Fill the page without worrying about speed. Instead, pay attention to keeping each stroke steady from beginning to end. If one stroke looks uneven, don’t erase it. Simply draw another one and focus on improving the next attempt.
A common mistake is rushing through the page just to finish the exercise. Another mistake is pressing too hard on every stroke. Relax your grip and let your hand move naturally across the paper.
After a week of practicing these movements, you’ll notice that forming letters feels much easier because your hand already understands the basic shapes.
If you want to see how these strokes come together, How to Master the Hand Lettering Alphabet in 15 Simple Steps explains how each movement builds the alphabet.
Drill 2: Practice Thick and Thin Strokes
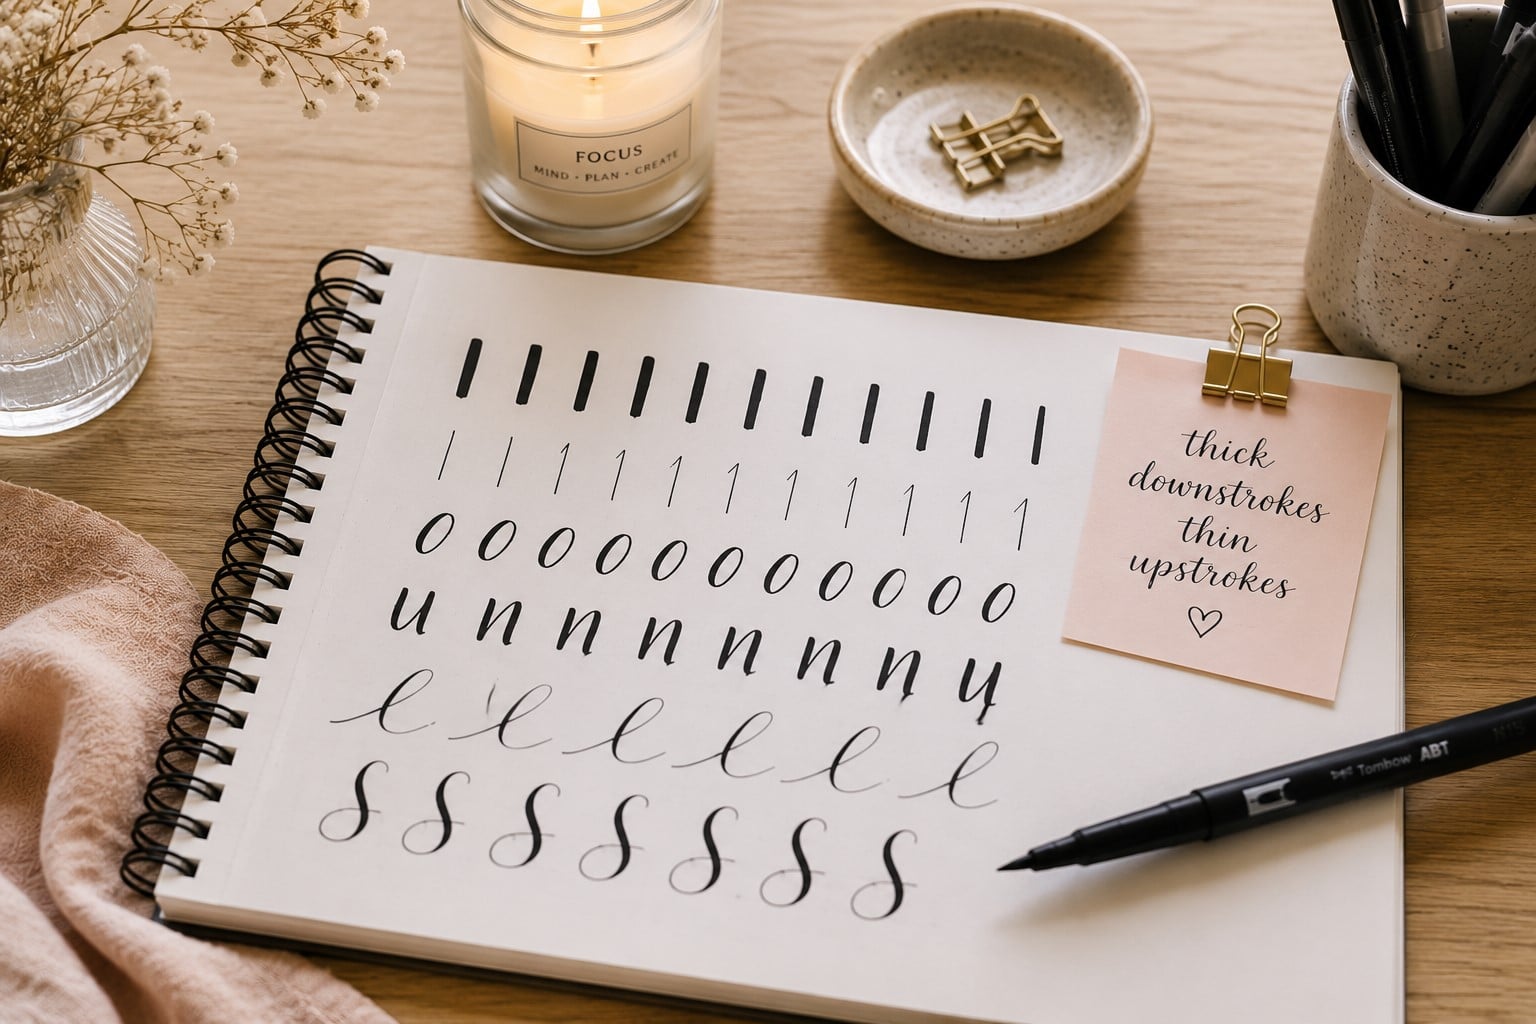
One of the first things people notice about beautiful brush lettering is the contrast between thick and thin lines. That contrast doesn’t happen by accident.
It comes from learning how much pressure to apply as your pen moves across the page. The good news is that this skill improves much faster when you practice it on its own instead of trying to master it while writing full words.
Choose one basic stroke and repeat it several times. Press your brush pen firmly as you move downward. Then reduce the pressure as you move upward. Keep repeating the same motion until it starts to feel comfortable.
Don’t worry if your thick lines aren’t perfectly even at first. The goal is to teach your hand how different amounts of pressure change the look of each stroke.
Many beginners grip the pen too tightly because they want more control. That usually has the opposite effect. A tight grip makes your hand tired and your strokes look stiff.
Hold the pen comfortably and let the brush tip do the work. Practice this drill for a few minutes every day instead of trying to perfect it in one sitting.
If controlling your brush pen still feels difficult, 17 Lettering Exercises That Instantly Improve Pen Control offers more exercises that strengthen your accuracy and confidence.
Drill 3: Repeat One Letter Until It Feels Natural
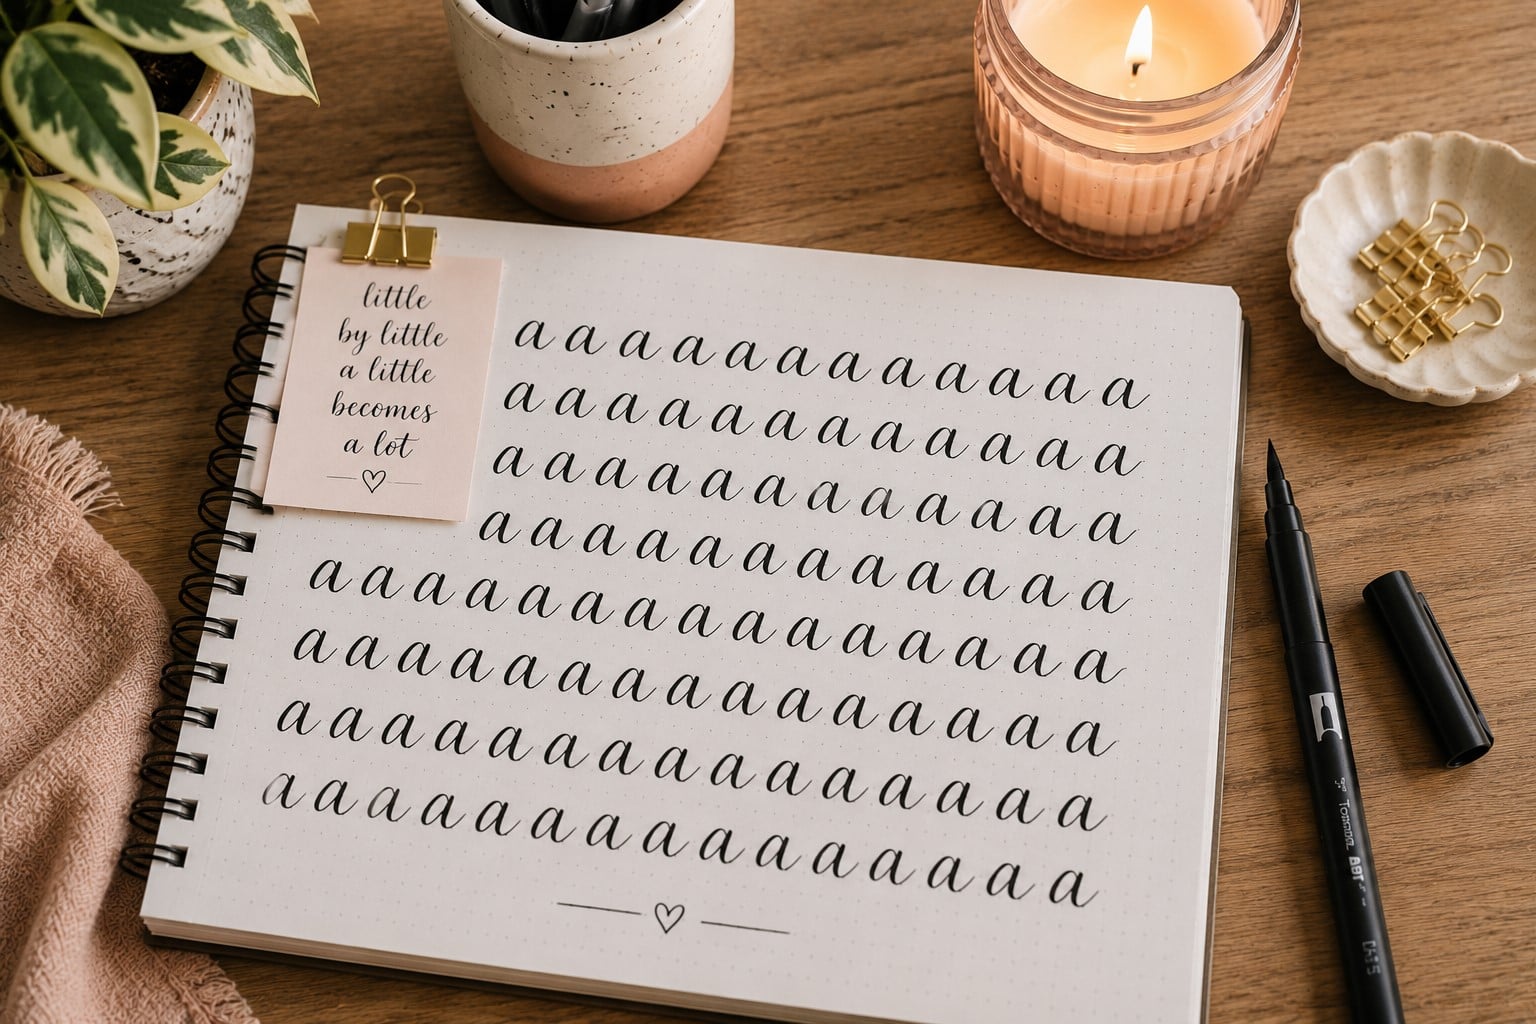
Practicing the entire alphabet every day sounds like a smart idea. In reality, it often leaves beginners feeling overwhelmed.
You move from one letter to another before your hand has time to remember the first one. A better approach is to slow down and focus on one letter at a time.
Pick a single lowercase letter, such as a, m, or s. Write it across one line. Then write it again on the next line. Continue until you’ve filled most of the page.
As you practice, look for small improvements instead of perfection. Maybe your curves become smoother, or your spacing becomes more even. Those little changes show that your muscle memory is growing stronger.
Avoid making every letter as quickly as possible. Speed often hides mistakes instead of fixing them. Pause after every line and compare your newest letters with the first ones you wrote.
You’ll usually notice improvement before you reach the bottom of the page. Once one letter feels comfortable, move to another and repeat the process.
If you enjoy structured practice, 19 Beginner Hand Lettering Practice Sheets You’ll Actually Use includes exercises that help you stay consistent without running out of ideas.
Drill 4: Connect Letters Instead of Practicing Them Alone
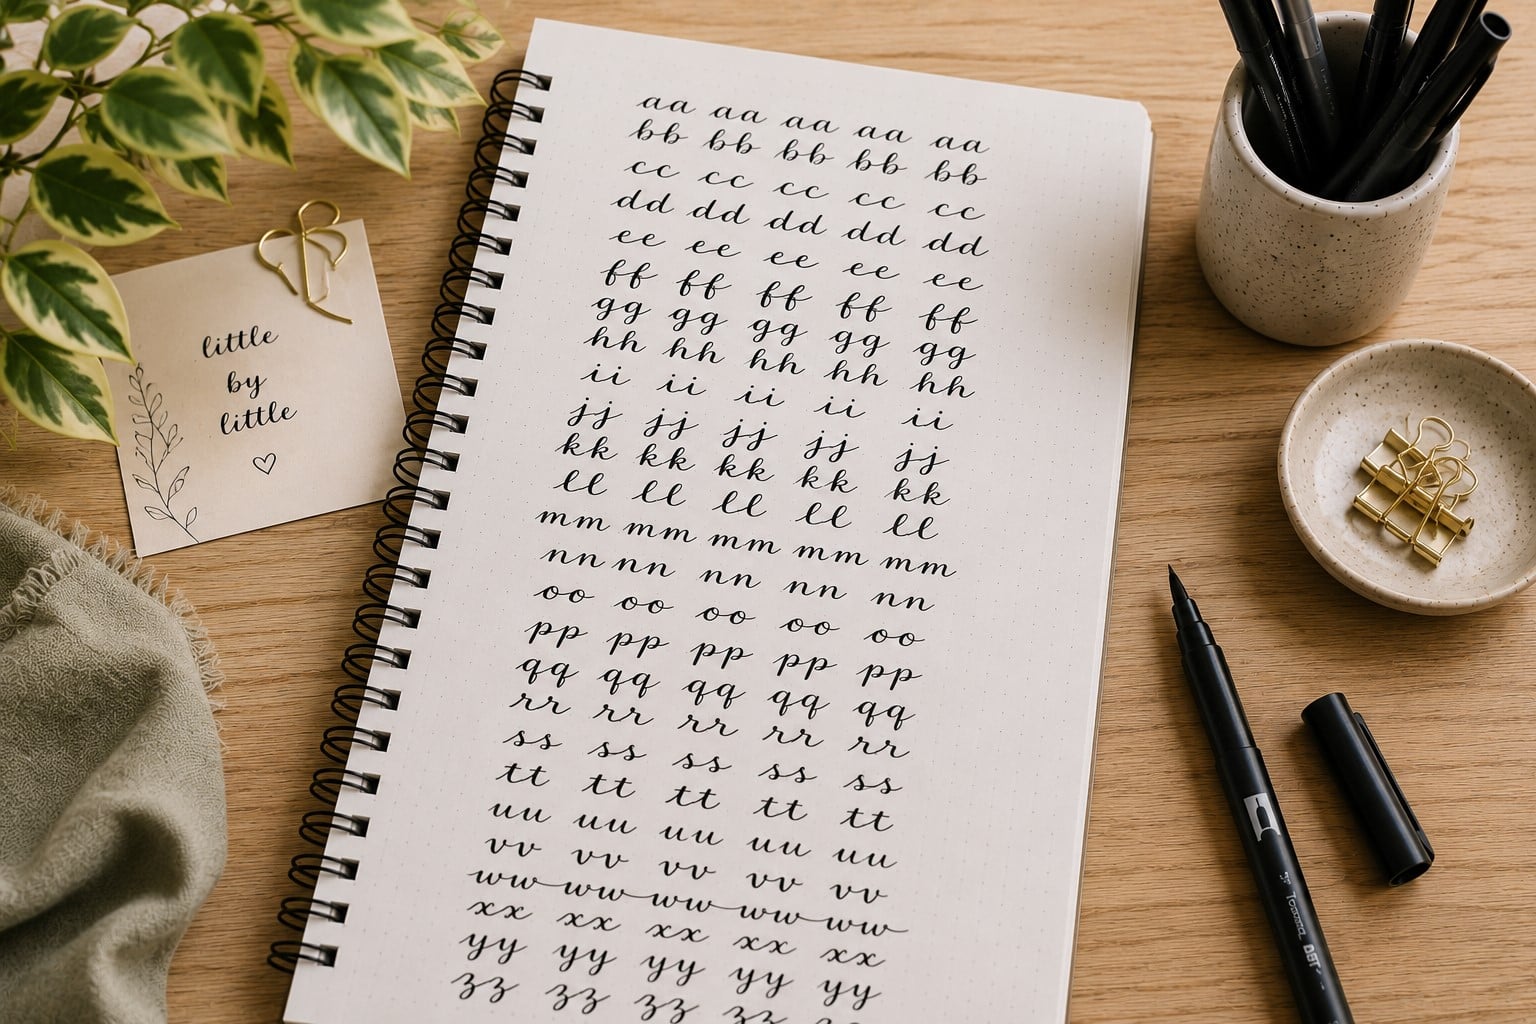
Writing individual letters is only one part of hand lettering. The real challenge begins when you connect those letters to create smooth, balanced words.
Many beginners create beautiful single letters, yet their words still look awkward because the transitions between letters feel forced.
Start with common letter pairs such as th, er, an, in, and lo. Write each pair several times before turning them into simple words.
Focus on keeping the connection smooth instead of lifting your pen after every stroke. Your goal isn’t speed. Your goal is creating natural movement from one letter to the next.
One mistake beginners often make is treating every letter like a separate drawing. That habit makes words look stiff and disconnected.
Try thinking of each word as one flowing movement instead. Even if your connections aren’t perfect, they’ll improve with regular practice.
Once connecting letters feels easier, writing longer words becomes much less intimidating. If you’re looking for a simple routine to follow, Easy Hand Lettering Tutorial: Learn in 21 Minutes walks through the process in an easy, beginner-friendly way.
Drill 5: Write the Same Word Over and Over
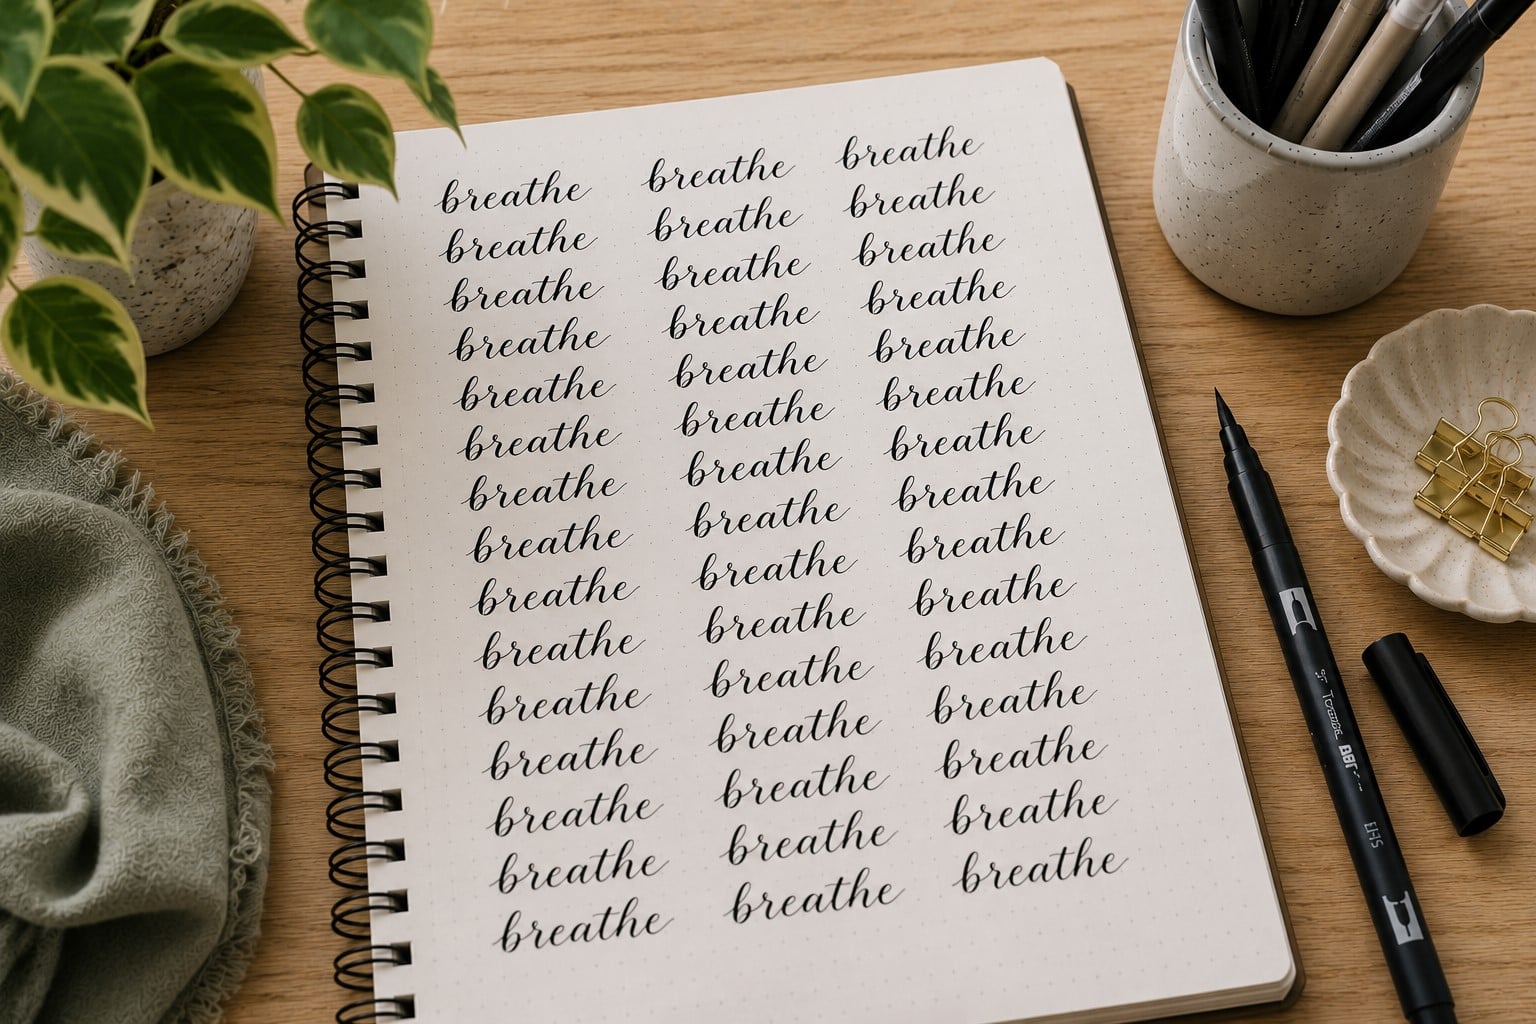
Repeating one word might sound repetitive, but it’s one of the fastest ways to improve your consistency. Every time you write the same word, your brain notices small details that were easy to miss before.
You begin adjusting the height of your letters, improving your spacing, and creating smoother strokes without even thinking about it. That’s why many experienced artists still include this exercise in their regular Hand Lettering Drills.
Choose a short word with different letter shapes, such as hello, smile, dream, or create. Write the word across the page several times. After each row, stop for a moment and compare your newest attempt with the previous one.
Look for one thing you did better and one thing you want to improve on the next line. This simple habit keeps your practice focused instead of becoming repetitive.
Don’t cross out every imperfect word. Keep every attempt on the page because those small mistakes tell the story of your progress.
After a few days, compare your newest page with one you completed earlier in the week. The difference is often bigger than you expect.
If you’re ready to improve even faster after mastering this drill, 21 Proven Ways to Improve Your Hand Lettering Faster shares more practical techniques you can add to your routine.
Drill 6: Fill a Page With Ovals
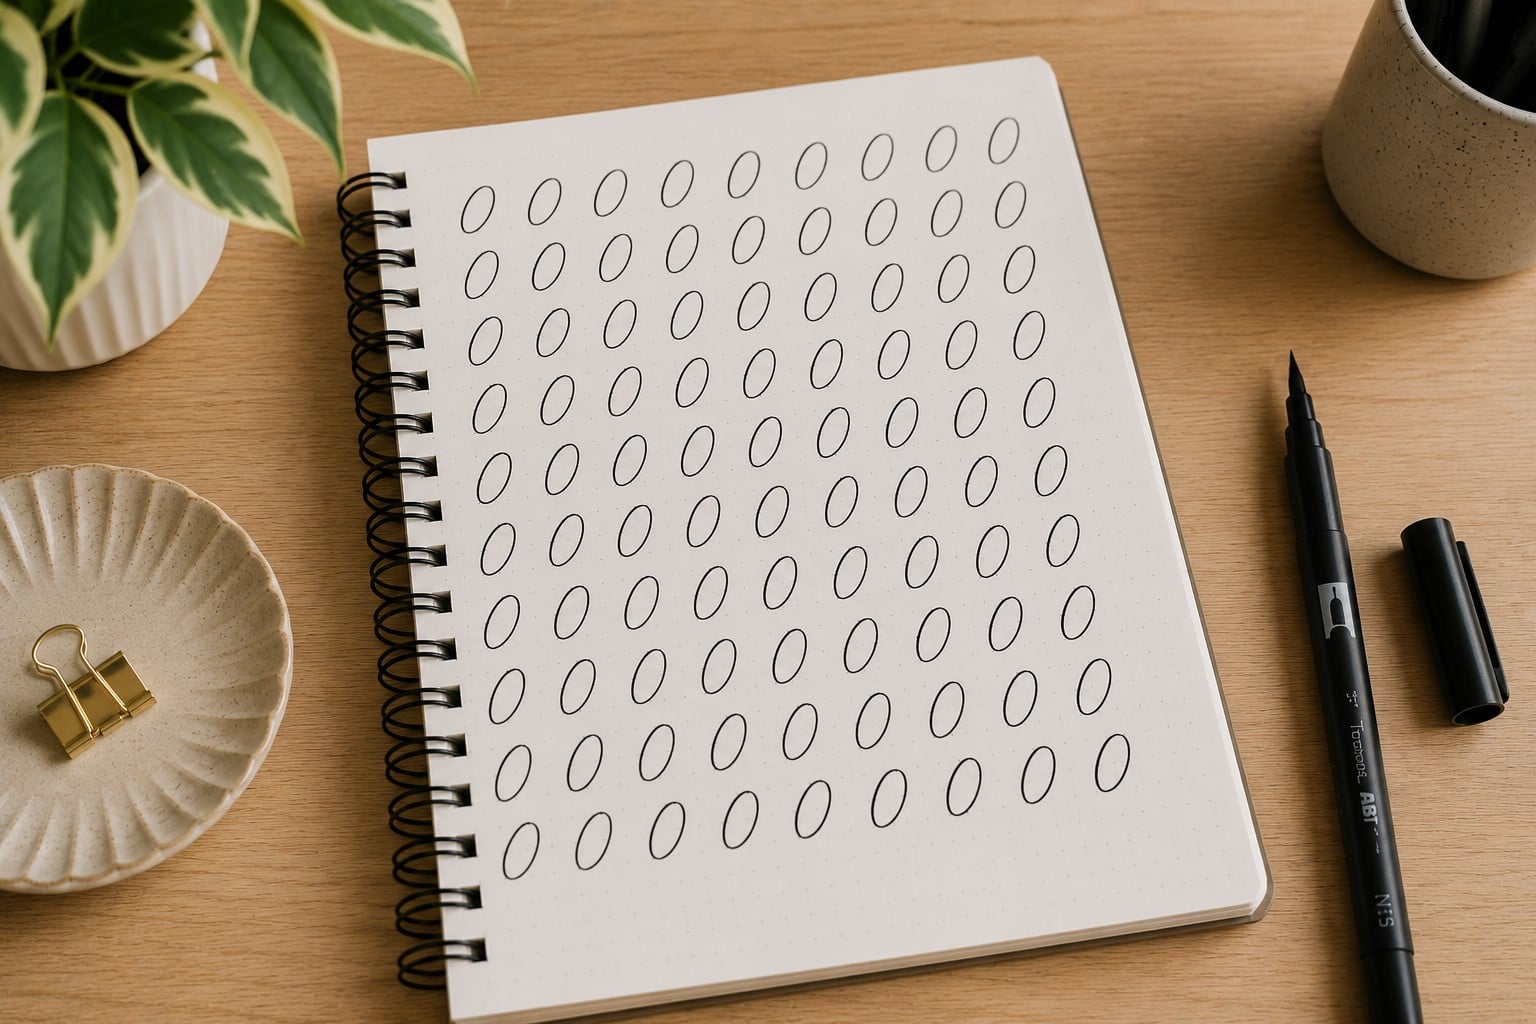
At first, drawing page after page of ovals may seem too simple to make a difference. Still, this exercise improves more than you might expect. Letters like a, c, d, g, o, and q all depend on smooth oval shapes.
If your ovals become more consistent, those letters naturally become cleaner too. This is one of the most effective Hand Lettering Drills because it strengthens both your control and your confidence.
Start by drawing large ovals across the page. Once they begin to look more even, make them slightly smaller. Keep your hand moving at a steady pace instead of stopping halfway through each shape. Focus on making every oval round and balanced rather than perfectly identical.
Many beginners create pointed or uneven ovals because they rush through the exercise. Others press too hard, making their movements feel stiff. Relax your grip and let your wrist move naturally.
With regular practice, you’ll notice your rounded letters looking smoother and more polished. If you want even more ways to improve the overall look of your lettering, 13 Simple Tricks to Improve Your Lettering Consistency is a helpful next read.
Drill 7: Practice Letter Spacing
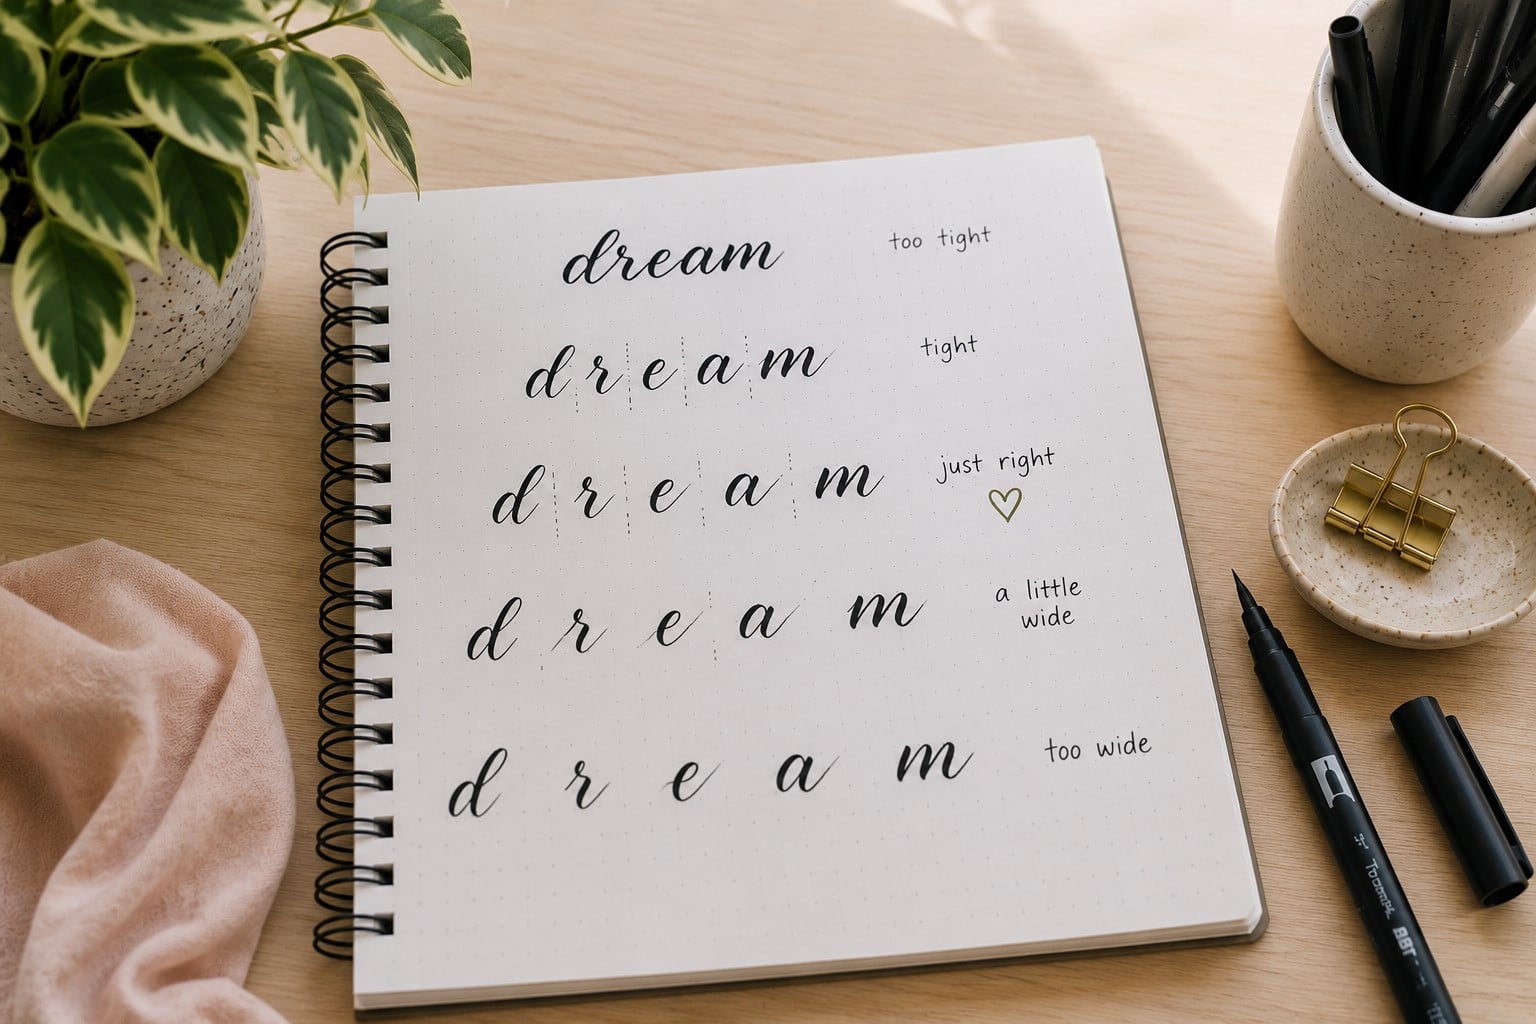
Beautiful lettering isn’t only about creating attractive letters. The spaces between those letters matter just as much. Uneven spacing can make even well-formed words look messy. Learning to see those spaces takes practice, but this drill makes it much easier.
Choose one short word and write it several times. After each attempt, look at the empty spaces instead of the letters themselves.
Ask yourself if one gap looks wider than another. Then write the word again while making small adjustments. This simple exercise trains your eyes to notice balance instead of guessing.
Don’t worry if you still see uneven spacing after a few pages. Your eyes become sharper with practice, just like your hands. Try stepping back from your notebook every few minutes.
Looking from a distance often makes uneven spacing much easier to spot. If you’d like to practice these skills in creative ways, 27 Easy Hand Lettering Ideas Every Beginner Should Try offers plenty of beginner-friendly projects.
Drill 8: Trace Good Lettering
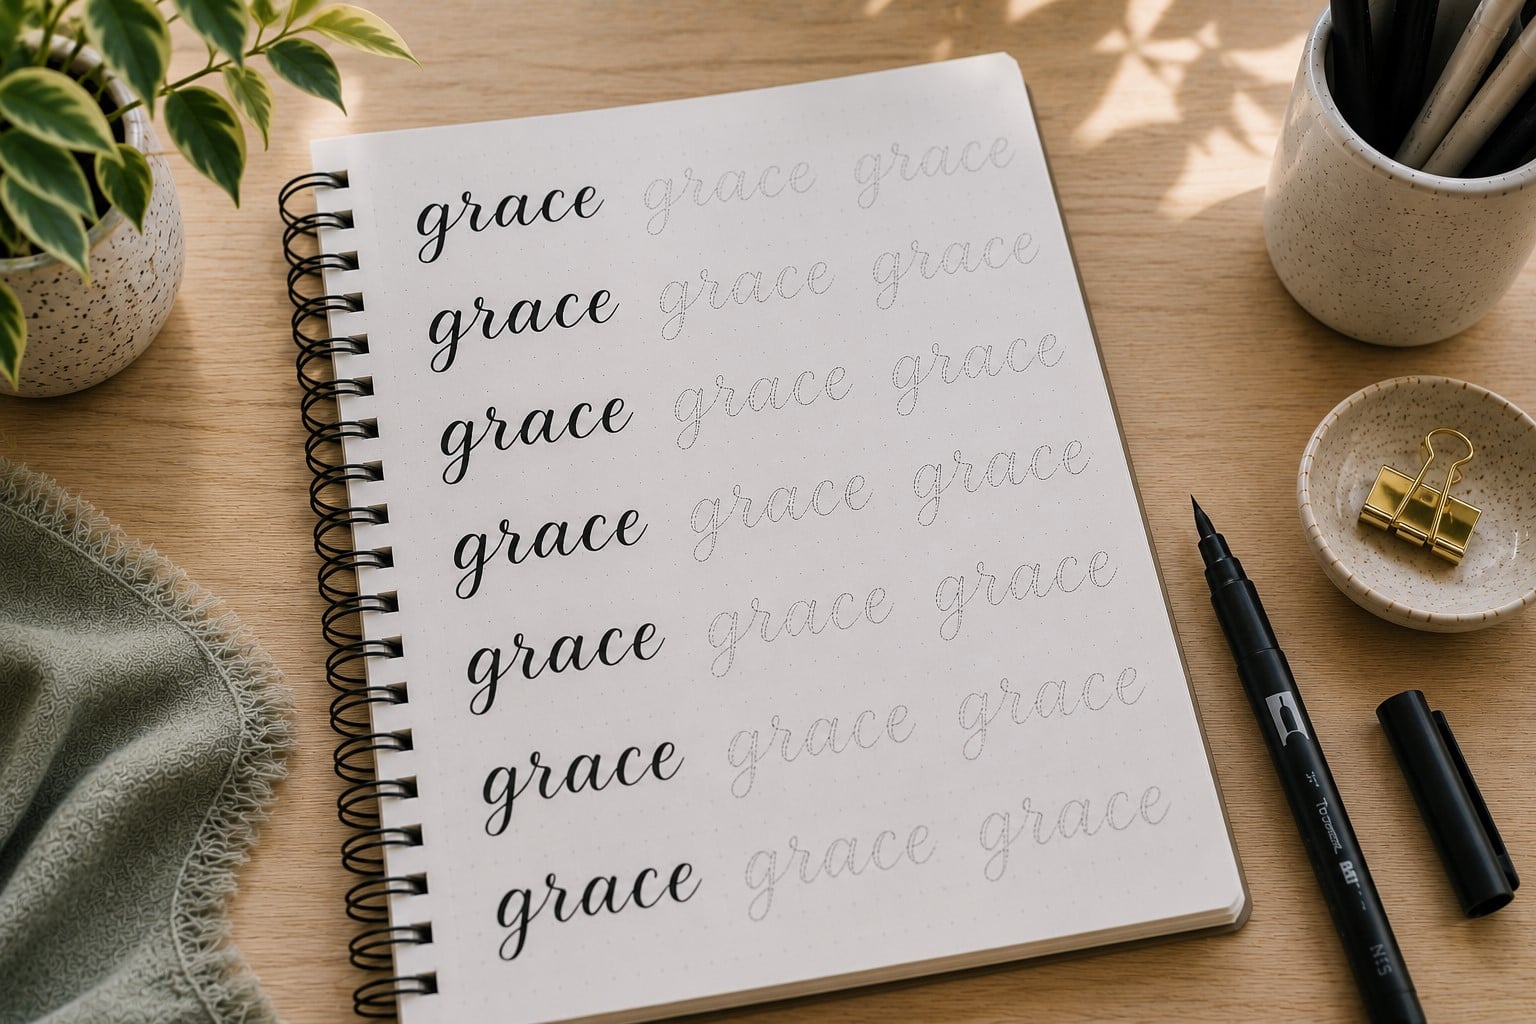
Tracing sometimes gets an unfair reputation. Some beginners avoid it because they think it isn’t real practice.
In reality, tracing teaches your hand how smooth lettering should feel. It also helps you understand stroke direction, spacing, and rhythm without feeling overwhelmed.
Print a lettering worksheet or place tracing paper over lettering you admire. Move your pen slowly and pay attention to every curve instead of trying to finish quickly.
Think about how each stroke begins, changes direction, and comes to an end. The goal is to understand the movement, not simply copy the result.
After tracing a page, put the reference away and write the same letters on a blank sheet. Compare both versions and notice where your own lettering starts to improve. Over time, you’ll depend less on tracing because your muscles will remember the movements.
If you’re still building strong beginner habits, 17 Hand Lettering Tips Every Beginner Should Know shares practical advice that complements this exercise.
Drill 9: Copy Short Quotes
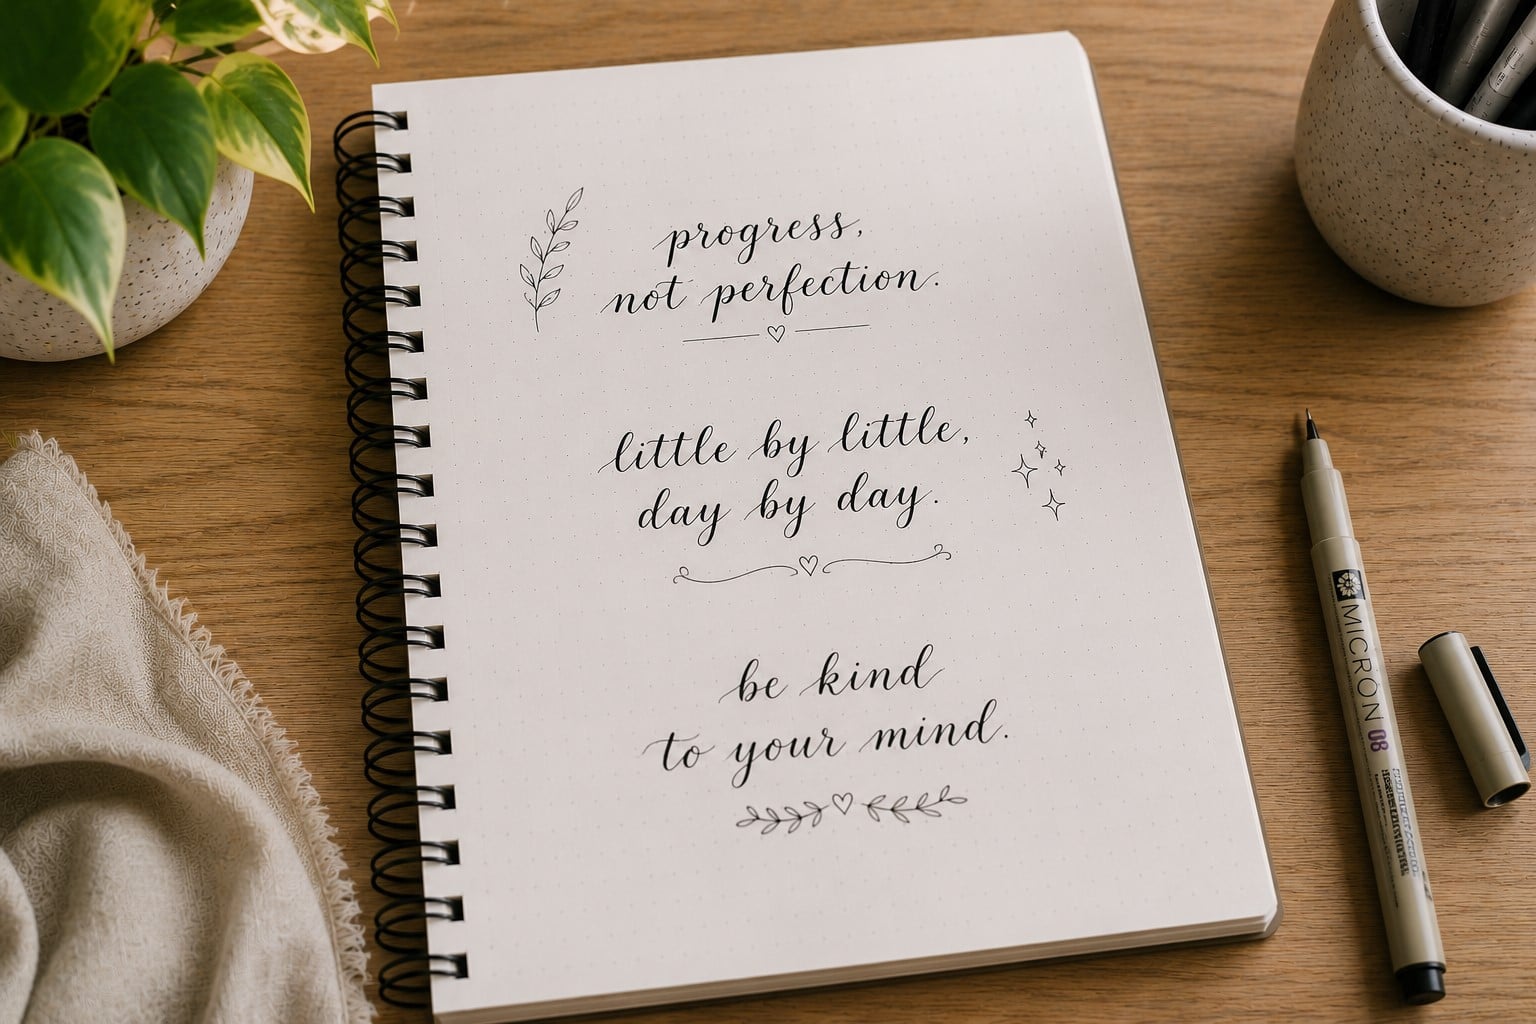
Practicing single words builds confidence, but copying short quotes teaches you how letters work together across an entire sentence.
This drill improves consistency while helping you develop a steady writing rhythm. It also feels more rewarding because you finish each session with something meaningful.
Choose a short quote with only a few words. Write it slowly while paying attention to letter height, spacing, and alignment. Don’t decorate every word right away. Focus on creating clean lettering before adding flourishes or extra details.
As you repeat the quote, you’ll notice that some words become easier to write than others. Spend extra time on the sections that feel difficult instead of starting over from the beginning. Small adjustments during each attempt lead to noticeable improvement over time.
If you’re ready to experiment with different looks, 11 Hand Lettering Styles Every Beginner Should Try will introduce styles you can practice with your favorite quotes.
Drill 10: Review Every Practice Page
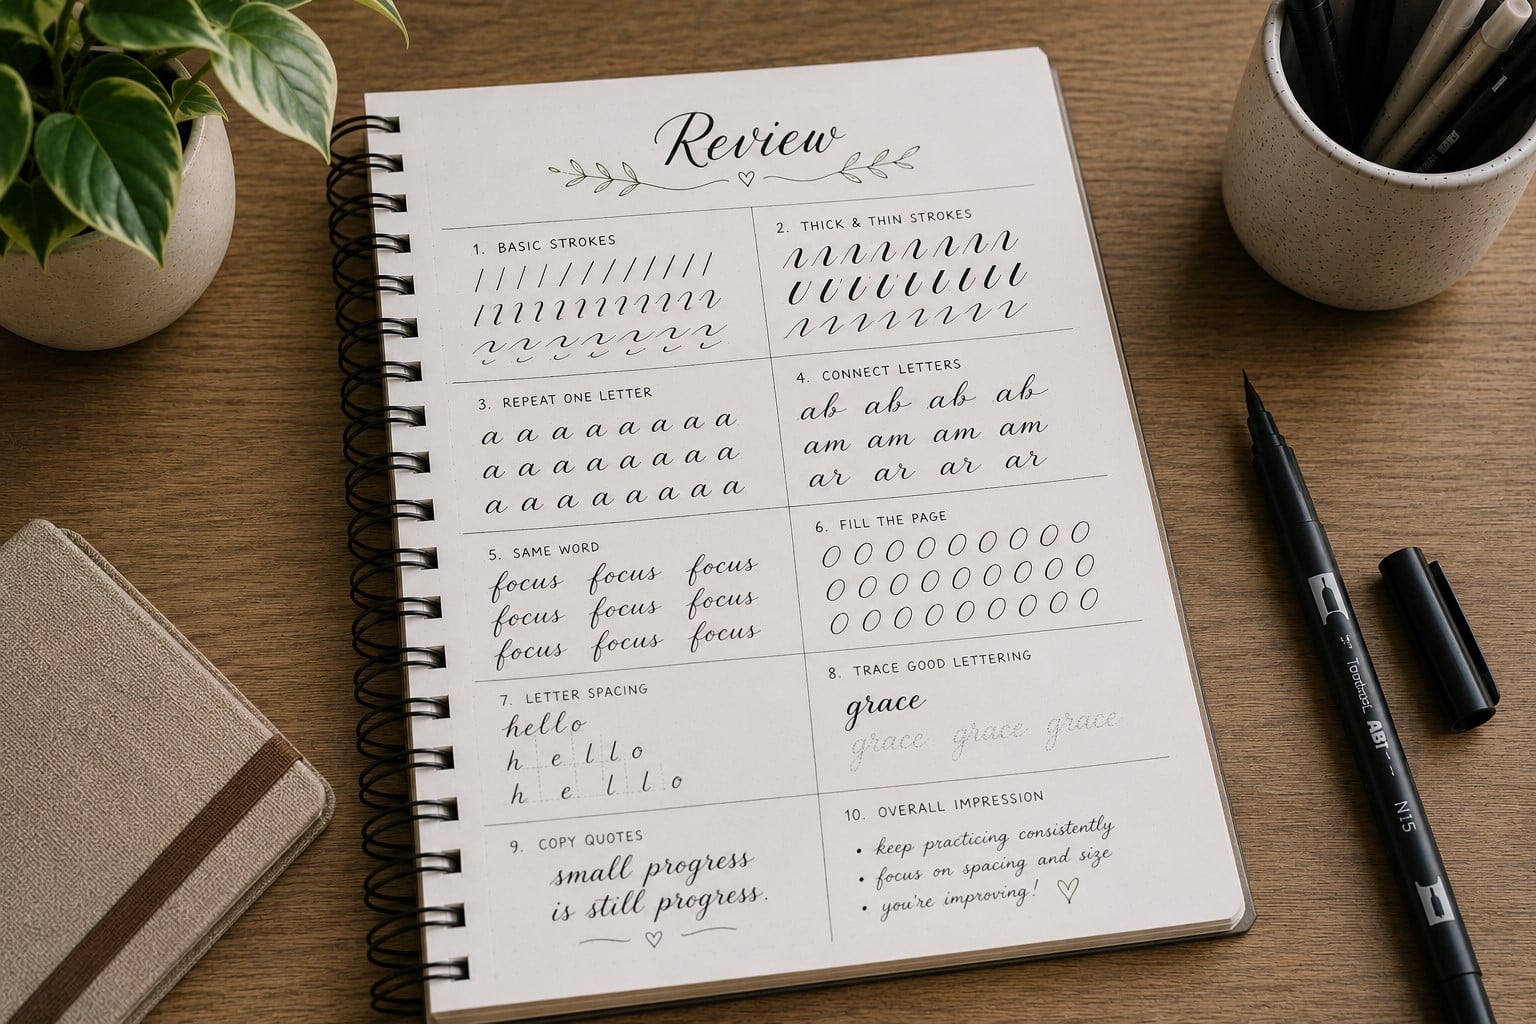
Many beginners finish a practice page, close the notebook, and move on. That habit can slow your progress because you miss valuable opportunities to learn from your work.
Taking a few minutes to review each page helps you understand what you’re doing well and what still needs attention. It turns every practice session into a learning experience instead of simply filling another sheet of paper.
After each session, look carefully at your lettering. Circle the letters you like most. Then identify one or two areas that need improvement. Maybe your downstrokes look uneven, your spacing feels inconsistent, or your curves need to be smoother.
Keeping your observations simple makes it easier to focus during your next practice session.
Avoid criticizing every little mistake. Instead, treat each page as proof that you’re improving one step at a time. Save your older practice sheets so you can compare them with newer ones after a few weeks.
Seeing your progress is often the motivation you need to keep going. If you’re unsure which problems deserve your attention first, 15 Common Hand Lettering Mistakes (And How to Fix Them) explains the most common issues beginners face and how to correct them.
Drill 11: Practice Different Letter Sizes
Writing every letter at the same size can make your work look flat. Changing the size of your letters adds interest and helps important words stand out.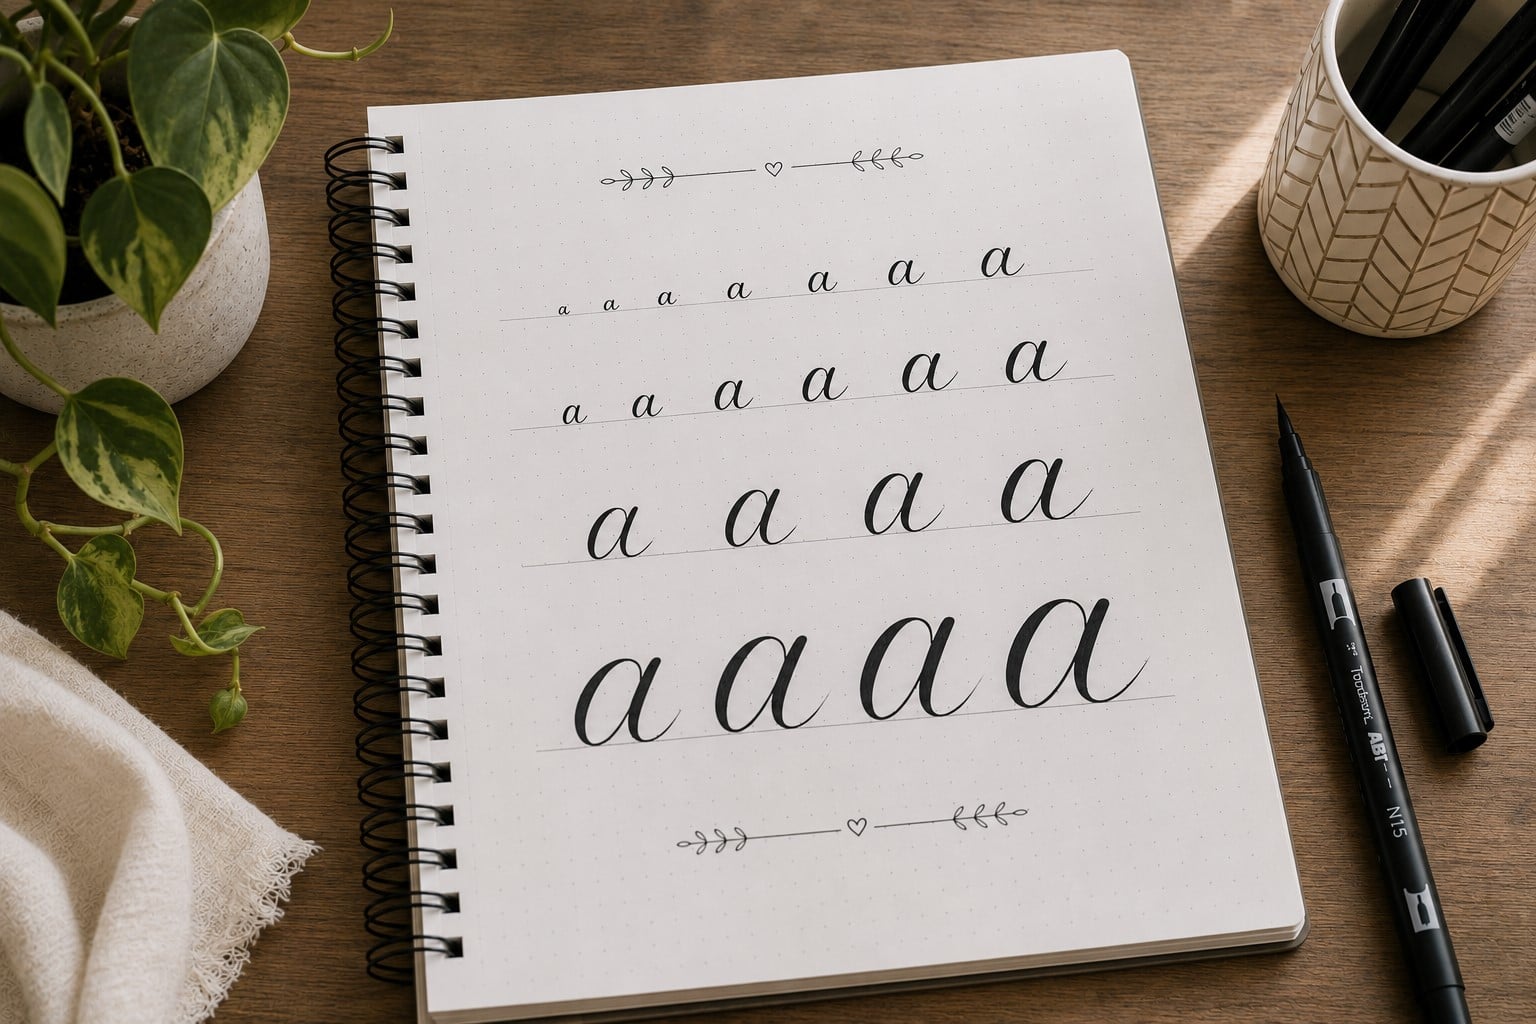
This drill teaches you how to stay in control whether you’re lettering something small in a journal or creating a large title for a card or poster.
It also improves your confidence because you’ll learn that good lettering depends on technique, not the size of your letters.
Choose one simple word and write it three times. Start with small letters on the first line. Make the second version medium-sized, then write the last version much larger.
Keep the shape of each letter the same as the size changes. Pay close attention to your spacing because larger letters need more room to breathe.
Many beginners focus so much on making bigger letters that they forget about consistency. They stretch some letters too much while squeezing others together.
Slow down and let each letter take up the space it needs. After a few practice sessions, you’ll find it much easier to adjust your lettering for different projects.
If you’d like more guidance on creating balanced designs, 13 Secrets to Creating Beautiful Hand Lettering Compositions explains how size, spacing, and layout work together.
Drill 12: Practice With Different Pens
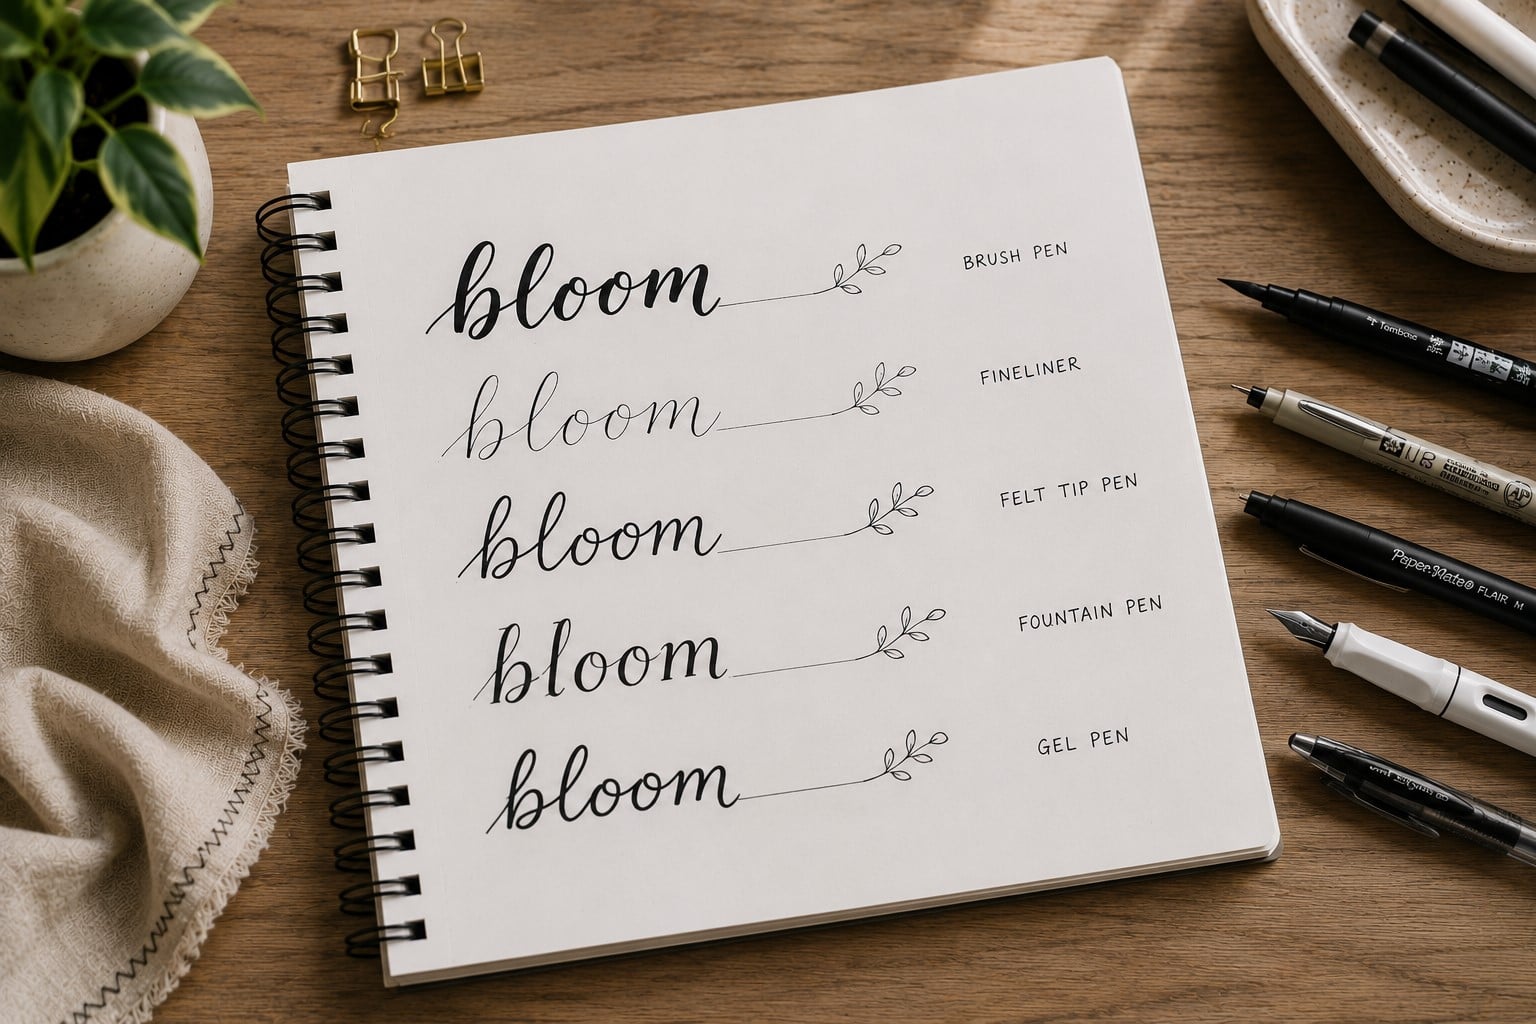
It’s easy to believe that buying a better pen will instantly improve your lettering. While quality supplies can help, learning how different pens behave is much more valuable.
Every pen responds differently, and this drill teaches your hand to adapt instead of relying on just one tool. Write the same word using a brush pen, fineliner, gel pen, marker, and pencil if you have them.
Notice how much pressure each pen needs and how the lines change from one tool to another. Some pens glide smoothly, while others need a slower, more controlled movement.
Don’t expect every pen to produce the same results. Instead, learn what each one does best. This makes it easier to choose the right tool for journals, greeting cards, signs, or everyday practice.
The more comfortable you become with different supplies, the more confident you’ll feel whenever you start a new project.
Drill 13: Create a Simple Lettering Layout
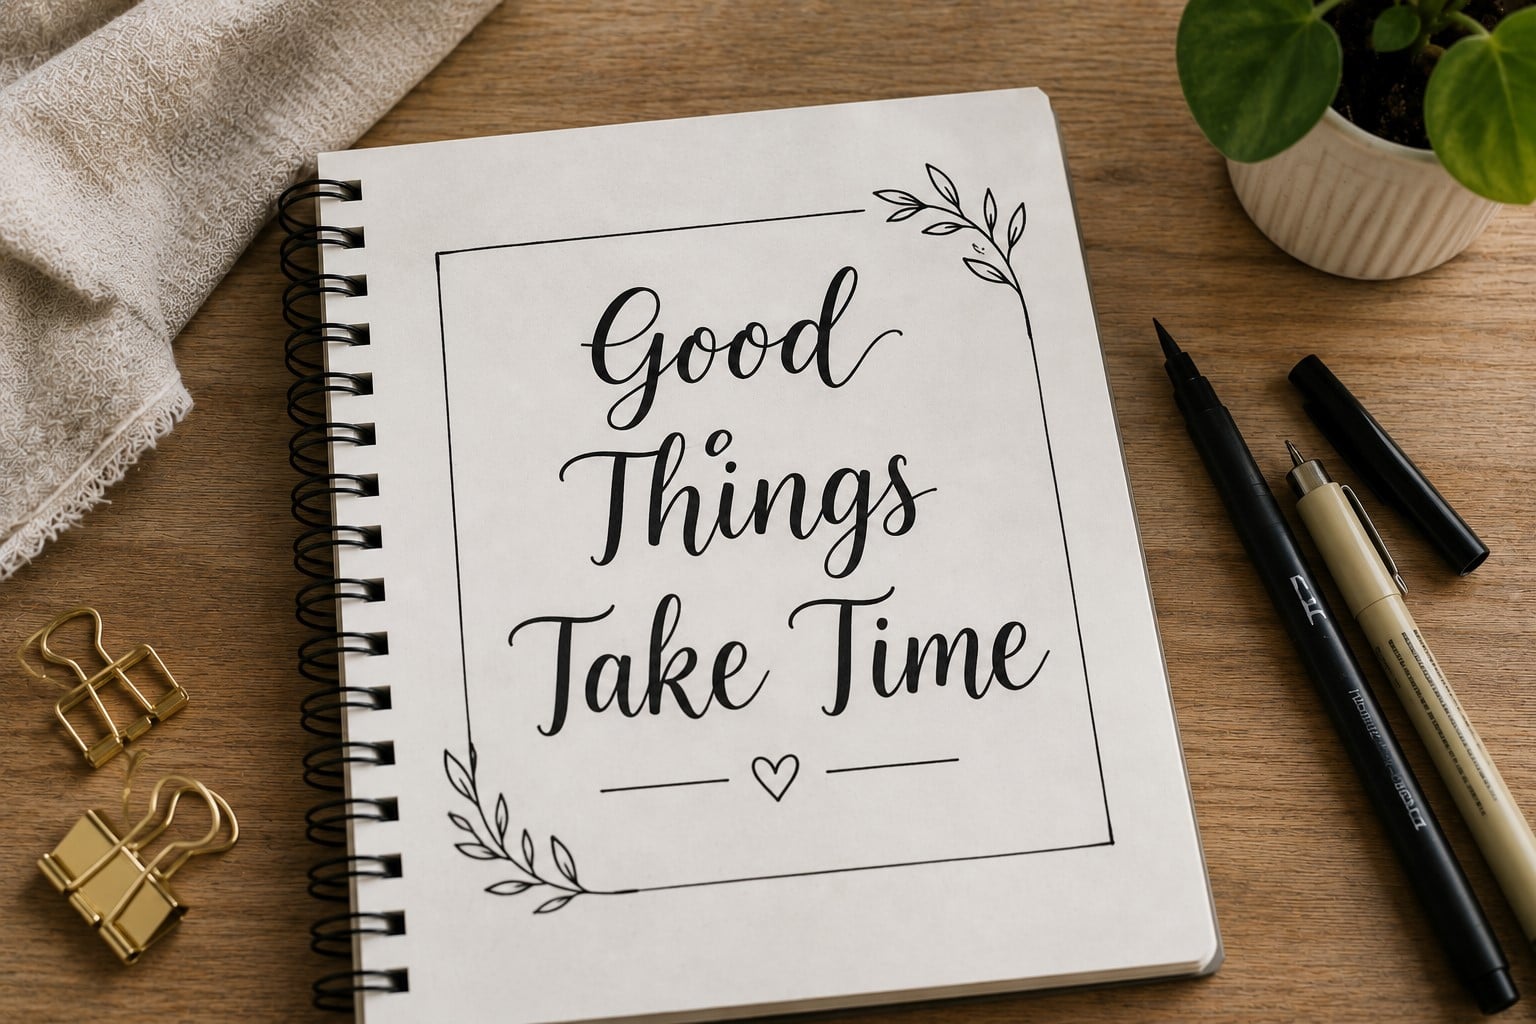
Good lettering isn’t only about writing beautiful words. It’s also about arranging those words in a way that’s pleasing to the eye.
This drill helps you think beyond individual letters and begin creating simple designs that feel balanced and intentional.
These Hand Lettering Drills become even more rewarding when you see your practice turn into finished artwork. Pick a short quote with three or four words.
Decide which word should stand out the most, then make it slightly larger or choose a different lettering style.
Place the remaining words around it while leaving enough white space. Resist the urge to fill every empty corner with decorations.
One common mistake is trying to make every word the center of attention. That often creates a busy design that’s difficult to read.
Instead, let one word lead the composition while the others support it. A clean layout usually looks more elegant than one packed with flourishes.
If you’d like to take your layouts even further, 23 Easy Tricks to Create Aesthetic Hand Lettering shares simple ways to make your finished pieces look polished.
Drill 14: Time Your Practice Sessions
Many people think longer practice sessions always produce better results. In reality, focused practice is often much more effective than practicing until you feel tired. Setting a timer helps you stay present and gives every minute a purpose.
Choose one drill before you begin and set a timer for ten or fifteen minutes. During that time, give your full attention to the exercise.
Don’t check your phone or switch to another drill because you feel bored. Staying focused helps your brain remember the movements much better.
When the timer ends, stop practicing and look at what you created. You’ll often notice more improvement from fifteen focused minutes than from an hour of distracted practice.
This habit also makes it easier to stay consistent because short sessions fit into almost any schedule.
Drill 15: Repeat the Drill That Challenges You Most
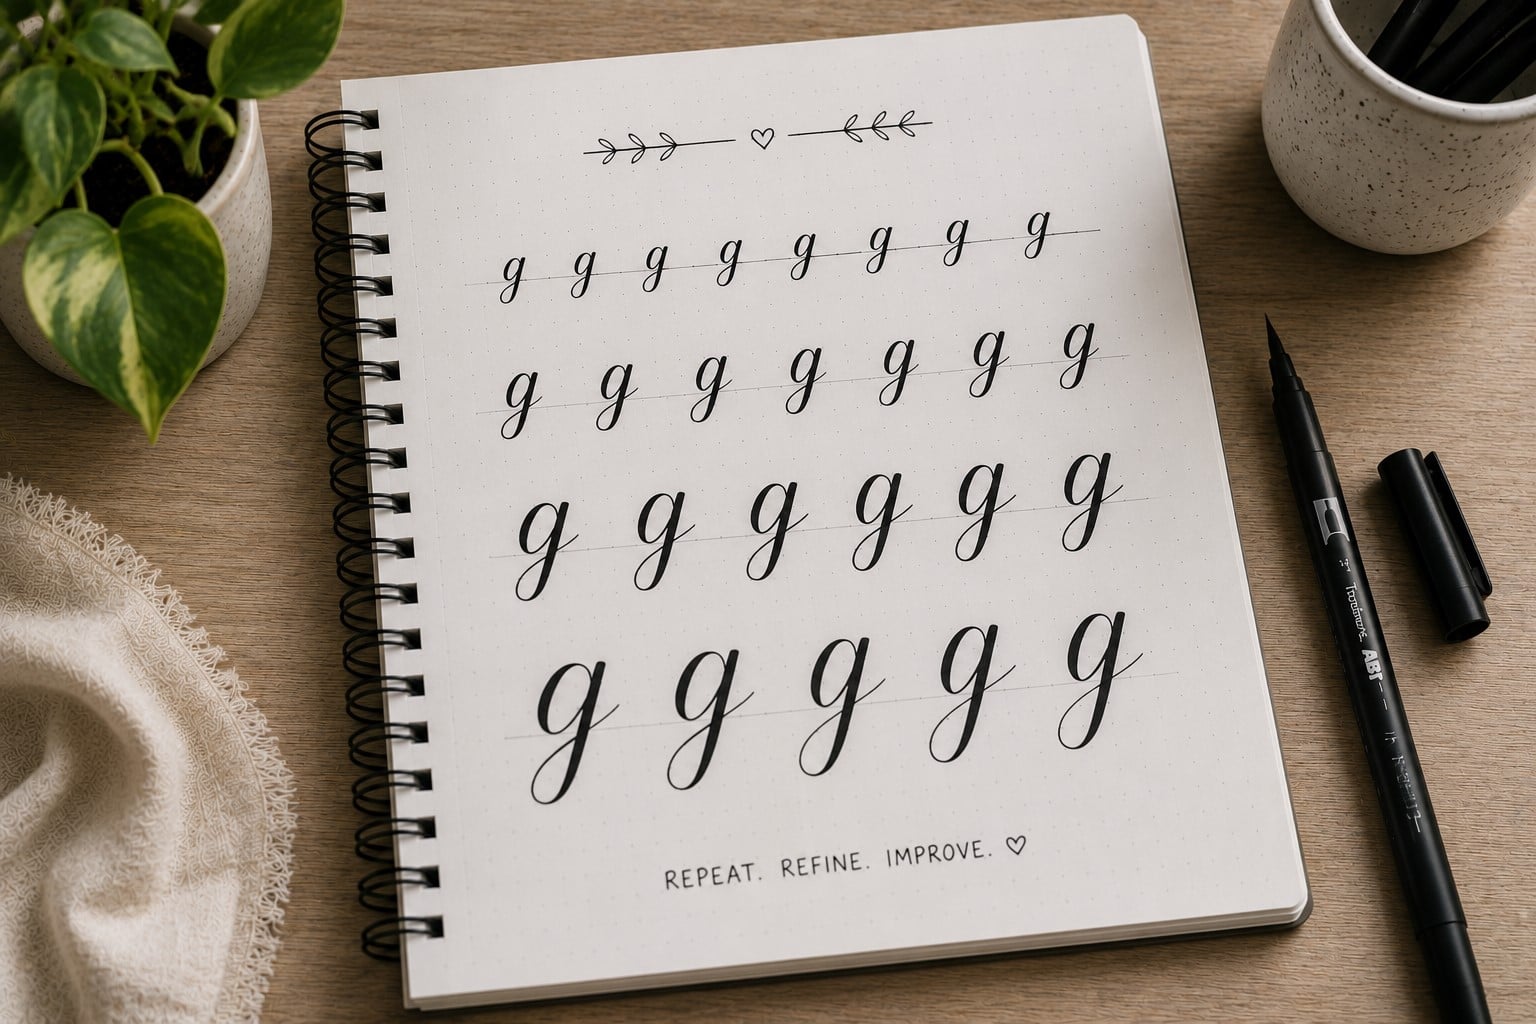
After trying all the exercises in this guide, you’ll probably notice that some feel easier than others. That’s completely normal.
The drills that challenge you the most usually have the greatest potential to improve your skills. Instead of avoiding them, make them part of your regular routine.
Choose one difficult drill and practice it several days in a row. Compare each day’s work with the previous day’s page. Look for small improvements instead of dramatic changes.
Better spacing, smoother strokes, or more confident curves are all signs that your practice is paying off.
Don’t feel pressured to master every technique at once. Strong lettering grows through consistent repetition, not rushing from one exercise to another.
The best Hand Lettering Drills are the ones you return to again and again because they continue helping you improve. As you build confidence, you’ll discover that steady practice always beats perfect practice.
Final Thoughts
Improving your lettering doesn’t happen because you buy better supplies or practice for hours without a plan. It happens when you spend time building the right skills.
That’s why Hand Lettering Drills are such an important part of every beginner’s journey. Each exercise strengthens one area, and those small improvements eventually come together to create beautiful lettering.
Don’t worry if your progress feels slow at first. Some days your letters will look smoother than others, and that’s completely normal. Keep your old practice pages instead of throwing them away.
Looking back after a few weeks will remind you how much you’ve grown, even when you don’t notice it from one day to the next.
Most importantly, enjoy the process. Every page teaches you something, even when it doesn’t turn out the way you hoped. Stay consistent, celebrate the small wins, and trust that regular practice will pay off.
Once these exercises become part of your routine, challenge yourself with How to Create Modern Hand Lettering in 17 Easy Steps to build on the skills you’ve developed. The more you practice these Hand Lettering Drills, the more confident and creative you’ll become.