27 Easy Hand Lettering Ideas Every Beginner Should Try
Disclosure: Some of the links in this post are affiliate links. This means if you click on the link and purchase an item, I will receive an affiliate commission at no extra cost to you.
Every lettering artist reaches a point where practicing the alphabet no longer feels exciting, but creating a finished piece still seems a little intimidating. That’s the perfect time to explore Beginner Hand Lettering Ideas.
Instead of focusing on perfect strokes alone, you’ll start turning simple words, quotes, and everyday objects into creative projects that build your confidence with every page.
The beauty of hand lettering is that you don’t need expensive supplies or years of experience to make something you’ll be proud of.
Many of the best lettering projects begin with a single word, a favorite quote, or a simple design.
As you try different ideas, you’ll naturally improve your spacing, composition, and pen control without feeling like you’re doing repetitive drills.
Before filling your sketchbook with creative projects, Easy Hand Lettering Tutorial: Learn in 21 Minutes will help you strengthen the essential skills every beginner needs.
In this collection of Beginner Hand Lettering Ideas, you’ll discover 27 fun and approachable projects that are perfect for practice.
Whether you enjoy decorating journals, making handmade cards, or simply filling a notebook with beautiful lettering, these ideas will inspire you to keep creating while developing your own unique style.
27 Easy Hand Lettering Ideas Every Beginner Should Try
1. Letter Your Name in Different Styles
 Your name is one of the easiest things to practice because you already know how it should look.
Write it several times using different lettering styles, changing the size, spacing, or decorative details with each version.
Try writing it in block letters, script, serif, and modern calligraphy to see how each style changes its personality. You can also experiment with thick downstrokes, thin upstrokes, or playful shadows.
By the end of the exercise, you’ll have a better idea of which lettering style feels most comfortable to you.
If you’d like to explore more lettering styles, 11 Hand Lettering Styles Every Beginner Should Try is a great place to start.
2. Create a One-Word Motivation Page
 Choose a single word like Believe, Create, Grow, Joy, or Dream. Fill an entire page by lettering the word in different sizes, layouts, and styles.
Challenge yourself to make every version look different from the last. Add banners, simple flourishes, or decorative borders to give each word its own personality.
This project builds creativity while helping you practice consistency without feeling repetitive.
3. Write Your Favorite Short Quote
 Pick a quote with five to ten words and turn it into a simple lettering composition. Keep the layout clean and let one or two important words become the focal point.
Begin by lightly sketching the placement of each line before reaching for your pen. This makes it easier to balance the quote and avoid running out of space.
As your confidence grows, you’ll naturally start creating more interesting layouts. For more inspiration, explore 19 Beautiful Ways to Letter Quotes Like a Pro.
4. Design a Birthday Card
 A handmade birthday card is a practical way to practice lettering while creating something meaningful. Letter phrases like Happy Birthday, Celebrate Today, or Wishing You Joy using simple embellishments.
Try adding balloons, stars, hearts, or confetti around the words to complete the design. Keep the decorations simple so the lettering remains the main focus.
Handmade cards also make thoughtful gifts that friends and family are likely to keep long after the celebration.
5. Fill a Page with Positive Words
 Choose encouraging words such as Hope, Kindness, Peace, Smile, and Courage. Arrange them across the page using different lettering sizes and styles.
Experiment with different alignments by placing some words horizontally and others vertically. Leave enough white space so the page doesn’t feel crowded.
This exercise trains your eye to create balanced compositions while expanding your lettering vocabulary.
6. Make a Seasonal Lettering Page
 Celebrate the changing seasons by lettering words that match the time of year. Spring flowers, summer sunshine, autumn leaves, or winter snowflakes all make wonderful themes.
Match your decorative elements to the season by drawing simple flowers, pumpkins, leaves, or snowflakes. You can also use seasonal color palettes to make the page feel more cohesive.
If you want your finished page to look even more polished, 13 Secrets to Creating Beautiful Hand Lettering Compositions offers simple design tips.
7. Create a Coffee Cup Lettering Design
 Draw a simple coffee mug and letter a cozy phrase inside or above it. Try sayings like Coffee First, Morning Brew, or But First, Coffee.
Add steam lines that flow naturally into the lettering for a creative touch. You can even decorate the mug with patterns, hearts, or simple shapes to make it unique.
This project teaches you how illustrations and lettering can work together without competing for attention.
8. Decorate Your Journal Cover
 Transform a plain notebook into something personal by lettering your name, favorite quote, or yearly goal on the cover.
Start with a pencil sketch so you can experiment with different layouts before inking. Add a simple border or a few botanical doodles to frame the design without making it feel busy.
Every time you pick up your journal, you’ll have a personalized cover that reminds you of how much your lettering has improved.
9. Practice Bounce Lettering with Simple Words
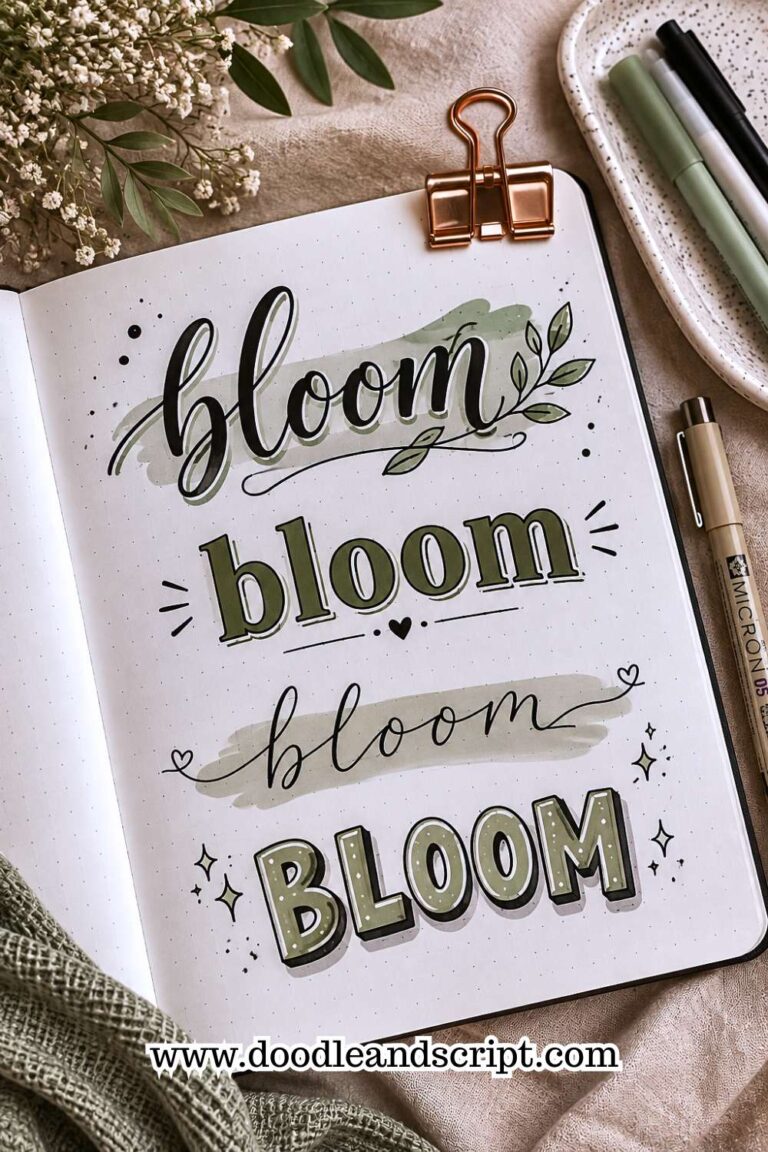
 Choose easy words like Hello, Bloom, Smile, or Create and experiment with gentle letter movement. Focus on lowering only one or two letters rather than changing every letter’s height.
Write each word several times, changing the bounce pattern with every attempt. Compare your versions to see which one feels the most balanced and easiest to read.
Over time, you’ll begin to recognize where a little movement creates the biggest impact. If you’re ready to master this playful style, How to Create Bounce Lettering in 13 Easy Steps will guide you through the process.
10. Create an Inspirational Wall Print
 Turn your favorite inspirational saying into a piece of wall art. Choose a short phrase like “Start Where You Are” or “Progress Over Perfection” and experiment with different layouts before writing your final design.
Think about which words deserve the most attention. Making one or two words larger than the rest creates a natural focal point and makes the message easier to read.
You can also add a simple border, leafy accents, or tiny stars to fill empty spaces without overwhelming the design.
Once you finish, frame your work or pin it above your desk as a reminder of how much your lettering has improved.
If you want more ideas for arranging words beautifully, 23 Easy Tricks to Create Aesthetic Hand Lettering is full of practical inspiration.
11. Design a Simple Bookmark
 Bookmarks are small enough to finish in one sitting, making them perfect for beginners. Letter a favorite quote, an encouraging word, or even the title of your favorite book on a strip of cardstock.
Because the space is limited, you’ll learn how to size your letters carefully and keep your spacing consistent. Add a few tiny illustrations, a border, or a tassel to make the bookmark feel complete.
This project is also a wonderful handmade gift for friends, family, or fellow book lovers. The more bookmarks you create, the more confident you’ll become working within narrow layouts.
12. Letter Your Favorite Song Lyrics
 Choose one or two lines from a song that inspires you and turn them into a creative lettering piece.
Short lyrics are easier to arrange and give you plenty of opportunities to experiment with different lettering styles.
Begin by deciding which words should stand out the most. You can emphasize those words with larger letters, shadows, or a different style while keeping the remaining text simple.
This teaches you how to create contrast without making the design feel cluttered. As you practice, you’ll become more comfortable planning layouts before putting pen to paper.
13. Make a Gratitude Lettering Page
 Create a page filled with words or short phrases that remind you of things you’re thankful for. You might include Family, Health, Home, Friends, or New Beginnings.
Instead of writing everything in the same style, vary the lettering to make each word feel unique.
Adding small decorative elements between the words creates visual interest while keeping the page balanced.
This project not only improves your lettering skills but also gives you a meaningful page you’ll enjoy looking back on.
If you’re still building your confidence, How to Learn Hand Lettering Step-by-Step (Even If You Can’t Draw) will help you strengthen the basics.
14. Create a Recipe Title Page
 If you enjoy cooking or baking, design a decorative title page for your favorite recipe. Letter the recipe name in large, attractive lettering and leave space underneath for ingredients or notes.
This project teaches you how to combine decorative headings with readable body text. It also encourages you to think about spacing, margins, and page organization.
Simple flourishes or kitchen-themed doodles can make the page even more inviting. Before long, you’ll have a personalized recipe collection that’s both useful and beautiful.
15. Decorate Gift Tags by Hand
 Plain gift tags become much more special when they’re hand-lettered. Write names, festive greetings, or short messages using simple lettering styles that are easy to read.
Since gift tags are small, they encourage careful planning and neat pen control. Try experimenting with different shapes, borders, and tiny illustrations to make each tag unique.
This is also an excellent way to practice lettering without committing to a large project. Friends and family often appreciate handmade details because they add a personal touch that printed tags simply can’t match.
16. Create a Word-of-the-Year Poster
 Choose one word that represents your goals or mindset for the year. Letter it boldly in the center of the page, then build a simple design around it using decorative accents.
Experiment with different fonts before deciding on your favorite version. You can also add meaningful symbols that represent the word, such as leaves for growth or stars for hope.
Displaying the finished piece somewhere visible serves as both decoration and daily motivation.
Projects like this also encourage you to develop your own creative style instead of copying someone else’s work.
17. Letter Inside Simple Shapes
 Draw circles, hearts, rectangles, banners, or hexagons, then fill each shape with a word or short phrase. Limiting your lettering to a defined space teaches you how to adjust letter size without sacrificing readability.
Different shapes create different design challenges, making this a fun way to improve your layout skills. Don’t be afraid to lightly sketch your lettering first before adding ink.
As you practice, you’ll naturally become better at centering words and creating balanced compositions.
If you’d like to strengthen your lettering foundation even more, How to Master the Hand Lettering Alphabet in 15 Simple Steps is the perfect next lesson.
18. Create a Daily Practice Challenge
Choose one lettering skill to focus on each day for a week. One day can be dedicated to uppercase letters, another to spacing, while the next focuses on brush pressure or flourishes.
Keeping your practice focused helps you improve faster than trying to learn everything at once. At the end of the week, compare your first page with your last one.
You’ll often notice smoother strokes, cleaner spacing, and better confidence without realizing how much you’ve improved.
Even spending fifteen minutes a day can make a noticeable difference over time.
If you want a structured routine, 17 Lettering Exercises That Instantly Improve Pen Control provides excellent daily practice ideas.
19. Design Your Favorite Book Title
 Think about a book you love and create a decorative cover featuring only its title. The goal isn’t to copy the original cover but to design one using your own lettering style.
Consider the mood of the book as you choose your lettering. A fantasy novel might inspire flowing script, while a mystery could suit bold block letters.
Add a few simple illustrations that hint at the story without overcrowding the page. This project encourages creative thinking while teaching you how lettering communicates emotion and personality.
20. Make a Mini Quote Collection
 Instead of creating one large quote, design several small quote cards on a single page. Each quote should have its own lettering style and layout.
Working with multiple designs gives you the freedom to experiment without worrying about perfection. If one layout doesn’t work, simply try a different approach on the next card.
Over time, you’ll discover the styles you enjoy most and naturally build your own creative preferences. Small projects like these are also perfect for sharing with friends or using as journal decorations.
21. Create Decorative Monthly Headers
 If you keep a planner or journal, design custom headers for each month of the year. Letter the month’s name using different styles while adding simple seasonal decorations around it.
January might feature snowflakes, while July could include sunshine or flowers.
Matching your decorations to the season makes each page feel unique and keeps your practice enjoyable. You’ll also become more comfortable combining lettering with simple illustrations.
If you’re looking for fresh ways to make your pages more attractive, How to Create Modern Hand Lettering in 17 Easy Steps offers ideas you’ll love.
22. Turn Your Initial into Decorative Art
Choose the first letter of your name and transform it into a decorative design. Begin with a large outline, then fill it with patterns, flowers, vines, stars, or geometric shapes.
This project helps you slow down and pay attention to details. It also teaches you how to balance decorative elements without making the letter difficult to recognize.
Try creating several versions using different themes until you find one that reflects your personality. By repeating the exercise, you’ll gain confidence in both lettering and simple illustration.
23. Letter on Colored Paper
 Most beginners only practice on white paper, but colored paper creates a completely different effect.
Choose black, kraft, pastel, or colored cardstock and experiment with pens that provide good contrast.
You’ll quickly learn how color influences readability and the overall appearance of your work. Metallic, white, and gel pens often produce beautiful results on darker backgrounds.
This simple change also encourages you to think more carefully about color combinations and composition. Small experiments like this keep practice sessions interesting while expanding your creative skills.
24. Design a Simple Thank You Card
 A handwritten thank-you card is a meaningful project that lets you practice lettering while creating something thoughtful.
Write a simple message like Thank You, You’re Appreciated, or So Grateful on the front.
Keep the design clean by choosing one lettering style and adding only a few decorative details. Flowers, leaves, or tiny hearts are often enough to complete the card without making it feel crowded.
Handmade cards carry a personal touch that recipients genuinely appreciate. As a bonus, you’ll gain more experience creating balanced layouts for real-life projects.
25. Create an Alphabet Inspiration Page

Write every letter of the alphabet, but challenge yourself to give each one its own personality. Some letters can be bold, others elegant, playful, or decorated with subtle flourishes.
This exercise encourages creativity while reinforcing your understanding of letter structure.
Looking at the completed alphabet also makes it easier to identify letters that need more practice. Keep these pages so you can compare your progress over time.
If you’d like to strengthen your letterforms even further, 15 Common Hand Lettering Mistakes (And How to Fix Them) will help you avoid common beginner habits.
26. Make a Vision Board with Lettering

Collect magazine cutouts, printed images, or simple drawings that represent your goals. Then use hand lettering to add titles, keywords, and encouraging phrases throughout the page.
The combination of images and lettering creates a project that’s both inspiring and educational. You’ll practice choosing fonts that complement the overall design while learning how words interact with visual elements.
Don’t worry about making everything perfect. The goal is to create something meaningful that motivates you every time you see it.
27. Start a Hand Lettering Sketchbook

One of the best Beginner Hand Lettering Ideas is dedicating an entire sketchbook to your progress. Fill it with practice pages, creative projects, favorite quotes, experiments, and ideas that inspire you.
Don’t tear out pages that don’t turn out as planned. They become valuable reminders of how far you’ve come and help you appreciate your improvement over time.
Date your pages so you can easily look back and see how your lettering has evolved.
A sketchbook isn’t meant to showcase perfection; it’s a record of consistent practice and creative growth.
When you’re ready to build an even stronger routine, 21 Proven Ways to Improve Your Hand Lettering Faster will help you continue developing your skills.
Final Thoughts
The best Beginner Hand Lettering Ideas are the ones that keep you excited to practice. Every project in this list helps you build a different skill, whether it’s improving spacing, experimenting with layouts, strengthening pen control, or discovering your favorite lettering style.
The more variety you add to your practice, the faster your confidence will grow.
Remember that beautiful lettering doesn’t come from creating one perfect page. It comes from filling many imperfect ones and learning something from each attempt. Keep your early work, celebrate your progress, and enjoy the creative process.
When you’re ready to take your skills even further, 25 Beginner Lettering Exercises That Actually Work will give you even more structured practice ideas to help you improve.