How to Hold a Calligraphy Pen Correctly (Step-by-Step)
As a beginner, the most important skill you need to learn is how to hold a calligraphy pen correctly. When I started out, I thought it wasn’t necessary but when I had to constantly struggle with uneven strokes, scratchy lines and most times my pen’s ink stopped flowing properly, I had to pay attention to the details of pen grip. When I finally mastered it, the quality of my strokes and smoothness of my writing improved, stopped painful hand strain and I felt more comfortable in my hand while practicing.
Many beginners are facing this same challenge as I did, and some think the problem is from the pen or ink. If you’ve bought varieties of pens and different brands of ink to improve your stroke appearance but nothing has changed, you need to start considering the way you hold your pen. These kinds of struggles are actually very common and are covered in detail in this guide on beginner mistakes in calligraphy and how to fix them. A proper calligraphy pen grip helps you maintain the correct nib angle, control thick and thin strokes, and create consistent, beautiful lettering.
In this step-by-step guide, you’ll learn how to hold a calligraphy pen correctly; the right finger placement, proper pen angle, and simple tips that every beginner can apply to improve their writing. Whether you are practicing modern calligraphy or traditional scripts, mastering this basic skill will build a strong foundation for your calligraphy journey.
Understanding Calligraphy Tools
When I started out, I spent a whole lot of money on expensive pens. I thought that the more costly tools I have, the better I will be able to write but I was disappointed. So, I don’t want you to make the same mistake, the calligraphy tools you should invest on should be dependent on the purpose it serves and what best suits you. If you’re just getting started and need a full overview of everything required, a calligraphy for beginners: complete starter guide will save you a lot of time and unnecessary spending.
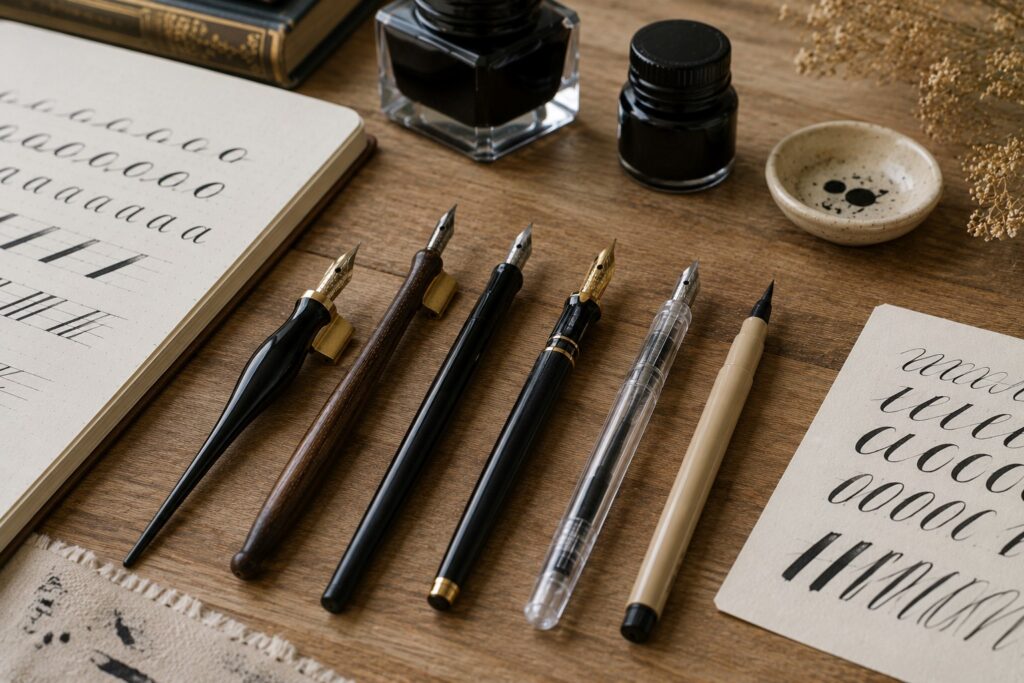
Types of Calligraphy Pens that’s Beginner-Friendly
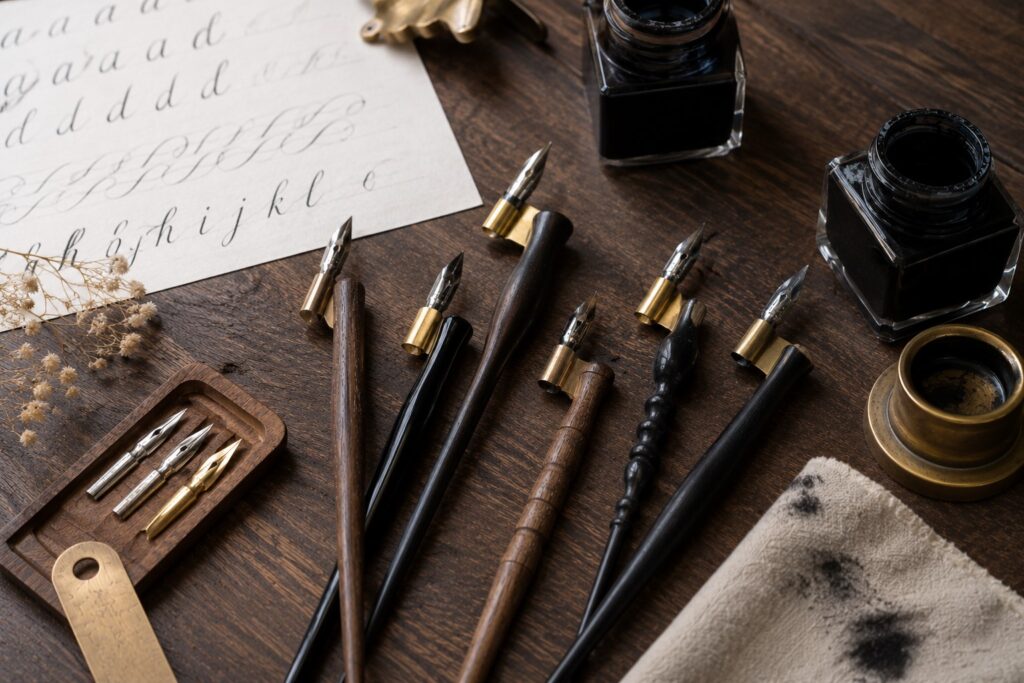
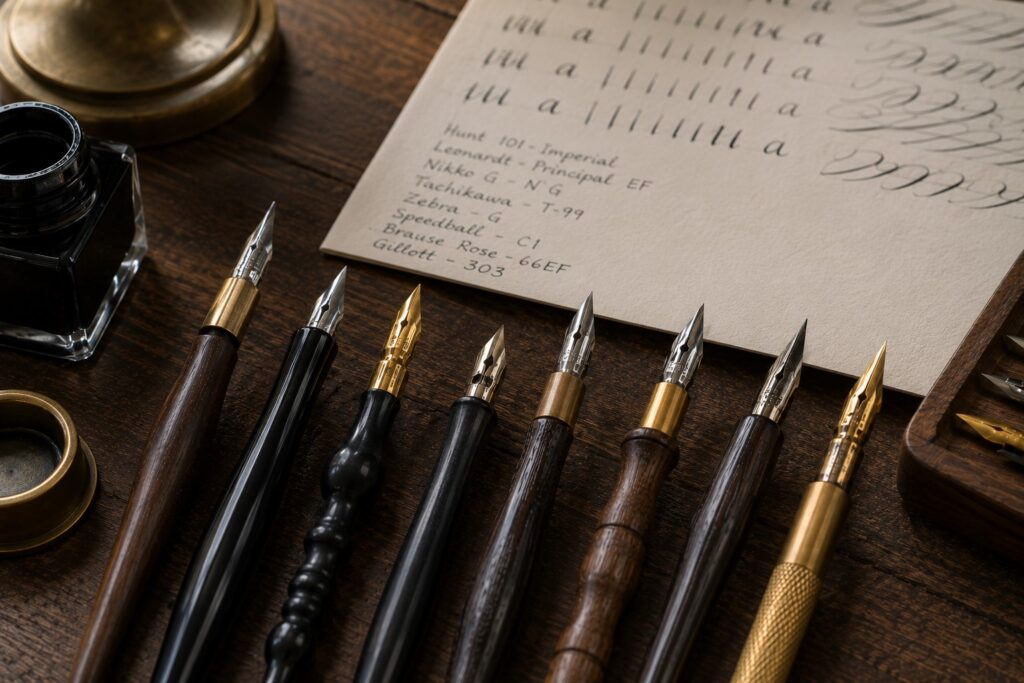
Pointed Pens
Also called dip pens. It is made of two parts, the pen holder (body of the pen that you can hold) and the nib (where you dip into the ink before writing). They are one of the most popular tools for traditional calligraphy, used to create beautiful thick strokes when pressed harder and thin strokes when the pressure is released. And I love Nikko G nibs; they are sturdy with flexible nibs that’re not too sharp or fragile for beginners.
Although there are dip pens that have broad edges, they can’t be called pointed pens.
There are two types of pen holders; straight and oblique. Oblique holders hold the nib at an angle, making it easier to create a slanted script like copperplate while straight pen holders are mostly preferred by left- handed calligraphers because it helps them to maintain a natural hand position, it is also ideal for creating non-slanted letters.
Pro tip: I recommend buying a Moblique 2-in-1 holder. It serves a dual purpose. You can use it as a straight pen or fix your flange for an oblique pen. This will serve you the expenses of buying a straight pen and an oblique pen individually. Also, my lefty friends can also have the opportunity to switch the flange to the right and use it for slanted writing.
Broad Edge Pens
It has a flat, wide nib instead of a pointed tip, have you now seen why I said that it can’t be classified as a pointed pen. They produce lines of the same thickness and are mostly used in traditional calligraphy style like italic, gothic, blackletter etc.
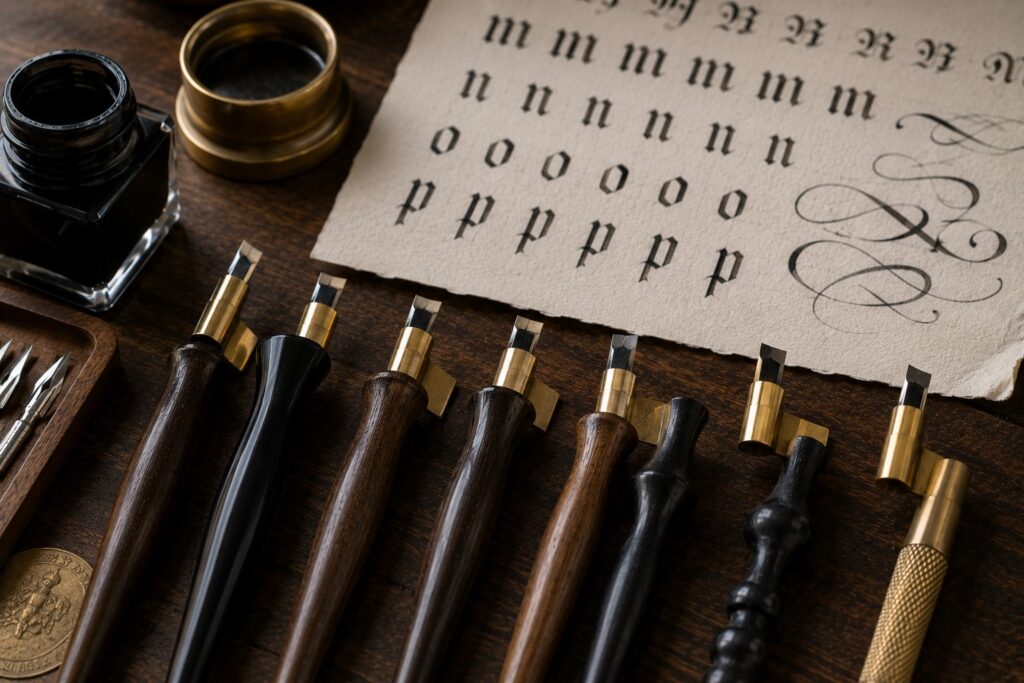
Practicing with broad edge pens can help with better pen control but I don’t usually advise beginners to start with broad edge pens because it writes big letters and if you aren’t careful, you may write and there’ll be no space left to complete a particular word on your paper.
Monoline Pens
This type of pen is used specifically for faux calligraphy. It is ideal for creating smooth strokes and carefully detailed designs.

Brush Pens
The brush pens that I’ve used since I started practicing calligraphy is the Tombow Fudenosuke brush pen. They are durable, come with flexible tips and yet very affordable. No matter what level of calligraphy that you’re in; beginner or expert, you’ll still need a Tombow brush. It pigmented and also comes in water color forms. If you want to get the most out of your brush pens, this guide on how to use brush pens properly covers everything from grip to maintenance in detail.

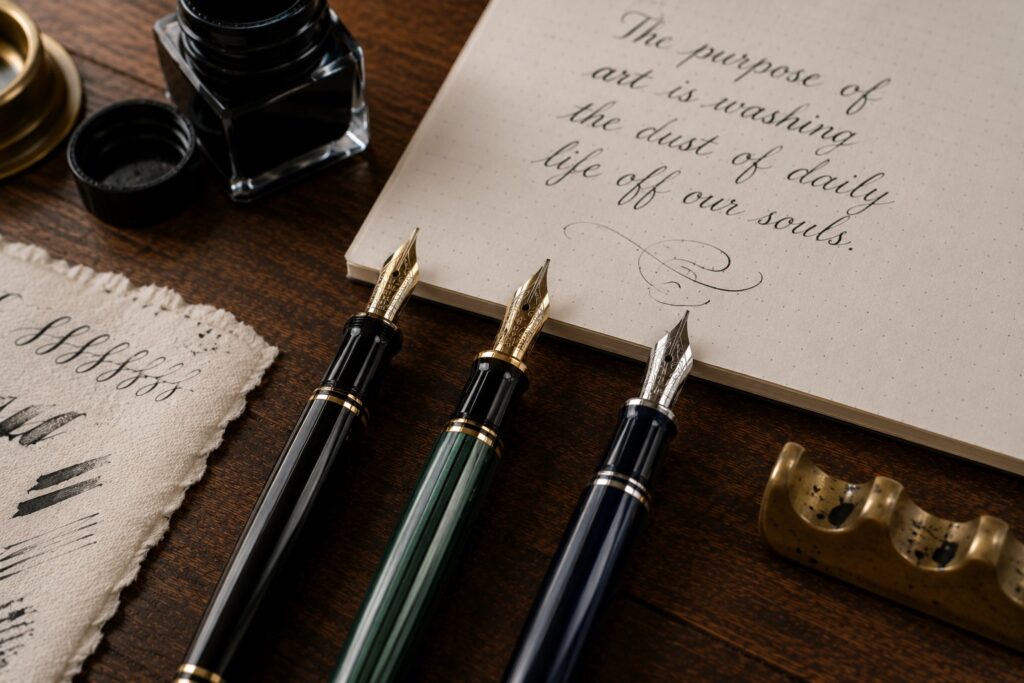
Calligraphy Fountain Pens
These ones are pens with built-in ink cartridges. Most preferred if you want something that’s less messy, allowing for continuous, and lower-maintenance writing than a dip pen but still feels classic.
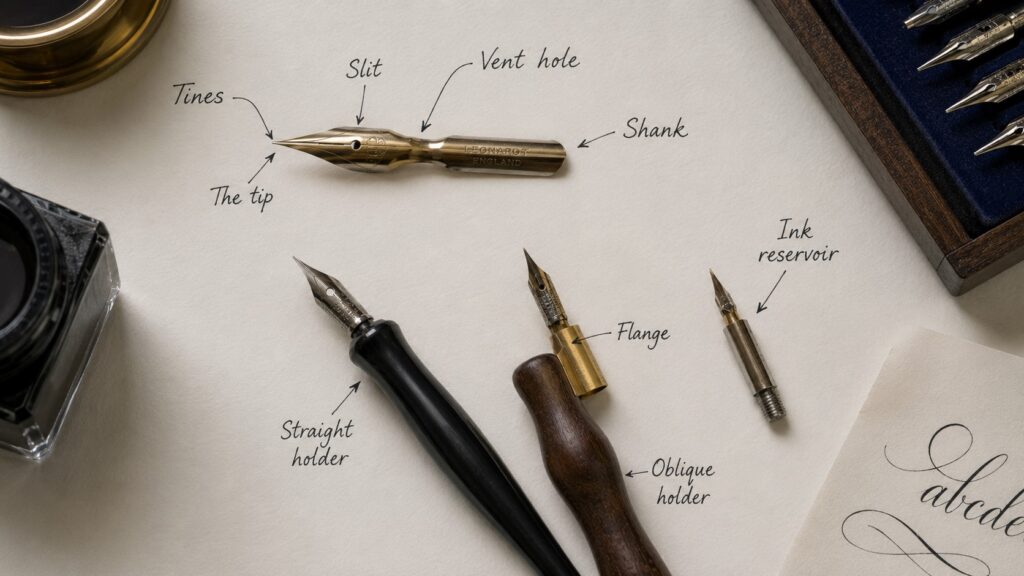
Parts of a Calligraphy Pen you Should Know
The Nib (The tip that writes): There are several parts that makes up the nib and they are;
Tines: If you always notice two tooth-like extensions that split when you apply pressure to create thicker downward strokes, that part is called tine.
Slit: It is a thin line at the center of the nip that ink flows through.
Vent hole: It regulates air that goes into the nib for a consistent ink flow.
Shank: It is the body or base of the nib that you insert into the holder.
The tip: this is the part that touches the paper.
The Holder: The holder comes in two types, straight and oblique. The oblique comes with a metal piece called flange that holds the nib.
Ink reservoir: It is a small metal that holds extra ink, making you write a little longer without frequent re-dipping.
How the Nib Affects the Way You Hold the Pen
Unlike normal everyday pens, calligraphy nibs need to stay at a consistent angle and this plays a huge role in the way you position your pen to write. While writing, try to hold the pen lightly and keep the nib at a steady but consistent angle for a proper ink flow to prevent uneven, rough or scratch strokes. Understanding calligraphy basics: understanding upstrokes and downstrokes will also help you understand exactly why nib angle matters so much for stroke quality.
Choosing the Right Pen for Beginners
A lot of beginners choose brush pens because it requires less setup and scale to dip pens as they progress.
But I will tell you for free, as you are starting out, any pen that makes you feel comfortable without hand strain and allows for ease of control; that’s the best pen for you. Once you figure out your preferred tool, how to start calligraphy with no experience is a great next step to follow.
How Ink Flow Relates to Your Pen Grip
Ink flow is another important factor that many beginners overlook. The way you hold your calligraphy pen can directly affect how smoothly the ink flows onto the paper.

I understand that as a beginner, it’s natural to grip the pen tightly because you’re kindda under tension for perfection but I will advise that you free yourself on the death grip to prevent a river flow of ink. Also, very little pressure will cause improper ink contact with the paper, making the pen skip. Just create a balance, not too tight and not to light when you hold onto your pen, make it relaxed but firm.
Here’s what to check out to know if you’re holding your pen too tight or very light. It might help you put yourself in check when practicing.
- Railroading: Whenever you see two thin lines instead of one solid line when you’re making a stroke, you need to release some pressure because the tooth of the tip has split far too apart, this mostly happens after dipping.
- Dry or skipping strokes: This happens when you hold the pen too vertical instead of the slanted angle or when the pen is held in a light inconsistent grip.
- Blobs: This is when the ink flows uncontrollably because of the heavy grip on the pen. These are some of the most common issues beginners face, and knowing how to avoid common beginner calligraphy mistakes will help you identify and fix them before they become bad habits.
Step-by-Step Guide to Holding a Calligraphy Pen
The results are worth it when you finally master how to hold your pen the right way.
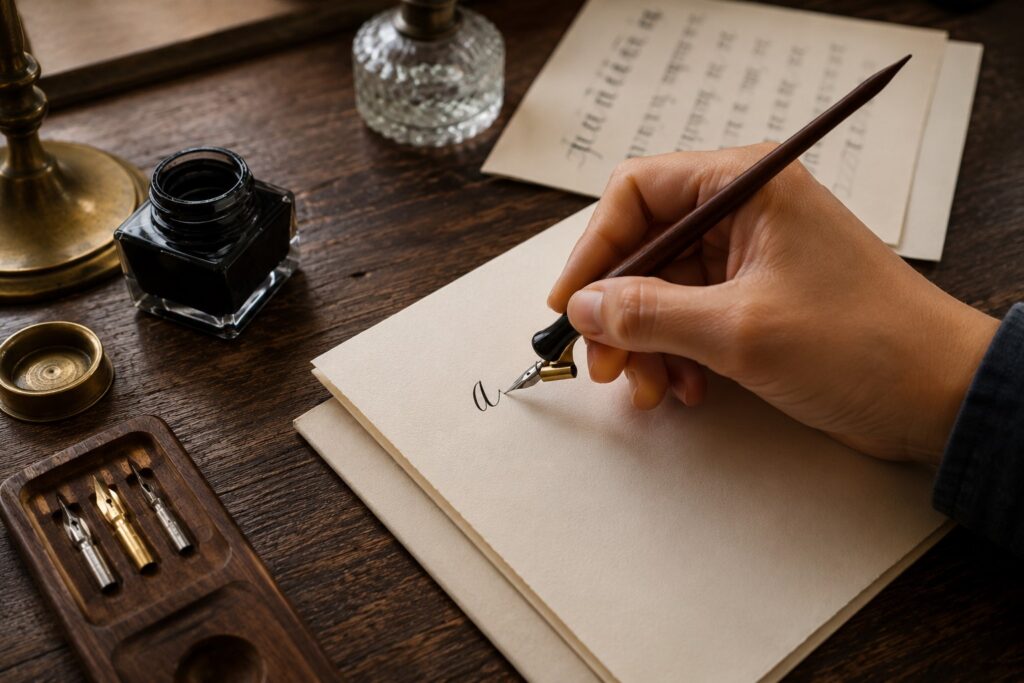
Step 1: Hold the pen lightly between your thumb and index finger
This the most basic, all you need to do is simply place your pen somewhere between the base of your thumb and the side of your index finger so as to control the pen effortlessly without restricting movement.
And griping lightly will ease tension that may lead to fatigue and shaky strokes. Don’t clutch onto the pen as though you are holding a regular ballpoint but firmly in a relaxed manner.
Step 2: Support the pen with your middle finger
I do this all the time and almost all the pro calligraphers I know use their middle finger as a support beam for the pen. This helps in controlling the pressure and guides the pen on the paper.
Step 3: Keep your grip relaxed, not tight
I struggled at this point too when I started out years back, I would hold the pen tightly, thinking it would give me that consistent downward stroke but ended up messing everything, with sore hands and cramps. It was always frustrating.
A tight grip might feel like you have more control, but in reality, it makes your strokes stiff and uneven. Aim for a more relaxed grip that feels soft around the pen allowing the pen to move at the pace of your hand naturally, not fighting with the pen.
Step 4: Position the pen at the correct angle
For me, my pen grip angle is always at 45- degree whether I’m using a brush pen, a straight pen holder or oblique. I keep that angle consistent and it has worked for me to get my signature thick and thin strokes.
I practiced severally before I could get my own sweet spot, so you need consistent practice and experimentation with your angle slightly at first until the ink flows smoothly. And once you achieve your own comfortable angle, take note of it and maintain it for a professional looking lettering.
Step 5: Rest your hand gently on the paper and move your arm instead
Don’t hover your hand above the paper. Rest only the side of your palm or the edge of your hand for stability. Do this when practicing longer strokes or curves like small letters h, g or p.
Also, use your forearm and shoulder to guide the pen, while letting your fingers hold and support the pen. This will create smoother, longer strokes and help maintain a steady nib angle.
Pro Tip: While practicing, I usually draw lines across the paper with my whole arm moving. If you try this out, you’ll notice how your strokes will become smoother and more controlled.
Bonus Tips to get better at Calligraphy as a Beginner
Start with slow and steady strokes
Always remind yourself that calligraphy isn’t like regular handwriting where speed matters. Instead, it’s about control, balance, and smooth strokes. Write slowly to maintain a correct nib angle and pen pressure. For more targeted advice on speeding up your progress without cutting corners, check out how to improve calligraphy fast.
Don’t jump the foundational skills
Upstrokes require light pressure while downstrokes need heavy pressure. Getting these right from the start is exactly what calligraphy basics: strokes every beginner must learn is all about; it’s one of the most important reads before you start practicing letters.
Practice for short sessions daily
Instead of practicing for longer hours, simple 30 to 45 minutes of consistent practice can make the difference. A structured 30-day calligraphy practice plan takes all the guesswork out of what to work on each day and keeps you moving forward consistently.
Use the right paper for calligraphy
My most recommended papers for calligraphy are clean, smooth papers like Rhodia pads, Canson Marker Paper or HP Premium 32lb Paper.
Clean your nib regularly for smooth writing
Be intentional when it comes to your tools, except you have the budget to spend on tools every time. Ensure to keep your pen nibs clean immediately after you are done with practice.
Be patient while learning pen control
Mastery isn’t magic but in consistent practice and patience. Pairing your grip practice with beginner calligraphy exercises to improve control will speed up how quickly your hand adapts to the correct movements. And as your control grows, working on how to create consistent calligraphy letters will help you take that control and turn it into polished, uniform lettering.
Use Guidelines & Grids
This is a simple habit that can dramatically improve your calligraphy while practicing because guidelines act as a roadmap for your writing. I still draw guidelines up till now when I’m practicing on a paper that has no grids. Even in my projects, I use guidelines for a clean, balanced and consistent lettering.
Final Thoughts
If you’re learning everything from home and need a structured path to follow, how to learn calligraphy at home is a comprehensive guide that walks you through every stage of the self-teaching process. And once your grip feels solid and your strokes are improving, trying out a brush calligraphy beginner tutorial is a great way to put everything you’ve learned into practice with a full lettering style. As you progress further, working on how to create your first calligraphy alphabet will be a natural and exciting next milestone; and knowing how long it takes to learn calligraphy will help you set realistic expectations and stay motivated throughout the journey.
This is a phase, and every expert calligrapher you admire today, was once a beginner. So, give yourself time to grow. With consistent practice, you’ll overcome that little awkward adjusting to the proper calligraphy grip, which is completely normal.