25 Beginner Lettering Exercises That Actually Work
Disclosure: Some of the links in this post are affiliate links. This means if you click on the link and purchase an item, I will receive an affiliate commission at no extra cost to you.
Practice is the key to improving your lettering, but not all practice leads to better results. You can spend hours filling pages with letters and still struggle with uneven strokes, inconsistent spacing, or shaky lines if you’re not practicing the right skills. That’s why having the right exercises is just as important as making time to practice.
The best lettering exercises aren’t complicated. They focus on simple movements that strengthen your pen control, improve your muscle memory, and help you create cleaner, more consistent letterforms.
As these basic skills become more natural, you’ll find it easier to write words that look balanced and polished instead of stiff or uneven.
The goal isn’t to rush through dozens of worksheets in one sitting. It’s to repeat purposeful exercises until your hand becomes comfortable with the movements.
Even a short daily practice session can lead to noticeable improvement when you’re working on techniques that build a strong foundation.
If you’re still learning the basics, How to Learn Hand Lettering Step-by-Step (Even If You Can’t Draw) is a great place to start before moving on to more focused practice.
In this guide, you’ll discover Beginner Lettering Exercises that actually work. Each one is designed to help you improve a specific skill, from pen control and pressure to spacing and consistency.
Practice them regularly, be patient with your progress, and you’ll soon notice your lettering becoming smoother, more confident, and much more enjoyable to create.
25 Beginner Lettering Exercises That Actually Work
1. Draw Straight Lines

One of the simplest lettering exercises is also one of the most effective. Drawing straight lines helps improve your control and teaches your hand to move steadily across the page.
Although it may seem too basic, this exercise builds the foundation for creating neat downstrokes, consistent spacing, and balanced letters.
Fill an entire page with vertical lines before trying horizontal and diagonal ones. Focus on making each line the same length and keeping equal space between them.
Don’t worry about speed. The goal is accuracy and control. As your lines become smoother, you’ll notice that your letters begin to look cleaner too.
Many beginners skip this exercise because they want to start writing words immediately. Spending just a few minutes on straight lines before every practice session can make a noticeable difference over time.
If you’d like more ways to strengthen your control, 17 Lettering Exercises That Instantly Improve Pen Control is an excellent next step.
2. Practice Thick and Thin Strokes

Modern lettering depends on the contrast between thick downstrokes and thin upstrokes. Learning to control pressure is one of the most valuable skills you can develop because it affects almost every letter you write.
Begin by drawing simple up-and-down strokes instead of complete letters. Apply gentle pressure as your pen moves downward, then release that pressure on the upward stroke. Repeat this movement until the transition feels smooth and natural rather than forced.
Don’t rush into writing entire words before you’re comfortable with this exercise. The stronger your pressure control becomes, the easier every future lettering exercise will feel.
If you need a step-by-step guide, How to Create Perfect Thick and Thin Strokes in 11 Steps explains the technique in greater detail.
3. Fill a Page With Ovals

The oval is one of the most important shapes in hand lettering. Letters like a, c, d, g, o, and q all rely on this simple movement. Practicing smooth, even ovals helps create alphabets that look balanced and consistent.
Start by drawing large ovals slowly before making them smaller. Try to keep every oval the same height, width, and angle. If one side feels flatter than the other, slow down and pay attention to how your hand moves through the curve.
Once your ovals become more consistent, you’ll notice that many lowercase letters immediately begin to look neater. This small exercise has a surprisingly big impact on your overall lettering.
4. Practice Underturns and Overturns

Many lowercase letters are built using underturns and overturns. These simple curves appear in letters like m, n, h, u, and y, making them an essential part of every lettering practice routine.
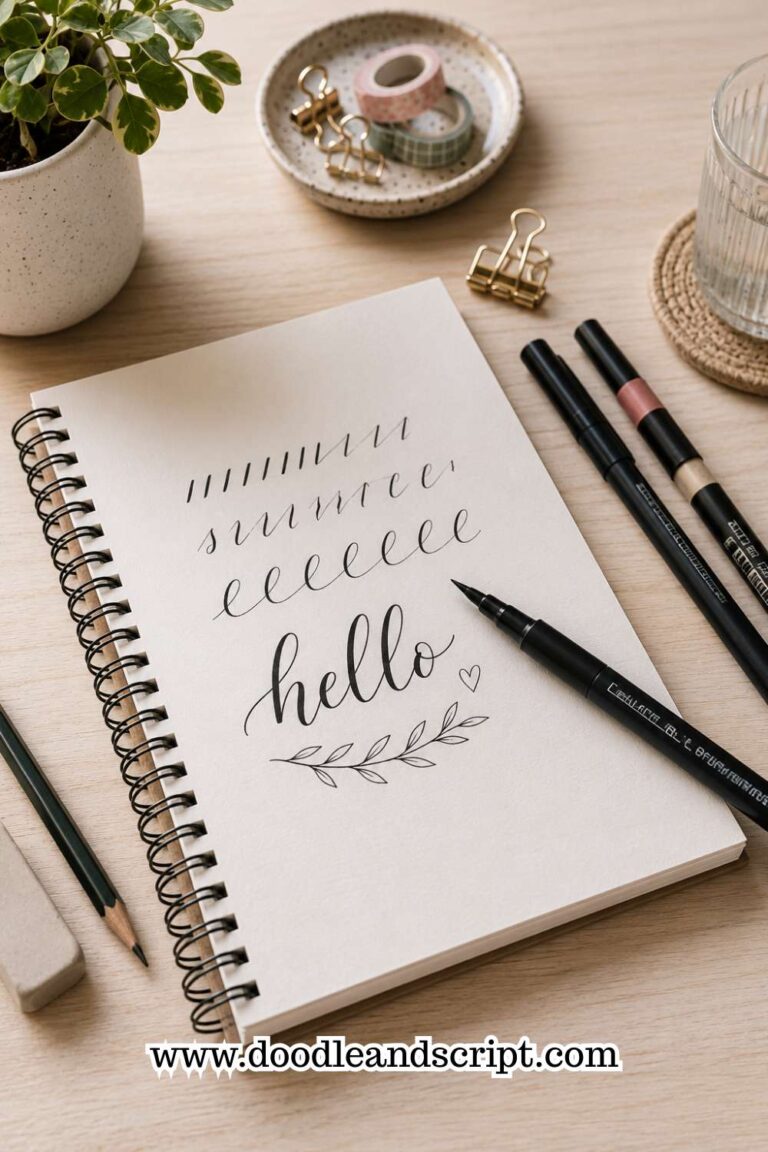
Instead of writing complete words, fill a page with repeated underturns followed by repeated overturns. Concentrate on creating smooth, even curves that all reach the same height. This helps develop muscle memory while improving consistency across your alphabet.
As these movements become easier, you’ll spend less time correcting uneven arches and more time enjoying the creative side of lettering.
If you’re still learning how letters are constructed, How to Master the Hand Lettering Alphabet in 15 Simple Steps provides an excellent foundation.
5. Repeat One Letter at a Time
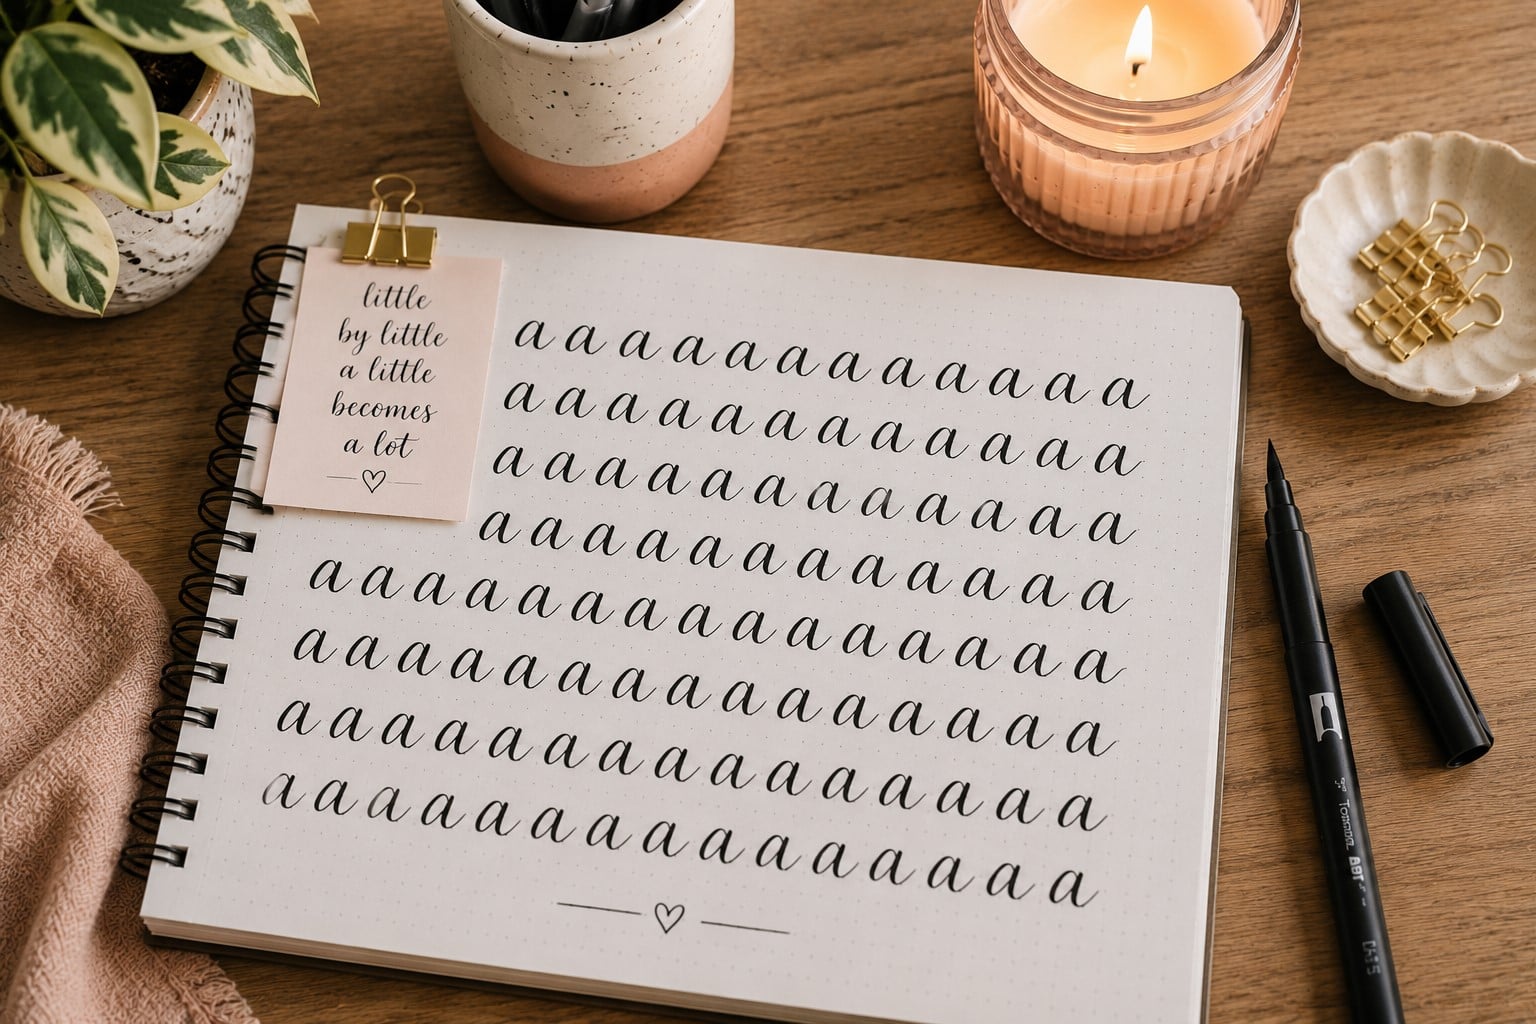
Rather than practicing the entire alphabet in one sitting, focus on one letter until it feels comfortable. Repetition allows your muscles to memorize the movement, making each attempt smoother than the last.
Choose a letter that challenges you and fill an entire row with it. Pay attention to the height, spacing, and shape instead of simply trying to finish the page. Compare your first few letters with your last few to see where you’ve improved.
This exercise also helps you identify patterns. You may discover that one curve consistently looks uneven or that one stroke always becomes too thick. Recognizing those habits makes it much easier to correct them.
If you’re looking for additional structured routines, 21 Hand Lettering Drills You Should Practice Every Week includes plenty of effective practice exercises.
6. Practice Similar Letters Together

Once you feel comfortable writing individual letters, start grouping letters that share the same basic structure. This exercise helps your hand repeat similar movements, making your lettering look more consistent across the entire alphabet.
For example, a, c, d, g, o, and q all begin with an oval shape, while m, n, h, and r share similar arches. Instead of jumping randomly from one letter to another, practice each family until the movements begin to feel natural. You’ll quickly notice that improving one letter often improves several others at the same time.
This approach also makes practice less overwhelming because you’re focusing on one type of movement instead of twenty-six different letters.
If you’d like even more structured routines, 15 Hand Lettering Drills That Will Improve Your Skills Fast offers excellent exercises for building confidence one step at a time.
7. Write the Same Word Repeatedly

Practicing complete words teaches your hand how letters connect and how spacing affects the overall appearance of your lettering. Instead of writing random words across the page, choose one simple word and repeat it several times.
Words like hello, create, dream, happy, or bloom work well because they include a variety of useful strokes. After each attempt, compare your newest version with the previous one. Ask yourself if the spacing looks better, if the letters are more balanced, or if your strokes feel smoother.
Repeating the same word removes the pressure of thinking about spelling or creating a new design. Your full attention stays on improving your technique, which often leads to faster progress.
If you need more ideas for meaningful practice, 21 Proven Ways to Improve Your Hand Lettering Faster shares additional techniques that fit easily into your daily routine.
8. Practice Even Letter Spacing

Beautiful lettering isn’t only about creating attractive letters. The space between those letters is just as important. Uneven spacing can make a well-written word look awkward, while balanced spacing gives your lettering a clean and professional appearance.
Choose a short word and write it several times, paying attention only to the spaces between each letter. Rather than measuring the gaps, look at the white space they create. The goal is for those spaces to feel visually balanced throughout the word.
This exercise trains your eyes as much as your hand. Over time, you’ll naturally begin noticing spacing problems before you’ve even finished writing the word.
If consistency is something you’re still developing, 13 Simple Tricks to Improve Your Lettering Consistency will help strengthen this skill.
9. Fill a Page With Loops

Loops appear in many lowercase letters, including l, h, b, f, g, and y. Practicing them separately helps improve your control while creating smoother ascenders and descenders throughout your lettering.
Begin with large loops that allow your hand to move freely. Once those feel comfortable, gradually make them smaller while keeping the shape smooth and consistent. Focus on creating graceful curves rather than rushing through the exercise.
You’ll notice that cleaner loops immediately improve the overall elegance of your lettering. Since loops appear so often, even small improvements can make a noticeable difference in your finished work.
10. Practice Without Looking for Perfection
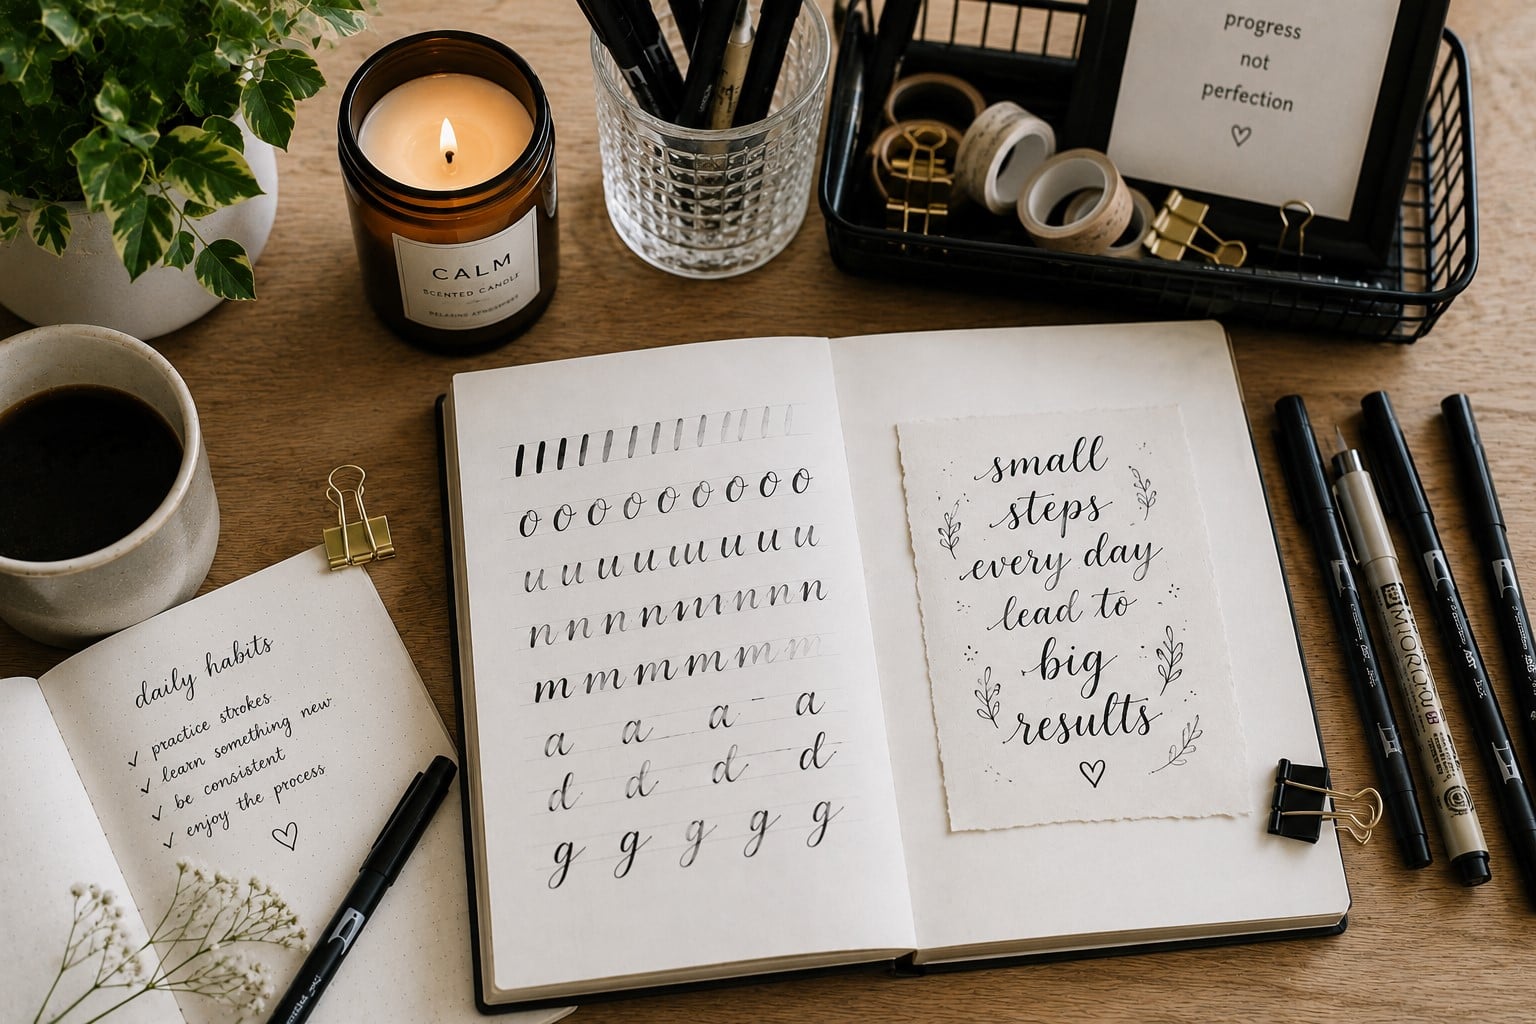
Many beginners erase every small mistake before moving on to the next letter. While it’s natural to want beautiful results, constantly stopping interrupts your rhythm and makes practice less productive.
Instead, finish an entire exercise before judging your work. Allow yourself to make mistakes, then review the page afterward to see what needs improvement. This helps you recognize patterns instead of focusing on one imperfect letter.
Remember that every practice page is meant to teach you something. A page full of imperfect letters is far more valuable than a blank page because it shows exactly what you need to work on next.
If you need encouragement and practical advice while building your skills, 17 Hand Lettering Tips Every Beginner Should Know is a great resource to keep you moving forward.
11. Practice Different Letter Sizes

Writing every letter at the same size is helpful when you’re learning the basics, but practicing different sizes gives you better control over your pen.
It also prepares you for creating quotes, greeting cards, and other lettering projects where certain words need to stand out.
Start by writing one letter in a large size several times, then repeat it in a medium size and finally in a much smaller size.
As you change the size, try to keep the proportions the same. Your curves, loops, and spacing should remain balanced no matter how big or small the letter becomes.
This exercise teaches your hand to adapt without losing consistency. As you become more comfortable changing letter sizes, you’ll find it much easier to create lettering that looks balanced and visually interesting.
If you’d like inspiration for putting this skill into practice, 19 Beautiful Ways to Letter Quotes Like a Pro is filled with creative ideas.
12. Create Simple Bounce Lettering Exercises

Bounce lettering gives words a relaxed, playful appearance by allowing a few letters to sit slightly above or below the baseline. While it looks effortless, creating balanced bounce lettering takes practice and careful control.
Choose a short word and write it normally first. Then write it again, lowering one letter below the baseline or raising another slightly above it.
Repeat the exercise several times while changing which letters bounce. This helps you understand how movement affects the overall appearance of your lettering.
The goal isn’t to make every letter bounce. A few carefully placed adjustments usually create a much more attractive result than exaggerating every stroke. If you’d like to explore this style further, How to Create Beautiful Bounce Lettering in 13 Easy Steps will guide you through the process.
13. Trace Lettering Before Writing Freehand

Tracing is one of the fastest ways to develop muscle memory, especially when you’re still learning basic letter shapes. It allows your hand to experience the correct movements before trying to recreate them on its own.
Use practice sheets or printable worksheets and slowly trace each letter instead of rushing through the page. Pay attention to the direction of every stroke, the amount of pressure you apply, and how the letters are formed. Once you’ve finished tracing, try writing the same letters freehand without looking at the guide.
You’ll often notice that your freehand lettering becomes much smoother immediately after tracing because your hand has already practiced the movement. If you’re looking for ready-made worksheets to build this habit, 19 Beginner Hand Lettering Practice Sheets You’ll Actually Use is a great place to start.
14. Practice Short Quotes Instead of Single Words

Once you’re comfortable writing individual words, challenge yourself with short quotes or phrases. This exercise teaches you how to maintain consistent spacing, letter size, and rhythm across multiple words instead of focusing on just one.
Start with simple phrases that fit comfortably on one line. As you gain confidence, experiment with writing them across two or three lines while keeping the composition balanced. This also helps you learn where to place emphasis and how to make your lettering easier to read.
Working with short quotes prepares you for real lettering projects like greeting cards, wall art, and journal pages. It also helps you combine all the skills you’ve been practicing into one finished piece.
If you want to improve the overall appearance of your designs, 13 Secrets to Creating Beautiful Hand Lettering Compositions shares practical techniques for arranging words in a visually pleasing way.
15. Practice Writing Without Pencil Guidelines

Guidelines are incredibly helpful when you’re learning, but they shouldn’t become something you rely on forever. Once you’ve built some confidence, challenge yourself by lettering on blank paper from time to time.
This exercise helps you judge letter height, spacing, and alignment using your eyes instead of depending on reference lines.
Start with a few simple words instead of a full quote. After you’ve finished, compare your work and look for patterns. Maybe some letters became taller toward the end of the word, or perhaps your baseline slowly drifted upward. Identifying these habits will help you improve much faster than simply filling another page with practice.
Don’t be discouraged if your first attempts look uneven. The goal is to strengthen your visual judgment, and that only happens through repetition. As you continue practicing, you’ll find it much easier to create balanced lettering on any type of paper.
16. Copy Your Favorite Alphabet

One of the best ways to understand letter construction is by studying an alphabet you admire. Instead of trying to invent your own style immediately, carefully copy a simple lettering alphabet to learn how each letter is formed.
Pay attention to the shape of every curve, the width of each stroke, and the spacing between letters. Rather than rushing through the alphabet, slow down and focus on recreating each letter as accurately as possible. This exercise trains both your eyes and your hand to recognize balanced letterforms.
As your confidence grows, begin making small adjustments to create a style that feels more like your own. Inspiration is a great teacher, but developing your own lettering voice comes from understanding the principles behind beautiful letterforms.
If you’re ready to explore different looks, 11 Hand Lettering Styles Every Beginner Should Try will introduce you to several styles worth practicing.
17. Fill a Page With Curves

Straight lines help improve control, but smooth curves are what make lettering feel natural and elegant. Many beginners struggle with shaky curves because they focus too much on reaching the end of the stroke instead of moving their hand smoothly through the entire motion.
Practice drawing large C-shapes, S-curves, and gentle waves across the page. Concentrate on creating fluid movements instead of perfectly symmetrical shapes. As your confidence improves, gradually make the curves smaller while keeping them just as smooth.
These simple exercises strengthen your hand control and make curved letters like c, e, g, and s much easier to write. Over time, you’ll notice your entire alphabet looking softer, cleaner, and more polished.
18. Practice Timing Instead of Speed
Many beginners believe they need to write faster to become better at lettering. In reality, control matters much more than speed. A slow, steady stroke almost always produces better results than a rushed one.
Choose a simple exercise, such as drawing ovals or writing the same word repeatedly, and maintain a comfortable rhythm from beginning to end.
Try not to pause in the middle of a stroke or suddenly speed up as you reach the end of a letter. Keeping a consistent pace helps your movements become smoother and more predictable.
As your muscle memory develops, you’ll naturally become faster without sacrificing quality. Building that steady rhythm early will benefit every lettering style you learn in the future.
19. Review Your Practice Pages
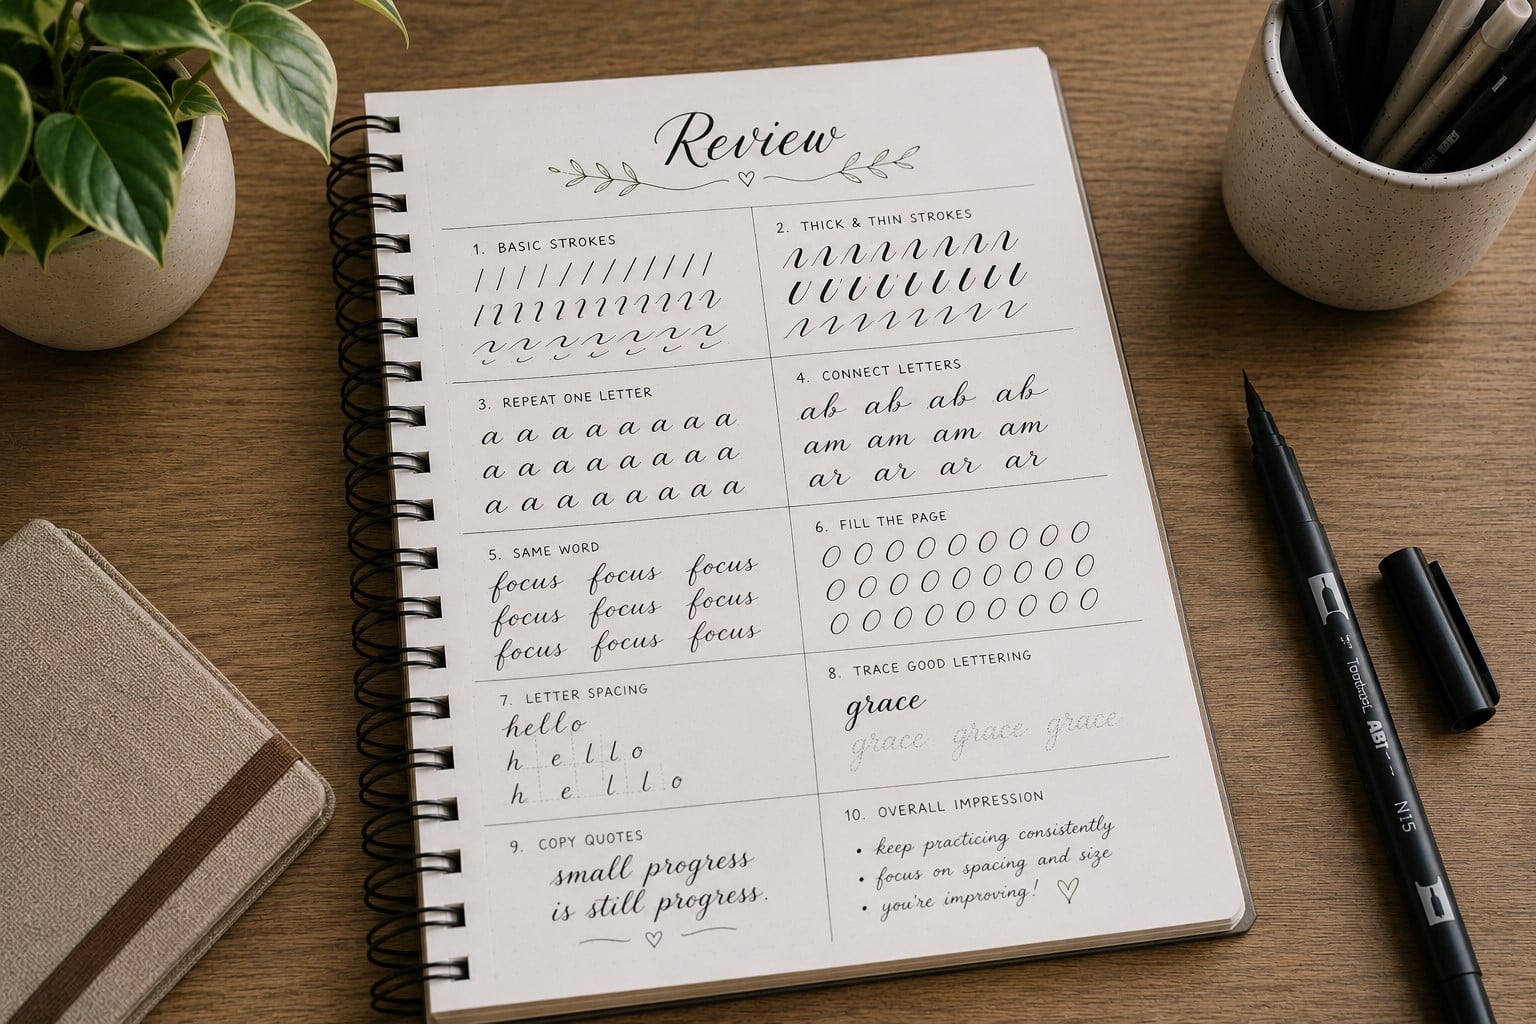
One of the most valuable exercises happens after you’ve put your pen down. Instead of closing your notebook immediately, spend a few minutes reviewing what you’ve created. Looking back at your work helps you recognize patterns that are easy to miss while you’re writing.
Compare your first attempts with your final ones. Notice where your spacing improved, where your curves became smoother, or where your letters still look inconsistent.
Write down one or two things you’d like to improve during your next practice session instead of trying to fix everything at once.
Reviewing your work regularly gives every practice session a clear purpose. You’ll spend less time guessing what to improve and more time building the skills that make the biggest difference.
If you’re unsure what mistakes to look for, 15 Common Hand Lettering Mistakes (And How to Fix Them) will help you identify common habits that hold beginners back.
20. Practice One Stroke for Five Minutes

You don’t always need a long practice session to improve your lettering. Sometimes, spending just five minutes repeating a single stroke can strengthen your control more than writing an entire page of random words. This exercise helps your hand become comfortable with one movement before introducing another.
Choose a basic stroke, such as a downstroke, oval, underturn, or loop, and repeat it continuously for five minutes. Pay attention to keeping each stroke the same height, width, and shape. As your movements become more consistent, you’ll notice that your letters begin to look more polished as well.
Simple exercises like this are easy to fit into a busy schedule, making it much easier to practice every day. If you’re looking for a structured routine to build stronger habits, Easy Hand Lettering Tutorial: Learn in 21 Minutes is a great resource to guide your practice.
21. Switch Between Large and Small Letters

Writing letters in different sizes challenges your control and improves your ability to maintain the same proportions regardless of scale.
This skill becomes especially useful when creating quotes, posters, greeting cards, or journal titles where some words need to stand out more than others.
Write one letter several times in a large size, then immediately repeat it in a much smaller size. Continue switching back and forth while keeping the shape of the letter consistent. Although the size changes, the overall structure should remain the same.
This exercise teaches precision and flexibility at the same time. As you gain confidence, you’ll find it much easier to create lettering layouts that feel balanced and visually interesting.
22. Combine Several Exercises Into One Practice Session
After practicing individual skills, challenge yourself by combining them into one short routine. For example, begin with straight lines, move on to ovals, practice loops, write a few repeated words, and finish with a short quote. This helps your hand transition smoothly between different movements while reinforcing everything you’ve learned.
Combining exercises also keeps practice sessions more engaging. Instead of repeating the same movement for thirty minutes, you’ll work on several different skills while staying focused and motivated. Over time, these combined routines help all of your lettering skills work together more naturally.
The more variety you include in your practice, the easier it becomes to apply those skills to real lettering projects instead of isolated exercises.
23. Practice With Different Pens
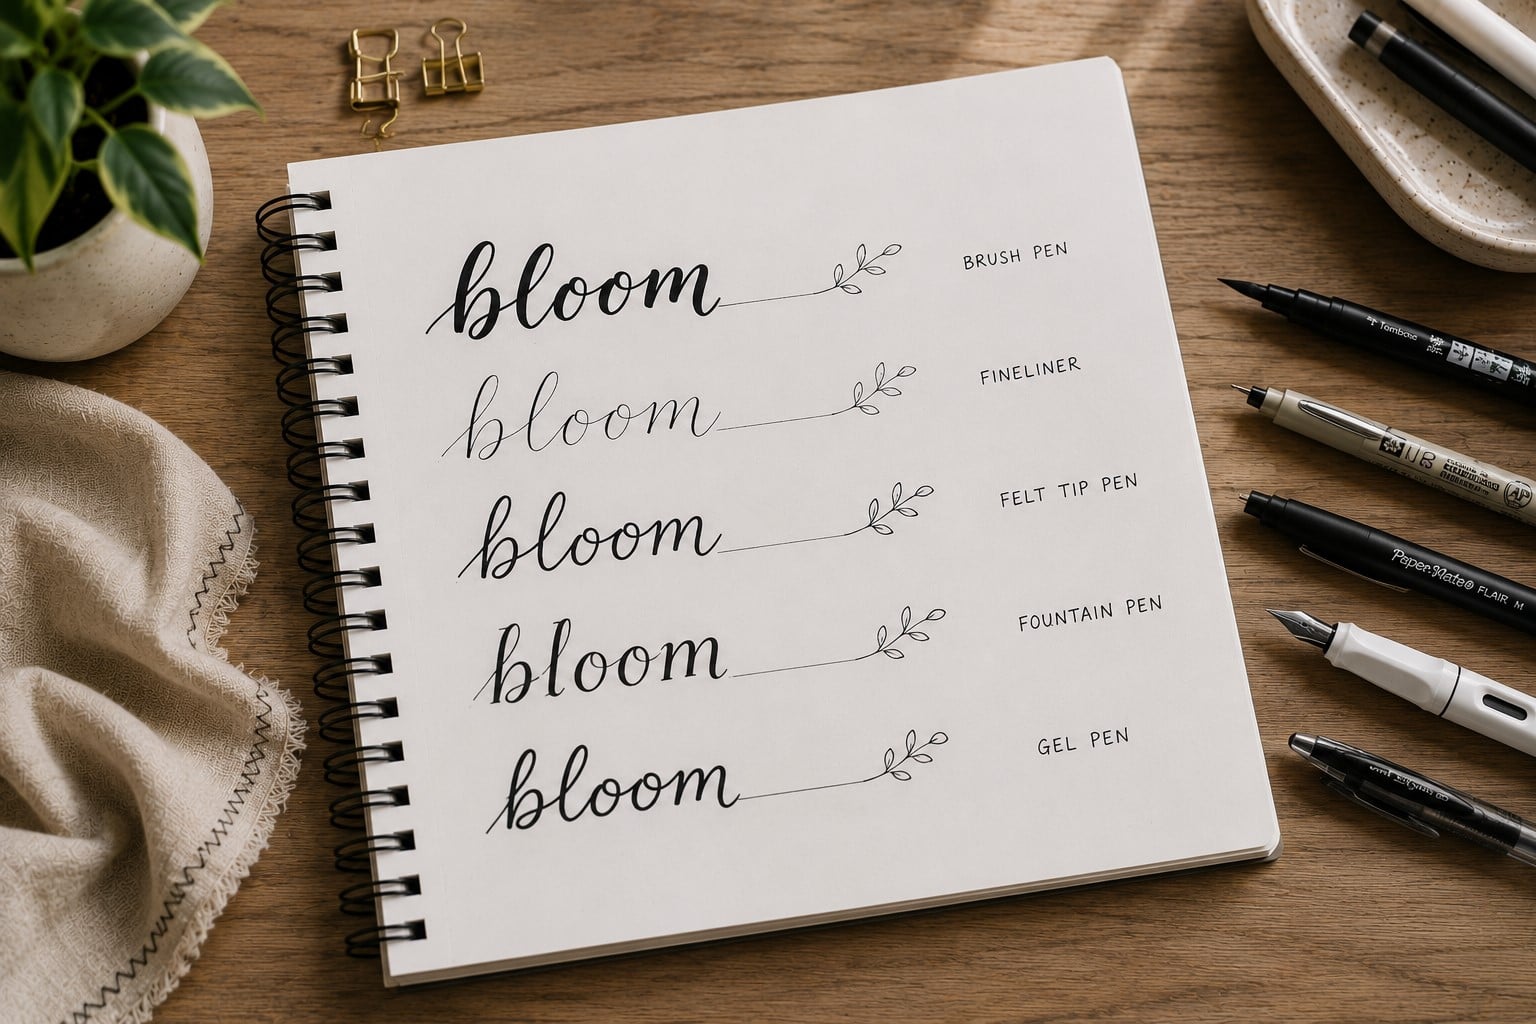
Once you’ve become comfortable with one pen, try repeating your favorite exercises using different lettering tools. Brush pens, fineliners, markers, and felt-tip pens all respond differently, and practicing with each one helps you become a more versatile lettering artist.
You’ll quickly notice that some pens require more pressure while others respond to even the lightest touch. Learning how each tool behaves improves your control and prepares you for a wider range of creative projects.
Don’t switch pens every few minutes. Spend enough time with one tool to understand how it feels before moving on to another. This allows you to adapt your technique instead of constantly starting over.
24. Practice Every Day, Even for a Few Minutes

Consistency is far more important than long practice sessions. Spending ten or fifteen minutes lettering each day will usually produce better results than practicing for several hours once a week. Regular practice strengthens muscle memory and keeps your skills fresh.
Create a routine that fits comfortably into your schedule. You might practice while drinking your morning coffee, during a lunch break, or before going to bed. Keeping your sessions short makes it much easier to stay consistent over time.
Remember that every page you complete is another step forward. Even if today’s practice doesn’t feel perfect, you’re still building the habits that lead to confident, beautiful lettering.
25. Enjoy the Learning Process
It’s easy to become so focused on improving that you forget why you started lettering in the first place. Every exercise in this guide is designed to strengthen your skills, but it’s equally important to enjoy the creative journey along the way.
Celebrate the small victories, whether that’s smoother curves, better spacing, or finally mastering a difficult letter.
Those moments show that your practice is paying off, even if your progress feels slow. Every experienced lettering artist reached that point by practicing consistently and giving themselves permission to learn.
As your confidence grows, you’ll begin using these exercises less as drills and more as warm-ups before creating projects you truly enjoy.
The stronger your foundation becomes, the more freedom you’ll have to experiment with new ideas, styles, and creative lettering designs.
Final Thoughts
The best Beginner Lettering Exercises aren’t the most complicated ones; they’re the ones you practice consistently. Every straight line, oval, loop, and repeated word helps strengthen your muscle memory and improve the control needed to create beautiful lettering.
Small improvements may not seem exciting at first, but they build the foundation for every lettering style you’ll learn in the future.
Don’t feel like you have to complete all 25 exercises in one sitting. Choose a few, practice them regularly, and gradually add new ones as your confidence grows.
The more intentional your practice becomes, the faster you’ll notice improvements in your spacing, pen control, consistency, and overall letterforms.
Once these exercises start feeling comfortable, challenge yourself by applying your new skills to real projects. Create greeting cards, journal headings, wall art, or your favorite inspirational quotes to see how far you’ve come.
If you’re ready for your next step, How to Create Modern Hand Lettering in 17 Easy Steps will show you how to turn these foundational skills into stylish, polished lettering you’ll be proud to share.