Faux Calligraphy Tutorial for Absolute Beginners
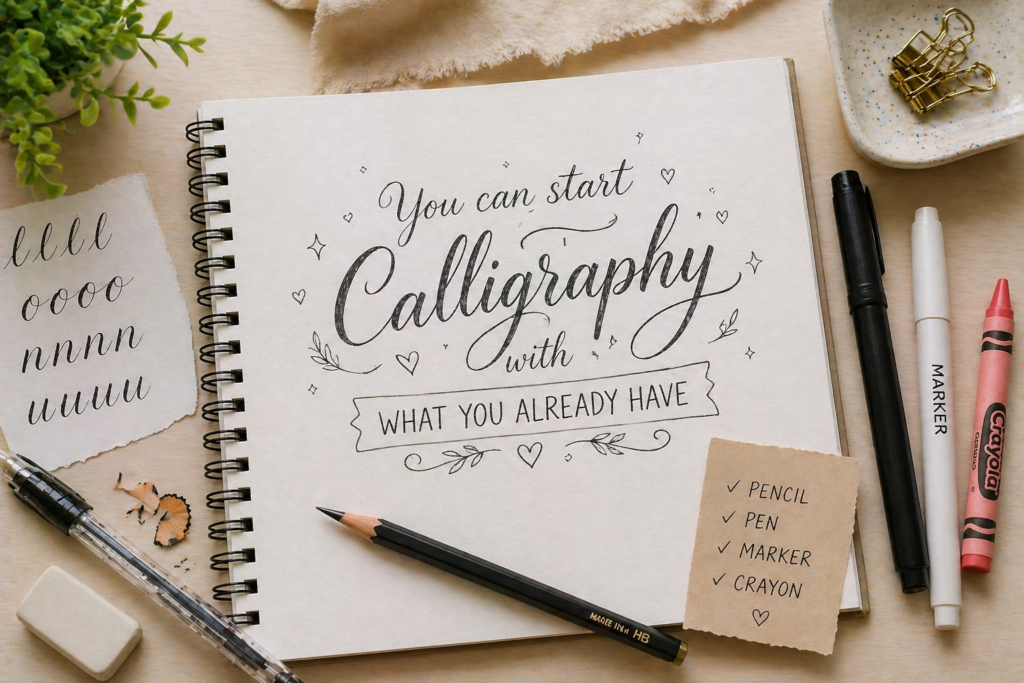
If you’ve been longing to start calligraphy but keep giving excuses that you do not have the funds to purchase expensive calligraphy tools, I have good news for you. You can start with your normal HB pencil, this does cost up to $5, right? Or any writing tool that you have around you, like your ballpoint pen, marker even crayon can do it. You just need to learn how to do it and it is my job to teach you. And if you’re still figuring out the bigger picture of where faux calligraphy fits into your learning journey, the calligraphy for beginners complete starter guide will show you exactly how everything connects.
By the way, the art of using pencil or non-calligraphy tools to produce calligraphy is called faux calligraphy. Faux means fake but not in a bad way though. It’s all about mimicry. You use your normal day to day marker to mimic what an actual brush pen or pointed pen could do.
Difference Between Real, Traditional Calligraphy and the Fake one, Faux Calligraphy
- Beginner friendly: If you are still at the beginner phase but want to create something with a fine finish that doesn’t require much effort, then faux calligraphy is for you. Whereas a “Real” calligraphy requires you to spend more time writing it in order to achieve a beautiful final piece. If you’re curious about what separates the two styles beyond just tools, modern calligraphy vs traditional calligraphy breaks down the full difference in a beginner-friendly way.
- Tools: You can basically use any writing tool that you have to create faux calligraphy but in traditional/modern calligraphy, you need to invest in specialized calligraphy tools such as brush pens, dip pens, nib, and calligraphy ink.
- Real calligraphy requires specific skills and rules on how to control your pens to seamlessly create the thick and thin stroke but fake calligraphy doesn’t require any skill nor follow any rule, you just write and then shade.
- Faux calligraphy actually favours left-handed people in the sense that you can easily do the lettering without any challenge unlike real calligraphy.
- Traditional calligraphy requires techniques like applying pressure to create the downstroke and reducing pressure to achieve an upward stroke. To understand exactly how that pressure system works, calligraphy basics: understanding upstrokes and downstrokes explains it clearly. But you don’t need to do all of that in faux calligraphy, you just draw lines along the downstrokes and fill in the space.

Why you’ll love faux calligraphy
First, it is simple, flexible and beginner-friendly. I actually started out with learning faux calligraphy first, not because I didn’t have the budget for brush pens but was kind of testing the waters, you know, to see if it’s something I did like to invest my money in. And it turned out to be my favourite hobby.
If you are looking for a way to keep your kids engaged during the holidays, you can get them to learn calligraphy and that’s faux because, it’s easy to teach kids and it won’t create a lot of mess around. You know children can be messy, you won’t want to invest in ink and they end up wasting it.
It allows for creativity with no pressure at all. You can just grab a marker and start writing a greeting card or a quote art as your imagination goes wild with freedom to experiment and develop your own lettering style. It’s also one of the easiest ways to start calligraphy with no experience because the barrier to entry is almost zero.
Tools You Need for Faux Calligraphy
1. Pens and markers that work well
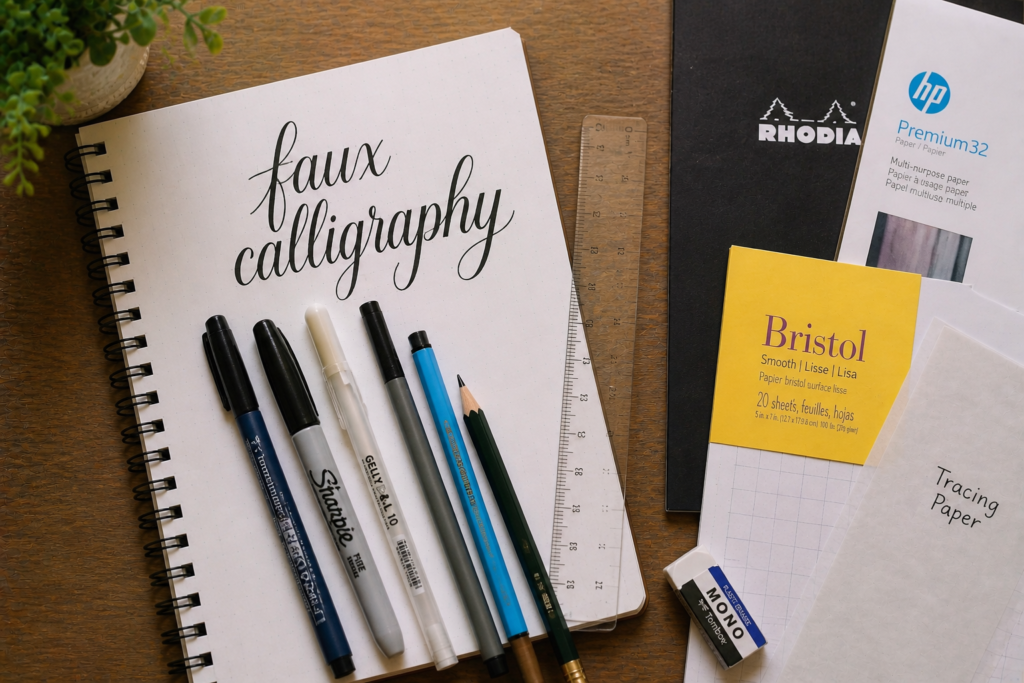
You can literally use any writing tool around you that you can control, even better, is any pen that allows you to thicken the lines. I see some people use ballpoint pen for faux calligraphy but personally, I don’t use it because they don’t yield good results when coloring in space. A normal HB pencil can do the job better than a ballpoint pen. Other pens you can choose are Tombow Fudenosuke brush pen, sharpie marker, Sakura moonlight gelly roll, stabile point 68 pens and a whole lot of others. If you eventually decide to upgrade to a real brush pen, make sure you read how to use brush pens properly so you get the most out of the switch.
2. Paper types for smooth lettering
Because you can use any type of pen for faux calligraphy doesn’t mean, you can use rough papers like standard printer papers.
Use smooth papers that are bleed resistance and also have some weight. Quality papers include Rhodia pads, Hp premium 32ib paper, marker paper, Bristol Board (Smooth Surface) and tracing paper. Most of the papers I just mentioned are very affordable and some even come with grid lines to serve as your guidelines when writing.
3. And lastly ruler, for blank page papers to serve as your guidelines.
You will need ruler as a beginner in Calligraphy for blank page papers. This will serve as your guidelines and direction.
Step-by-Step Faux Calligraphy Tutorial
Step 1: Draw out your guidelines
Whenever I’m using blank paper to write, especially when I am working on a paid project. I usually start by drawing out light guidelines to help keep my lettering neat, evenly spaced and consistent. Ensure that the lines are light enough to be easily erased without leaving traces when you are done.
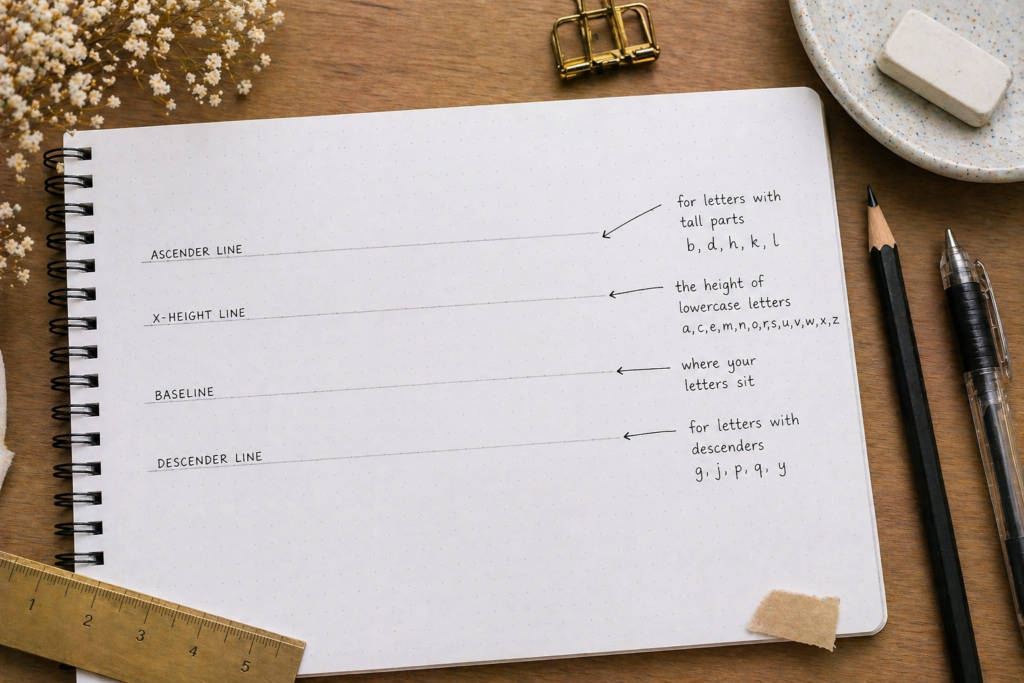
Guidelines help you create a baseline where your letters will sit, an x-height line that shows the height of your lowercase letters, an ascending line for letters that protrudes upwards like b, d, h and l, and also descender lines for letters like g, j, p, and y. These are the same structural rules that apply in real calligraphy too; how to create consistent calligraphy letters explains how to use them effectively across any style.
As a beginner, guidelines will make your practice easier by helping you maintain uniform letter size and spacing. Once your muscle memory is built and you gain confidence, you may stop relying on them.
Step 2: Write your word normally
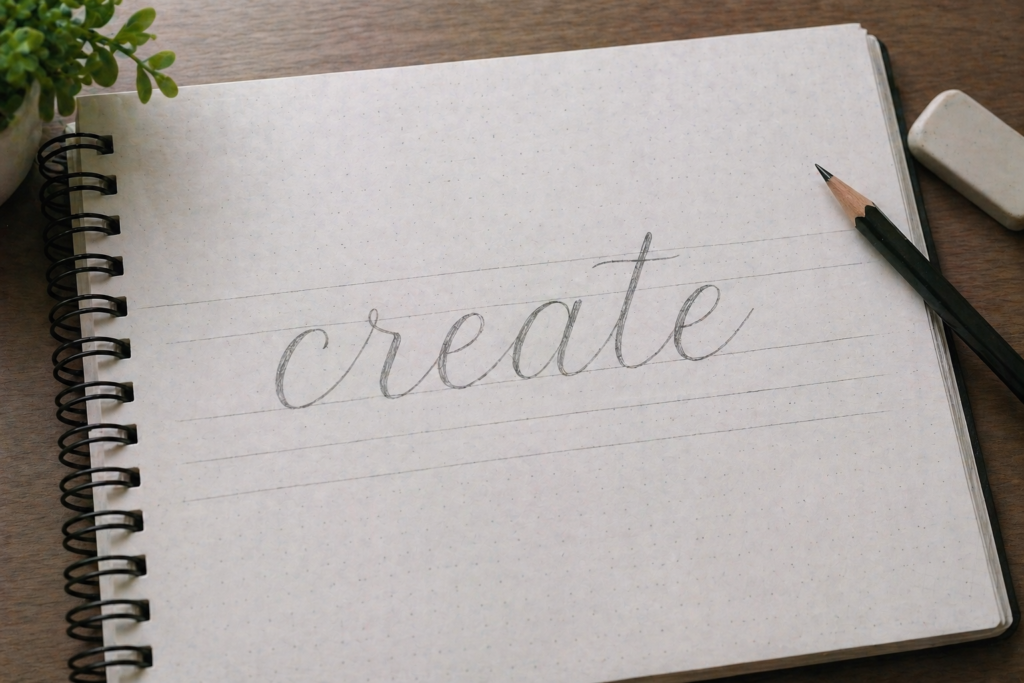
Write any word using your regular handwriting or a simple script style. Don’t just worry about making the strokes thick or fancy, at this stage. As you write, give your letters enough space so you can easily add thickness to them when the time comes.
Step 3: Identify downstrokes
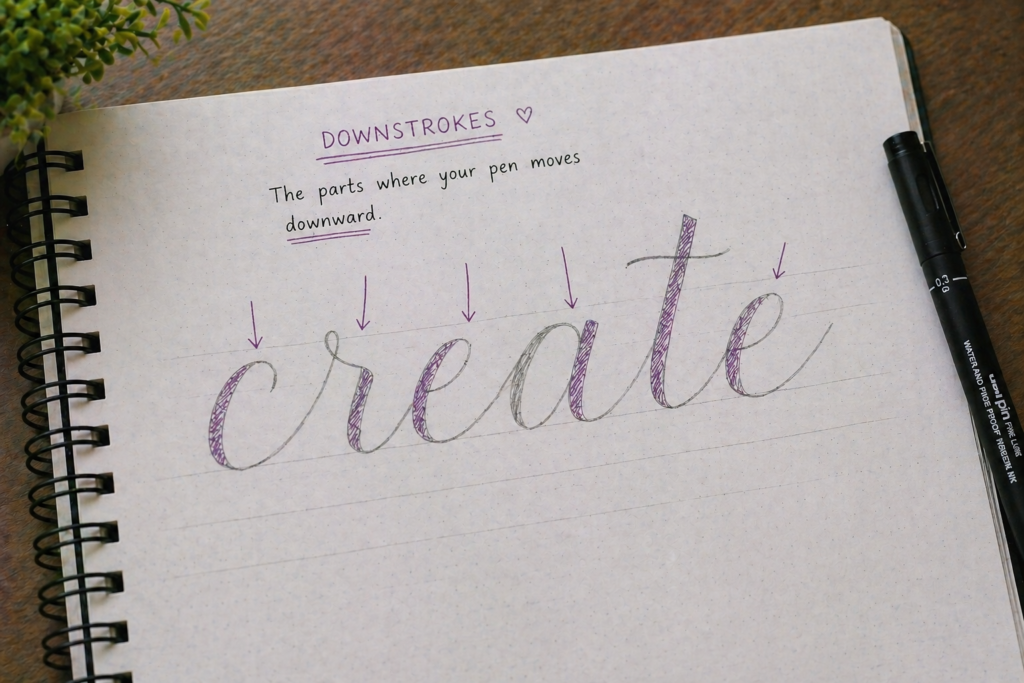
Once you are done writing, take a look at each letter carefully to identify the downstrokes. When your pen moves down towards the bottom of your paper while writing, that part of the letter is called downward stroke. For example, if you write the letter “i”, that part that your hand moves downward is called the downstroke. If you’re unsure how to identify downstrokes confidently, calligraphy basics: strokes every beginner must learn will make it very clear.
In real or traditional calligraphy, the strokes naturally appear thicker because of pen pressure. But faux calligraphy, however, you will create that thick line effect manually.
Step 4: Add Thickness to the Downstrokes
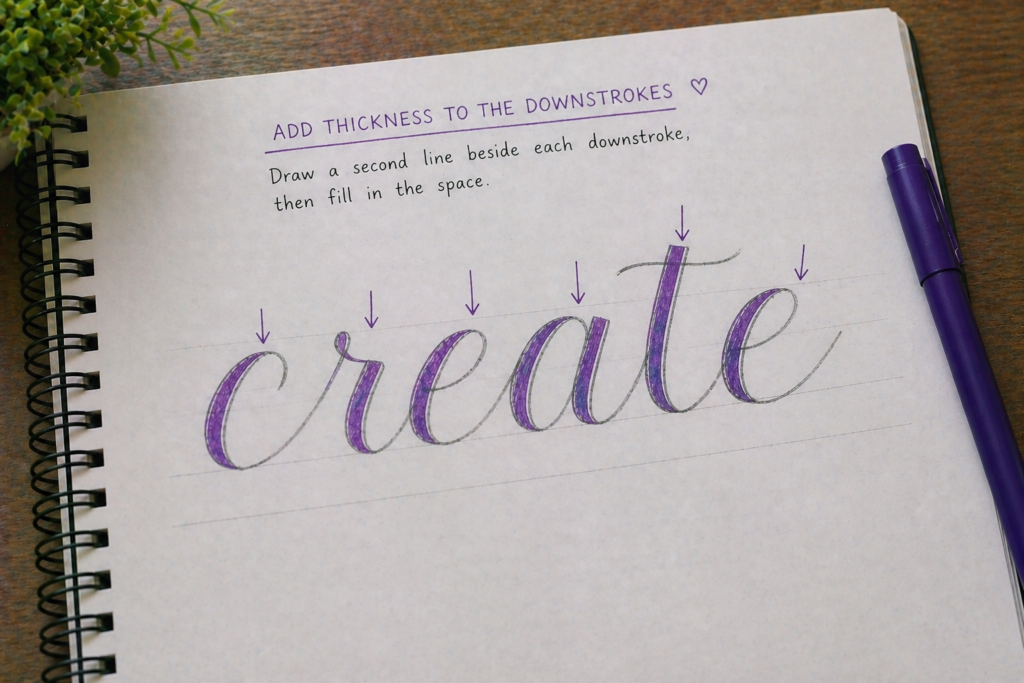
Here is where the fun part begins, now that you’ve identified the downstrokes in each letter, draw a second line besides each of them, make it in such a way that it follows the shape of the original stroke closely.
Then, fill in the space between the two lines to make the stroke solid and bold. This is what gives faux calligraphy its signature looks and makes your lettering resemble real calligraphy.
Take your time with this step so the thickness of your strokes stays consistent across all your letters.
You may likely not get it right the first day but with consistent practice, you’ll start to see your handwriting transform into elegant faux calligraphy. If you hit roadblocks along the way, beginner mistakes in calligraphy and how to fix them covers the exact errors most beginners make at this stage and how to correct them quickly.
Faux Calligraphy Alphabet Guide for Beginners
Lowercase Letters Practice
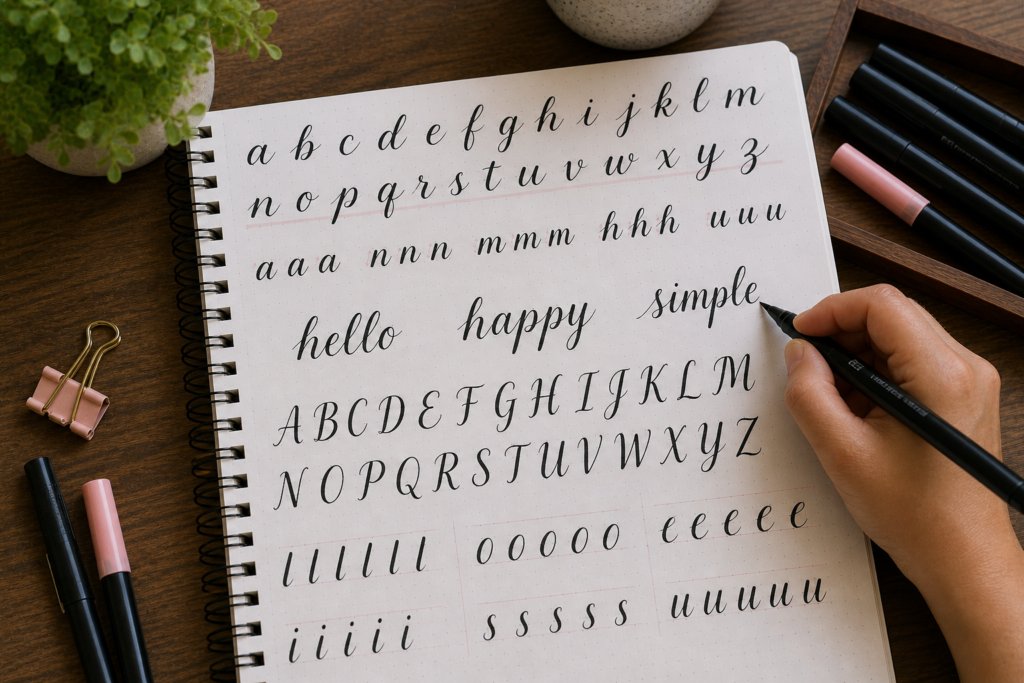
The easiest letters to begin with as a newbie are the lowercase letters because they appear more frequently in words, like in sentences, you don’t write a sentence all in capital letters, right? Apart from that, they are smaller and also simpler to write. Start with letters that their downstrokes are easy to recognize and practice, letters like a, n, m, h, and u.
I recommend you begin with short words like “hello, happy or simple” And if you look at those words that I just listed out above, they contain alphabets that you can easily see the downward stroke. Practice these alphabets repeatedly, in rows so that you can get used to forming letters confidently. When you feel ready to take this further, how to create your first calligraphy alphabet walks you through building a complete alphabet from scratch.
Uppercase Lettering Tips
These ones are sometimes a bit challenging for beginners because they often have more curves and decorative elements.
But it’s still not difficult as it seems though, start with basic uppercase letters before experimenting with more decorative styles. Write the letter normally, then identify the downward strokes and add thickness just like you would with lowercase letters.
Maintaining a Consistent Style
To master faux calligraphy, all you need is consistent practice and keeping to one style. If you discover a style that resonates with you, maintain it. I know a lot of beginners may be tempted to jump from one style to the other, especially trying to copy other people’s style that they think is attractive. Staying consistently unique is what makes your lettering polished and professional even if you’re not yet perfect.
Things to pay attention to when writing Faux calligraphy for consistency:
- Stroke thickness: Ensure that all your downward strokes look the same, like the same width throughout the word or sentence.
- Letter spacing: Always keep space as you write normally first, so that when you want to thicken the stroke, there will be some space left. This is to avoid crowding your letters together.
- Letter size: Most people think that once they pass the beginner phase, guidelines no longer matter but it does. Guidelines help you to keep your letter’s height the same.
- Writing rhythm: Write slowly and steadily to maintain the same spacing and smooth strokes. Running calligraphy drills every beginner should practice alongside your faux calligraphy sessions is a great way to build this rhythm faster, even if you’re not using a traditional pen.
How to Hold Your Pen for a smooth faux lettering
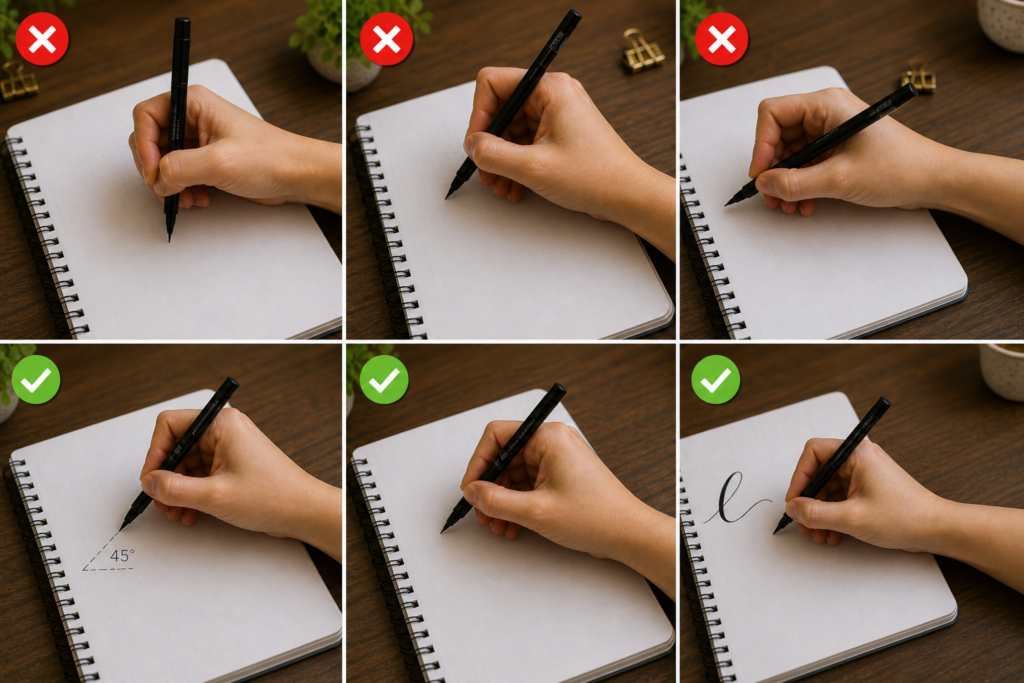
- Since it is not the traditional calligraphy which requires applying varying pressures, just relax your hand and write in a way that makes you feel comfortable to avoid hand pains which may result in shaky lines. That said, the general principles of a relaxed and controlled grip still apply; how to hold a calligraphy pen correctly gives you a solid foundation that transfers to any writing tool, not just traditional calligraphy pens.
- I do hold my pen about 1 to 1.5 inches away from the tip for better control and movement. Also, I am mostly comfortable at this length.
- I usually position my pen slightly slanted to a 45-degree angle rather than holding it straight up against the paper, this will give room to more natural fluid motion.
- Allow your forearm to move alongside your fingers to create smoother and more consistent letters.
- If you are left-handed, always tilt your paper to the left so that you can comfortably write and for better control.
Faux Calligraphy Frequently Asked Questions
A lot of beginners ask me these questions and I do take out time to answer them, so I want to address them here for you to understand as well.
1. Can you do faux calligraphy with any pen?
Yes, absolutely, you can use any pen that’s handy but I don’t recommend using a ballpoint pen because it’s always quite challenging to fill in the lines when creating thickness for your downstroke.
2. Is faux calligraphy easier than brush lettering?
Faux calligraphy is easy to write as compared to brush calligraphy because you begin with your normal hand writing and just simply shade and your lettering is ready but brush lettering requires technical skills to produce beautiful lettering. If you want to explore brush lettering after mastering faux, the brush calligraphy beginner tutorial is the perfect next step.
3. How often should beginners practice?
I wanted to help my deaf and dumb Uncle out at his gift store so that was the reason why I started learning calligraphy, it was a huge motivation for me to see him smile. So, I practiced everyday, at every little chance I got, when I was less busy. I never missed a day but I can’t actually measure the time I invested because I spent most of my free time just doing calligraphy, even at night.
You need to have a “why” to start and this will motivate you to practice often but if you are time conscious, practicing at least 30 minutes to 1 hour everyday is enough. To stay on track and make every session count, following a 30-day daily practice plan will help you build a consistent habit without burning out. And if you’re wondering how long it takes to learn calligraphy before your work starts looking polished, that guide gives you an honest and realistic timeline based on your practice frequency.
Final thoughts
Faux calligraphy is very simple and anybody can do it, even a child. I taught my kids and they now write simple birthday cards to their friends. All you need is to practice, practice, practice and stay consistent at it. And when you feel ready to level up from faux to real calligraphy, how to avoid common beginner calligraphy mistakes will make sure your transition is smooth and frustration-free.