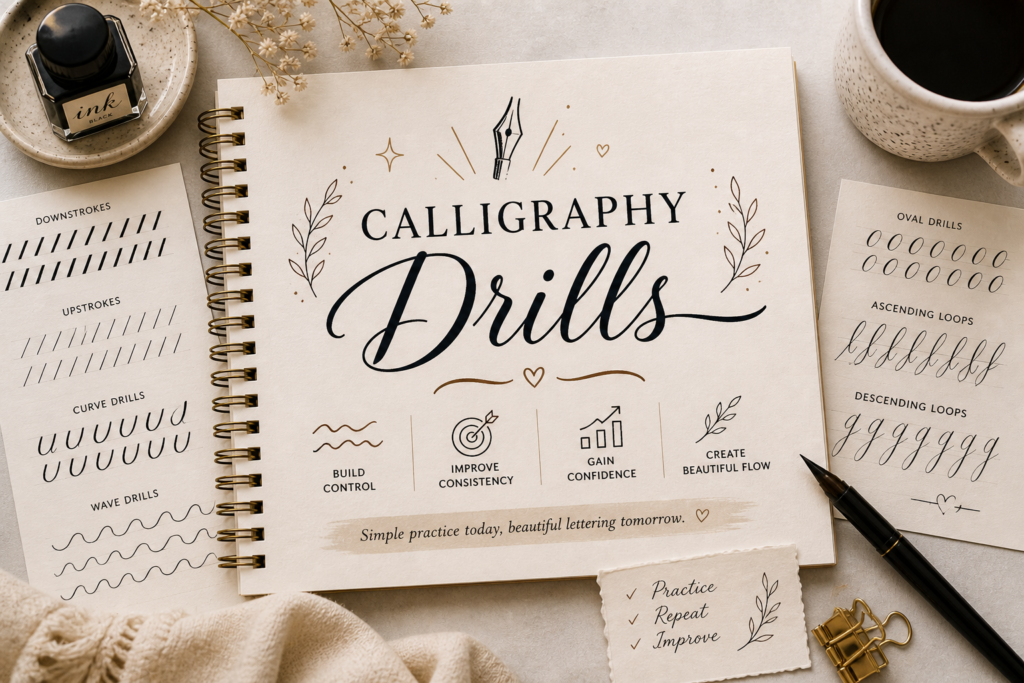
Calligraphy Drills Every Beginner Should Practice
If you’re just starting out with calligraphy, let me tell you something I wish I fully understood earlier: calligraphy drills are everything. I know they can feel repetitive or even a bit boring at first, but these simple exercises are actually the foundation of beautiful lettering. Think of drills as the behind-the-scenes work that makes your strokes look smooth, confident, and beautiful. If you’re still figuring out where to begin overall, the calligraphy for beginners complete starter guide will give you the full picture before you dive into drills.
So, what do I mean by calligraphy drills? They’re structured practice exercises kind of like repeating strokes, shapes, and letter patterns continuously. You could fill up one page of your paper with just rows of upstrokes or wavy lines. They help you build control and consistency.
Most beginners are always in a hurry to jump straight into writing fancy words, instead of focusing on mastering the basics first without knowing that this is where the real progress happens. It’s why I always recommend drills to beginners and they work 100 out of 100% of the time. This is also one of the core things covered in how to avoid common beginner calligraphy mistakes; skipping drills and rushing into letters is one of the biggest mistakes beginners make.
So, if you’ve been wondering how to get better at calligraphy as a beginner, this is your answer: start with drills, stay consistent, and give yourself time to grow. In this guide, I am going to list out all the drills that a beginner should practice, show you how to practice them and get better too. Hop in, lets ride.
Calligraphy Drills Every Beginner Should Practice
1. Basic Stroke Drills
This is where I do tell my people to start calligraphy drills and I will encourage you to start with these basic strokes too. They may look simple but without them, your letters will look shaky and inconsistent. My mom would always say, “little things matter a lot” and for real, those little things are the upstroke, downstroke and curves. To understand exactly how these two strokes work and why they matter so much, read calligraphy basics: understanding upstrokes and downstrokes before running your first drill.

Practice Light Upstrokes
Thin lines were one of the strokes that I learnt early enough, though it was difficult at first because naturally, I do hold things in a tight grip. But what rescued me was practicing upstroke drills for a few minutes each day, after a while, I discovered that my hands became more relaxed and it even helped me outside calligraphy when my boyfriend then but now my husband said that I held his hands softly as compared to my usual dead grip habit. That compliment made my day, lolz.
Tip
If your lines are still thick, just slow down a bit, you’re probably pressing too hard without realizing it. This is also a grip issue; learning how to hold a calligraphy pen correctly will help you relax your grip naturally without losing control.
Practice Heavy Downstrokes
Thick lines were really a big deal for me but I still ran drills on it. Each time one of my people submits her work for me to evaluate, the downstrokes were always flat with no variation. So, I asked her some questions, and she told me that she was always too scared to press down properly. I recommended an intense downstroke drill to her, she practiced and came back to thank me, stating that she has seen improvements.
Alternate Upstrokes and Downstrokes
If your transitions are usually rough without a clean flow, start combining thin strokes and thick strokes together instead of practicing them separately. The full breakdown of how these two strokes interact is explained clearly in calligraphy basics: strokes every beginner must learn.
Maintain Consistent Pressure Throughout Strokes
Pressure control isn’t about just pressing hard or light on your paper, it’s about maintaining the consistency of the thin or thick lines throughout the paper, like from start to finish.
This one actually humbled me a bit when I started. I thought I was doing fine until I noticed my thick lines weren’t evenly thick and my thin lines weren’t consistently thin. So, watch your strokes closely. If they fade in and out, slow down and focus on applying steady pressure.
Keep Stroke Height Uniform
Use guidelines or papers that have grid lines because strokes to keep letters at the same height. You don’t want the tail of your letter g to be shorter than the tail of your letter y in the same word, that word will look inconsistent, in normal writing that can be pardoned but in calligraphy, it will look disorganized. This is also directly tied to how to create consistent calligraphy letters; uniform stroke height is the first step toward overall letter consistency.
2. Straight Line Control Drills
You may think that they are just mere lines and aren’t important, and skip it but the moment you actually try to draw clean, straight lines with a brush pen, that’s when you’ll realize where the real control begins. If your lines aren’t steady, your letters won’t be either. These simple calligraphy drills will help you to train your hand to move with confidence, and trust me, it shows in your finishing. For more structured exercises that build this kind of control, beginner calligraphy exercises to improve control is a great companion resource to this section.

Draw Straight vertical and horizontal Lines
My lines were wobbly, uneven, and sometimes leaning without me even noticing. This is one of the first drills I practiced and it looked so easy. What I did was slowing down and focusing on one clean stroke at a time. Over time, my hand became steadier, and my lines looked more intentional.
Tip
Keep your hand relaxed and let your arm guide the movement instead of just your fingers. Don’t rush it, move slowly and keep your eyes on where the line is going, not just where it started.
Practice Diagonal Lines
I love calling them slant lines, they are more useful for actual lettering because strokes are written diagonally. Use guide lines to practice it, don’t make the mistake of free styling when you are running a drill.
Keep Spacing Consistent Between Lines
This is one of those things I didn’t pay attention to early on and it showed on my calligraphy without me even noticing until my tutor, Mr. Henry, pointed it out. That was when I realized that lines were all over the place, some too close, others too far apart. He told me to use dotted grids or lightly ruled paper to guide your spacing until it becomes natural. Once I started focusing on spacing, my practice sheets looked cleaner, and my eye for balance improved.
Improve Hand Stability and Control
All these drills come together to build one important skill and that is control. I can tell you from experience, this doesn’t just happen overnight.
There were days my lines still looked shaky, and I felt like I wasn’t improving. But the more I practiced, the more stable my hand became. If you’re using brush pens for these drills, make sure you also understand how to use brush pens properly because the way you handle the pen directly affects how steady your lines turn out.
3. Curve and Shape Drills
Once you get your curves and shapes right, your calligraphy will just flow naturally. Here are the things you should practice during your drills
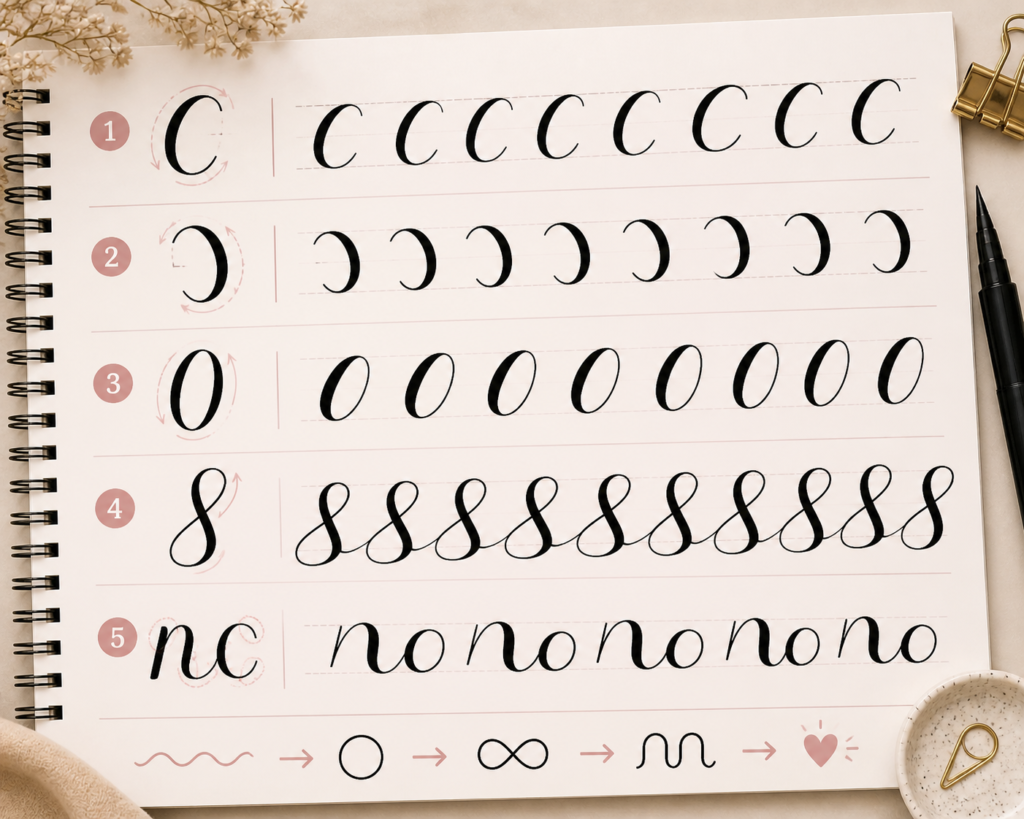
Practice Basic Curves
Practice simple C-shapes, it will make you comfortable with curved motion instead of stiff lines. Here’s how to write a brush pen c-shape. Start with a thin, upward, slightly curved stroke serving as an entry stroke. At the middle, curve around and gently transition into a thick downward stroke as you move down towards the baseline.
On reaching the baseline, curve up slightly into a thin stroke to create the exit connector. Make the pressure to be heavy at the middle of the curve and lighter at the top and bottom. Don’t grip your pen too tightly. If your curves look stiff, loosen your hand and let the motion flow. This is also one of the areas where the brush calligraphy beginner tutorial provides really helpful visual guidance for beginners.
Reverse Curves
These ones are a little bit tricky for some beginners but you can’t run away from them. It’s like your hand has to unlearn what it just learned and go the opposite way smoothly. Practice slowly and mirror your movements. If one side looks better, spend extra time fixing the other.
Oval Shapes
Letters like a, o, d, g all depend on this shape being clean and consistent. When practicing your oval shapes, always put this into consideration; Maintain a slanted shape like approximately angle 55 degrees and not a straight circle. The left side of the oval must be thicker than the right side, this means that the left side is the downstroke, while the right side is upstroke.
Instead of starting at the top to create your oval shape, start at the “2 o’clock” position, this will make it easy for you to connect the two strokes neatly.
Continuous Loop Drills
This drill actually became one of my favorites. There’s something really satisfying about drawing loops over and over, it almost feels like you’re getting into a rhythm. Always start the upstroke and then transition to a thick stroke and keep moving without stopping between loops to help your hand build muscle memory.
Smooth Transitions Between Curves
This is the part that separates beginner work from a pro’s calligraphy. Slow down whenever you are transitioning between strokes. The goal is to aim for a seamless flow instead of rushing through it. Understanding the difference between how modern calligraphy and traditional calligraphy approach these transitions can also help you decide which style’s rhythm feels more natural for your hand.
4. Letter Formation
This is the stage where you get to learn how to combine the basic strokes you’ve been practicing into letters.
Break Letters into Basic Strokes
Don’t just jump into writing the letters at once, understand the type of strokes that makes up the letter. Here’s how to do it;
- Pick one letter
- Identify the strokes that make it up
- Practice each stroke separately, then combine them
If a letter looks off, don’t rewrite it blindly, break it down again and fix the exact stroke that’s causing you headache. The full process of building letters this way is covered step by step in how to create your first calligraphy alphabet.
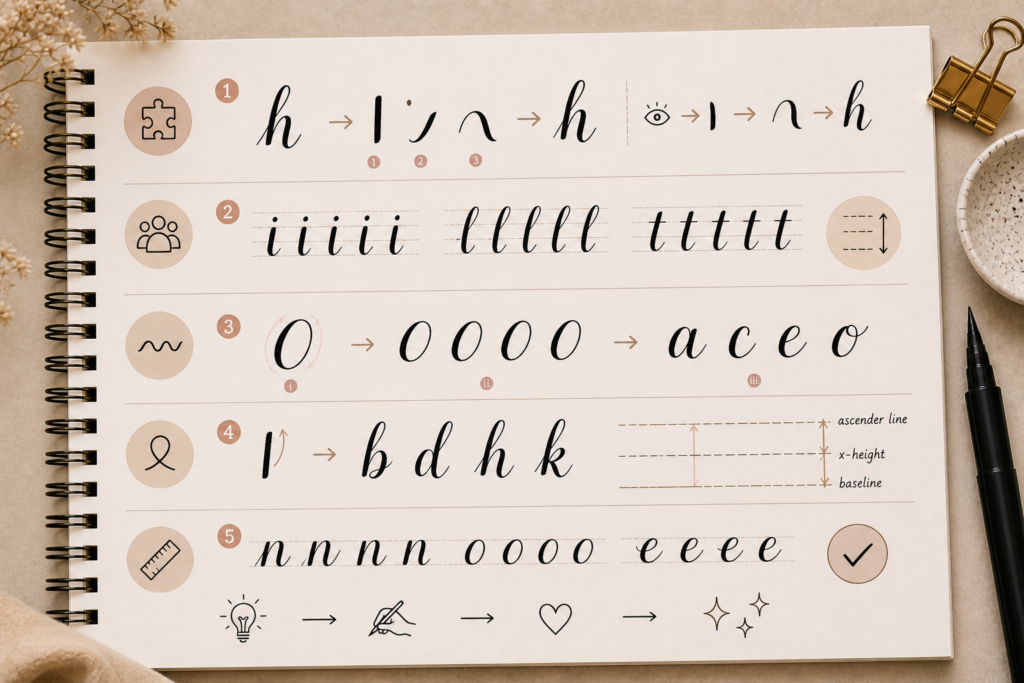
Practice Lowercase Letter in Groups
What I mean is that, pick letters that kind of flow the same way and practice them together, lowercase letters like i, l, t. Simple letters like these expose your mistakes faster than fancy ones. Write rows of i, l, t repeatedly, focusing on equal height and spacing with a consistent downstroke.
Practice the Curved Letters
Letters like a, c, e, o rely on smooth shapes, if you write them wrongly, some of the ovals will be too round while others, too narrow.
i. Don’t rush these letters, start by practicing ovals on their own.
ii. Then turn those ovals into letters like “a” and “o”.
iii. Focus on keeping the shape smooth and even.
Practice Loop Letters
The goal here is to ensure that your loops look clean and balanced, not too wide, not too tight. Loop letters that you can practice are b, d, h, and k. Here, you start with the vertical downstroke, add the loop slowly at the bottom or top depending on what letter you’re writing. Use guides to ensure that all the heights are the same. If you find yourself making the same errors repeatedly during this stage, beginner mistakes in calligraphy and how to fix them will help you identify and correct exactly what’s going wrong.
Focus on Consistent Letter Proportions
How I do achieve this is that, whenever I am writing, all my similar letters will be of the same size. Then at the end, I will step back and look at the writing as a whole, to check if all my letters are aligned properly. If you want to take this even further, how to improve calligraphy fast shares targeted techniques for making your proportions noticeably better in a short amount of time.
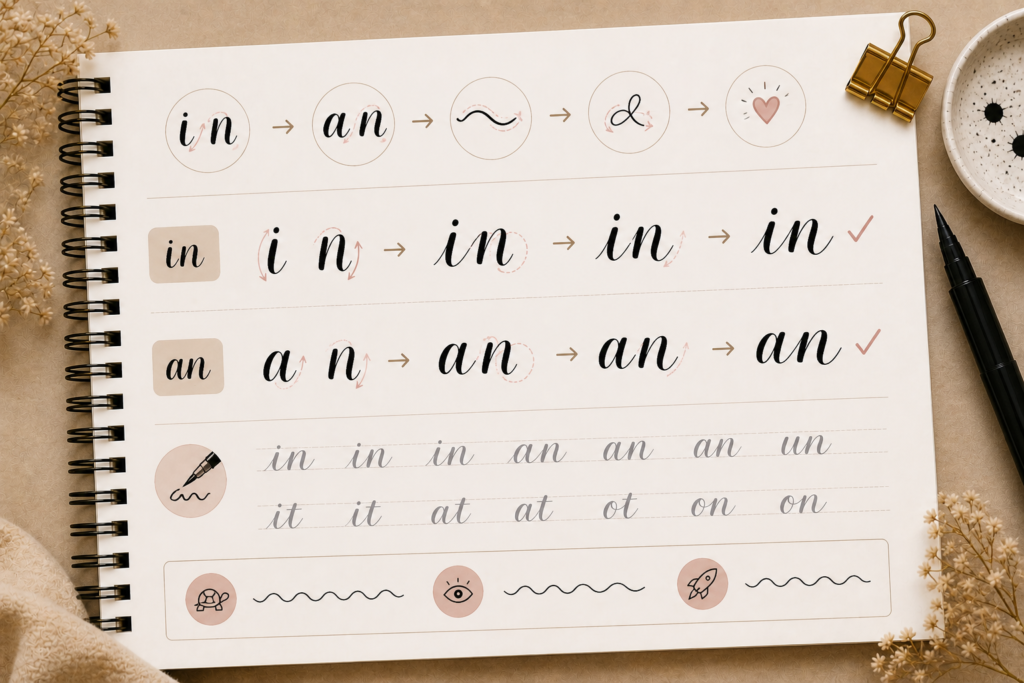
5. Connecting Letters
I call this one, flow drills because if your letters aren’t connected properly, it will show that you’re an amateur. Start with connecting two letter words like “in” and “an” As you go, try and improve the flow between strokes. If connecting letters feels frustrating, try starting with faux calligraphy first; it lets you practice the visual flow of connected letters without worrying about ink pressure or nib control.
6. Word and Phrase Drills
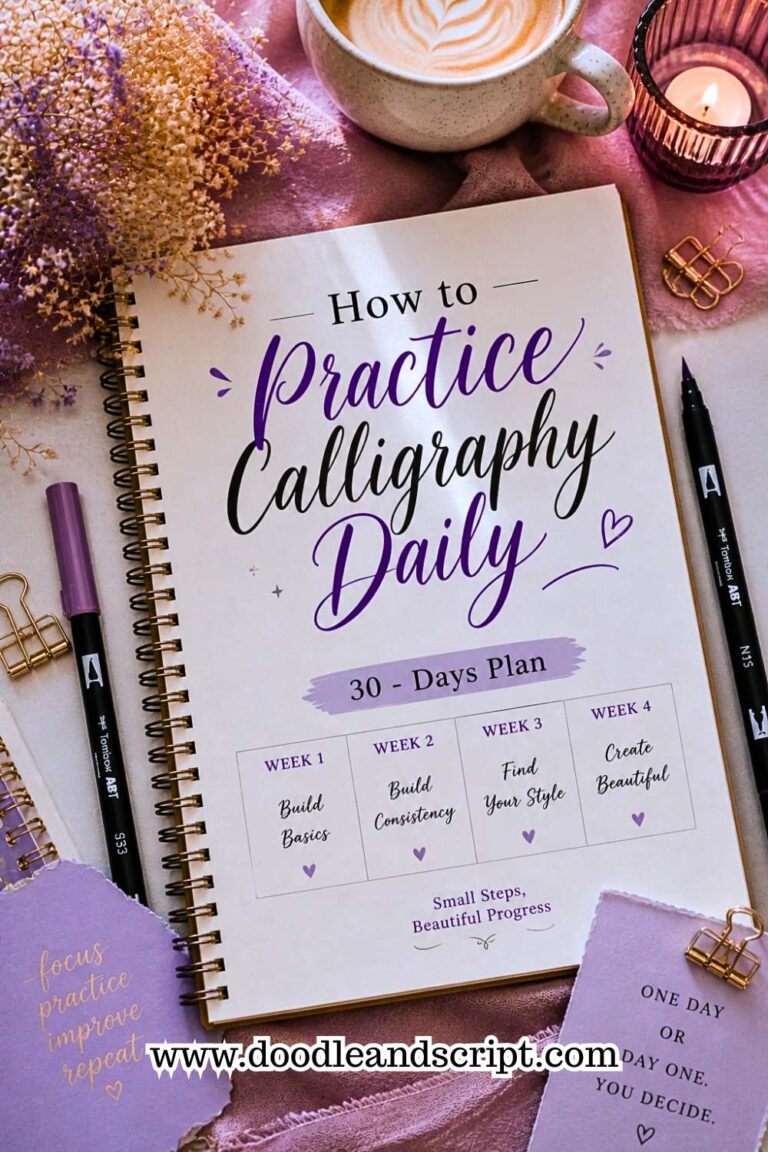
If you’ve gotten to this point then, you are making huge progress. I recommend practicing short, short words and common phrases repeatedly and focus on consistency across words. The best way to stay consistent at this stage is to follow a 30-day daily practice plan; it structures your word and phrase drills so that each session builds directly on the last, keeping your progress steady and measurable.

Final thoughts
If you’ve been following my calligraphy topics, you may have come across a post where I mentioned that I actually punished my daughter by asking her to fill up an entire page with upstroke and the next with downstroke only to discover that her strokes improved.
If you stick with drills, even for just a few minutes a day, you’ll start noticing real changes. Your lines will look cleaner, your letters will be more balanced, and your overall style more polished. You’ll also feel more confident every time you pick up your pen and trust me, that confidence makes a huge difference. If you want to know how long it takes to learn calligraphy, staying consistent with drills is honestly the biggest factor that determines your timeline.
The importance of drills cannot be overemphasized; you need it as long as you want your lettering to look beautiful. You don’t need to spend long hours writing, as little as 20 minutes per day is good enough to keep you on track. If you’ve never done calligraphy drills before, I hope you’re gonna start now. And if you’re still wondering where drills fit into your overall learning journey, how to learn calligraphy at home shows you exactly how to build a complete practice routine around exercises like these from the comfort of your own space.